Chevy/Reo?

Rat Rods Rule

Help Support Rat Rods Rule:

This site may earn a commission from merchant affiliate links, including eBay, Amazon, and others.
E-man. No splits. It's 20 gauge and the corners are 5/8" radius. I only bent a 1/4" lip. By working slowly with the hardwood corking tool the sheet metal had an opportunity to stretch without splitting. I finished off each corner by hammering a 1" diameter piece of thick wall tubing into the corner. That helped create a somewhat uniform corner radius.
Shrinking the metal around the corners of the doors was actually a bit harder to do.

I could not have accomplished the work on the side panels without the guidance of Terry & Lee, known as Tator, here on RRR. They ran a welding and fab shop for many years, retiring recently. For a while, Terry taught metal forming classes in his shop.

Whenever I need help with metal shaping I turn to Terry and Lee. They are most gracious in letting me use some of their equipment too.
 
Bob, The real trick is getting all the doors spaced even evenly and in the same vertical plane. Of course, even more critical was the idea, and the vision to see where the doors should go and how many doors to do. Great Job executing your concept! I'm hoping you'll make them heat activated like a Kenworth grille.

By the way, hammer forming is not that hard, everyone else should give it a try. You can use MDF (particle board, sort of) for the forms. It's only if you want to do several of the same thing (like a bunch of doors) that the tooling needs to get more complicated.
 
http://s256.beta.photobucket.com/user/rwstillwater/media/HoodTop005-1.jpg.html?sort=3&o=0
The Chevy 6 guys call the 292 engine a tall deck block because it is taller than the 250 engine. If it was any taller it would't fit under the hood.:eek: 
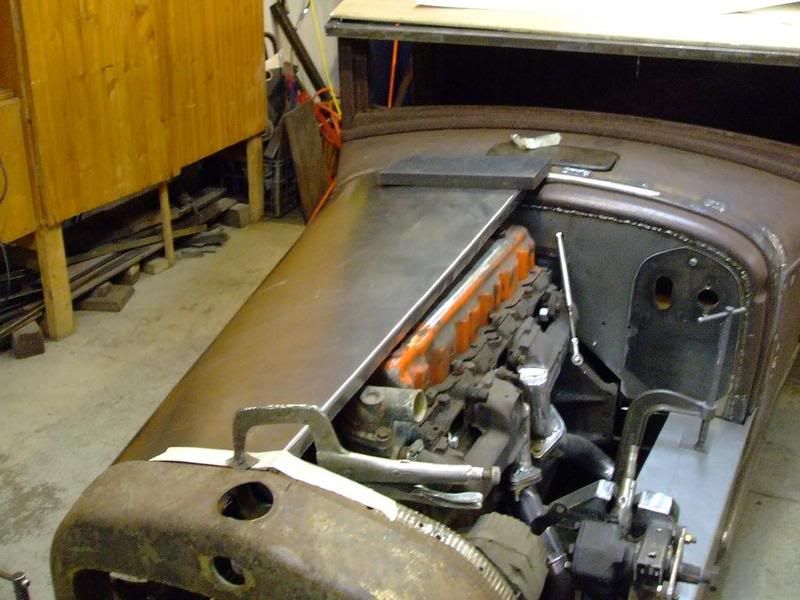
I'll have to relocate the oil filler cap, it's that close. Both hood sides are partially finished. Next will be a continuous hinge down the center.
My friend Terry, of Terry & Lee fame (Tator here on the RRR) had cataract surgery Friday. Monday he'll be seeing well enough to put the beads on the hood side panels using a Pullmax.
Yes, DJ3100, hammer forming is not difficult. It worked very well on the hood sides.
I'm still trying to figure a good, simple way to attach the doors. Sorry, no heat activation.[S

****Just encountered a problem with Photobucket. I can't copy the IMG code. That's why there is a link to the pic in this post.
 
****Just encountered a problem with Photobucket. I can't copy the IMG code. That's why there is a link to the pic in this post.

Great work as always, Bob. [cl

Here's the pic...

HoodTop005-1_zps2bf9823f.jpg
 
WOW!!!!:eek:

This place needs to change it's name. This has left the days of throwing rusty garbage together with chickens#it welds and calling it a car. You have now entered the realm of coachbuilder quality work. I am in awe, thank you for sharing, Bob.[;)[dr[P

Regards,
Shea:)
 
Fabulous looking work! It's great to see how creative and inventive one can be when doing this kind of fab work by hand....it gives us all inspiration! It must feel great to sit back and admire your work......
 
HoodBead005.jpg

Spent part of the afternoon at Terry & Lee's putting the bends and the beads in the side panels. Thank you T & L. Much appreciated.

Shea and Bill, thank you for the positive comments. Fact is, I hang around with guys that are very skilled and I feel like a hack compared to them. Main thing is however, I have so much fun doing this in the manner that I build that it doesn't bother me much anymore.
 
HoodBead001.jpg

Tomorrow I'll get the hinge installed in the top panels, trim the sides of the top panels and bend a flange that will sit atop the flange on the side panels.

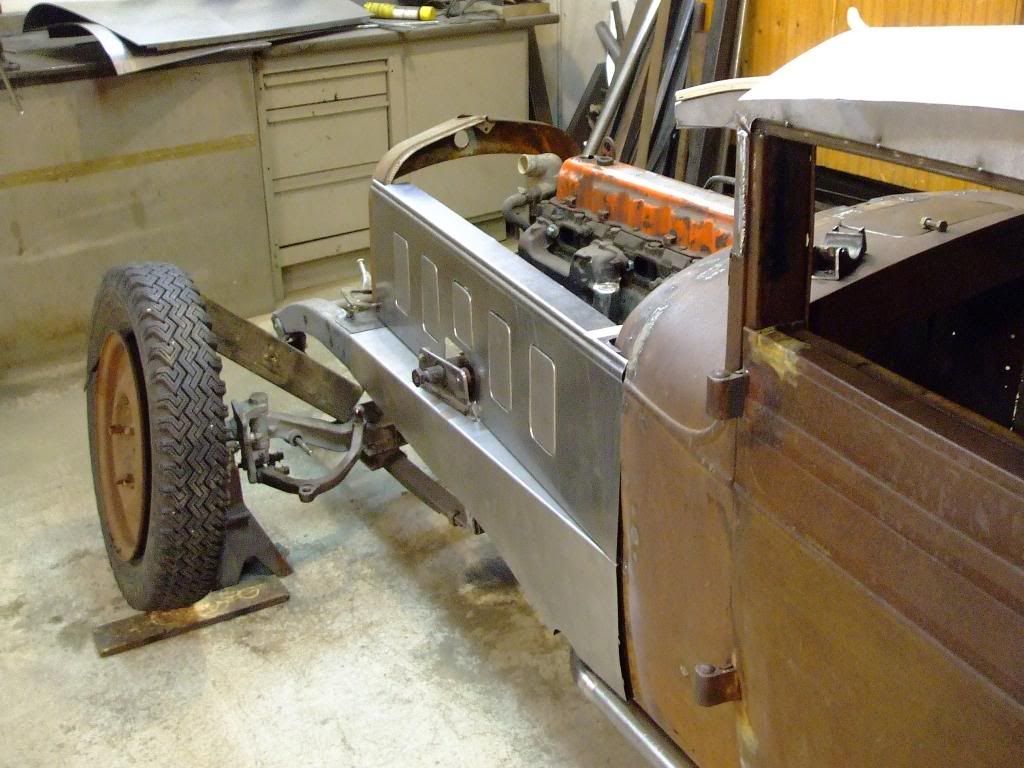
I'm thinking it might need a dropped axle.
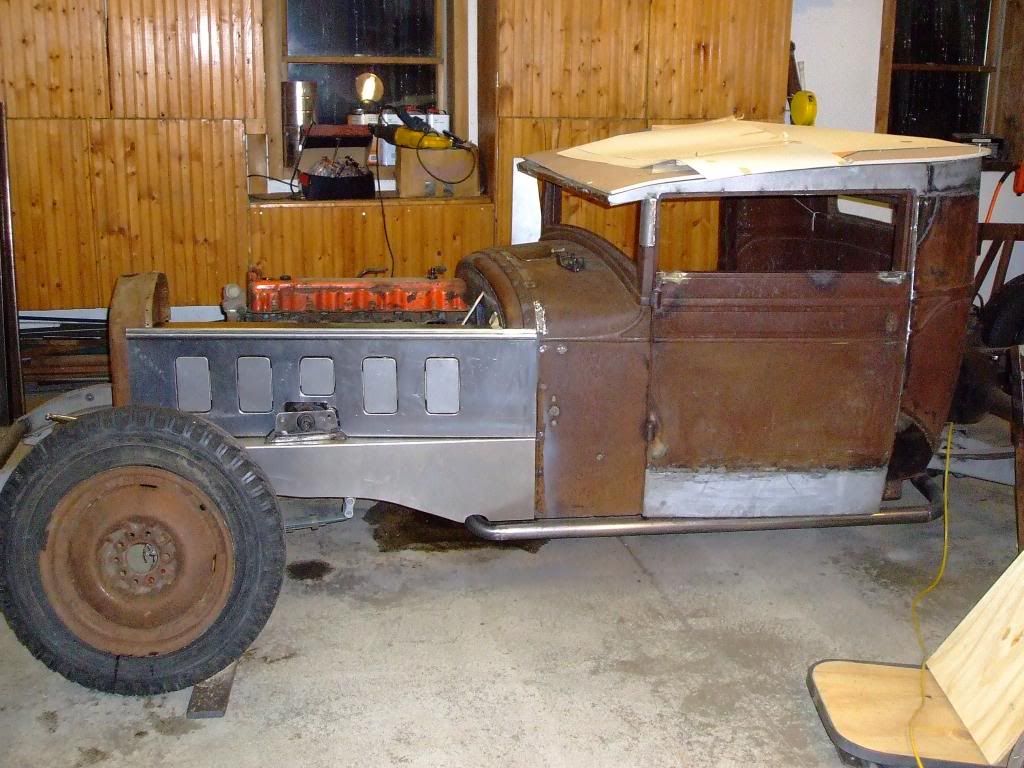
 
Wow Bob! I see you have the mandatory Minnesota snow tire on the front. :D

I got over being jealous of others talents, now I tried harder hone my talents. Good work buddy. [cl
 
That looks really great with the doors in place, I wasn't sure how it would look with the smaller door in the middle, but I think you pulled it off!
 
http://s256.beta.photobucket.com/user/rwstillwater/media/HoodFlange014.jpg.html?sort=3&o=0
Trouble with Photobucket again, hence the link.

Got the hood tops trimmed and the lower flanges formed. Also installed the continuous hinge (not on for the pic however). The fit up of the frame cover, side panel and hood top is pretty good with just a little tweaking needed.

Because there's so much new metal on this project it's doubtful I can leave the body in its current rusty state. This one will probably wear red primer.

Thanks guys for following this project and for the positive comments.
 
Really liking the looks of the hood and panels Bob! [cl[cl I agree on the red primer........just too much new metal.

HoodFlange014.jpg


BTW here's the pic.........I just thought I'd give it a shot and pasted in the IMG Code and it showed up.

[P[P[P
 

Latest posts

Back
Top