Chevy/Reo?

Rat Rods Rule

Help Support Rat Rods Rule:

This site may earn a commission from merchant affiliate links, including eBay, Amazon, and others.

The fellow I sold my International to has become very interested in inline engines. I s'pose it's because the International has a 250 Chevy 6 in it. Rich is a retired printer and in the past has produced some very limited circulation magazines. He just started a magazine for Inliners.
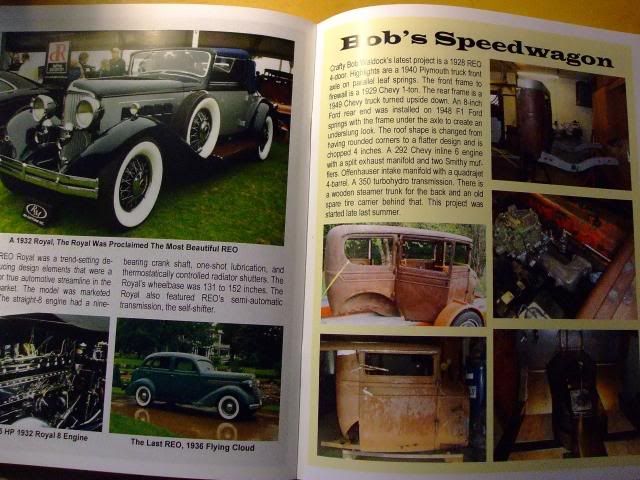
I'm very appreciative that he included 3 pages of my Reo build in his first issue.
 

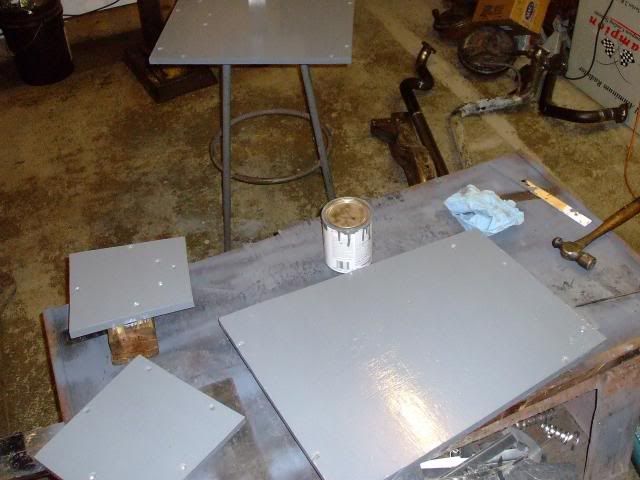
Wood floor boards. One coat of primer. Two coats of Rustoleum. Whoopie ding!

More sheet metal patching and grinding of welds tomorrow.
(There's one new post at the end of page 44)
 
Lookin really good Bob !!!!!!
I've got to grind the welds on mine too. I have a hard time making myself do the grinding part.
 

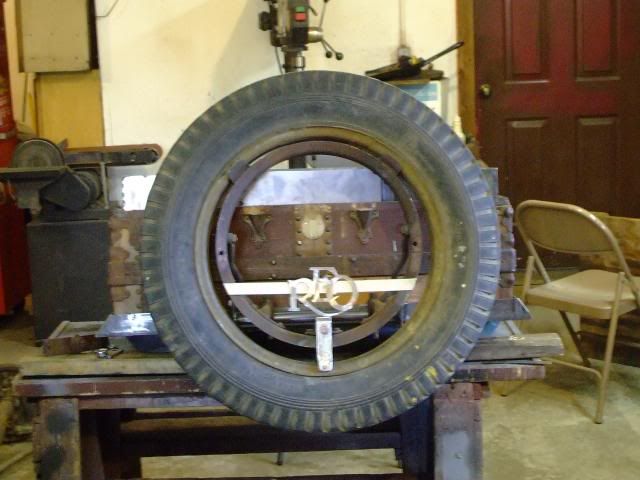
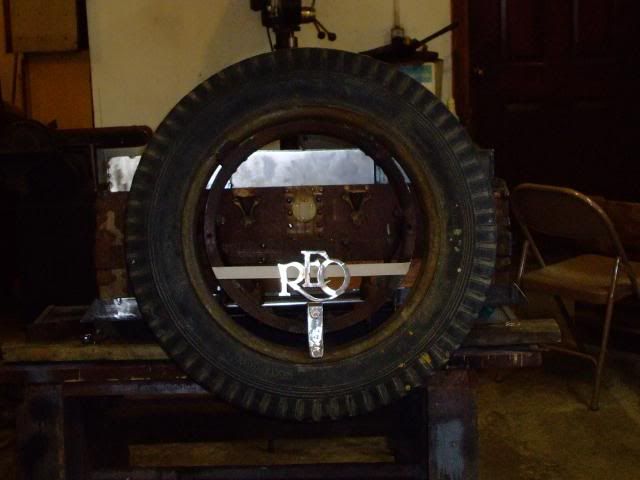
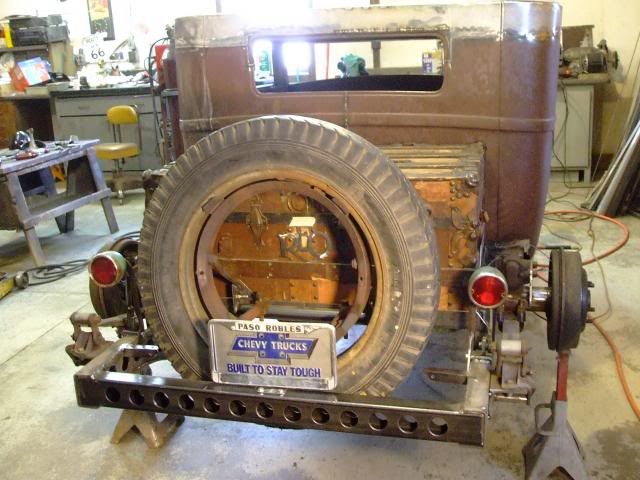
Finished all the mounting hardware for the spare tire. I'm not sure this is the correct rim size for the carrier but I have it so I'm using it. The shiny piece in the bottom middle is a bracket I made to clinch the rim to the carrier.
Thinking of mounting the "REO" nameplate as shown. The light colored horizontal piece is just masking tape holding it in place.
BTW I tried the license plate in the middle but it didn't look good.
 
I like the look, I've not seen one of those spares put together, so not sure how it should look, but it looks like its an inch smaller than it should be compared to the rim?

Can't wait to see more of this build!
 

DR, there needs to be some clearance to lift the rim off the brackets located at 10:00 and 2:00. Apparently the 20" rim I have is about as small as they come for wooden spoke wheels.
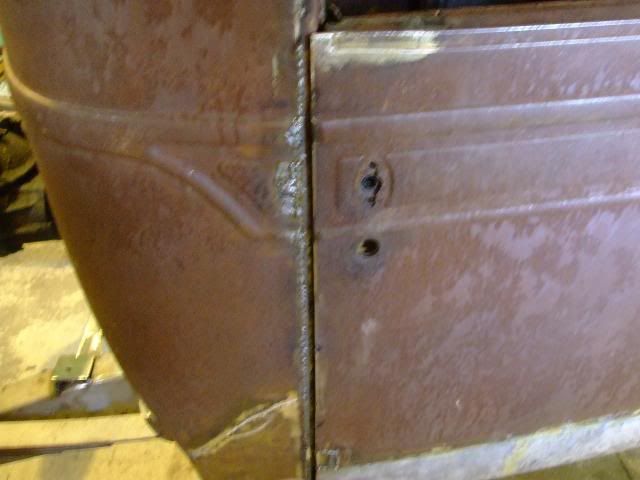
Worked on door gaps today. I tack welded 3/16" rod to the door edge to define the desired gap and then welded 3/16" and 1/8" rod to the body to fill the excess gap. Also melted a fair amount of .030 MIG wire in the gap.
All the welding on the body is done, except for tiny holes in the beads that will reveal themselves when I grind the beads. Hoping the weather warms up and stays dry so I can do all the grinding outside.
 
Last edited:
Good looking gap there Bob.
Are you sure about the welding being done?
I've decided the welding is never done, at least in my world and on my Dodge.
Stay after it.
 

Here's how it'll look from the rear. I tried the license plate in a few places and settled on the middle. Tail lights and the license holder are from Todd (RRR member).

You guys are a hoot. Heverdone nailed it. I did a bunch more welding. Forgot that the storage bins in the wooden trunk were only tacked. Tomorrow we grind!
 
Looks great....

The spare tire thing is a nice touch....was that the plan all along? :D If not, I like it....if it was.....I still like it...lol
 
I don't like Sam Fear anymore


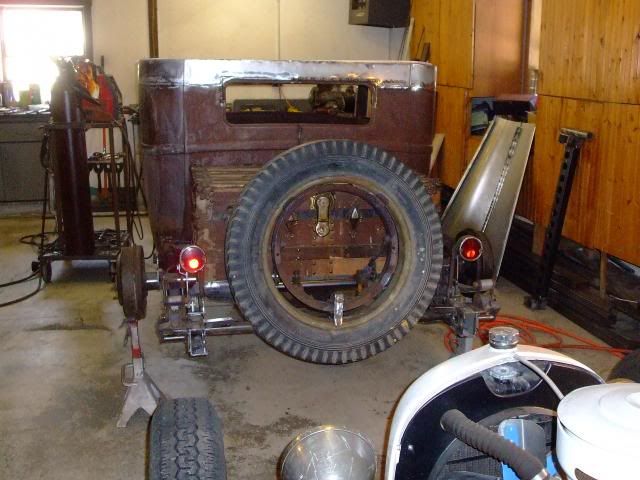
Last night Sam asked how the Reo looks from the side. This morning I took some pics and analyzed them on the computer. Not only did I not like the side view but I didn't like the rear view either. It occurred to me that a car shouldn't have a cross member behind a spare tire. A bumper maybe, but not a cross member.

So I put a tube cross member between the spare tire and the wooden trunk where it can hardly be seen. This looks better to me. I have access to an original Reo bumper so I might give that a try. Also I have some finish work and gusseting to do on the frame ends. Removing the cross member and frame behind the spring shackles shortened that area 4".

If you page up you can compare with and without the cross member.

Thanks Sam for creating all this extra work.;)
 
Wow......I thought it looked fine...

But since I've never build something even similar to that.....I'll have to bow to the masters...... Bob was/is that a big deal to move or not? [S
 

Latest posts

Back
Top