Flipper_1938
He recycles the right way
Mounted the Steer Clear unit today, solves the usual interference problem with the head and column....
That could come in handy!!!

Mounted the Steer Clear unit today, solves the usual interference problem with the head and column....
Yeah, I know the steering unit is expensive and not "old school correct" but it sure solves the problem. But then how "correct" is Packard gasser?? I'm already creating a 'never was' kind of thing here, so I'm just writing my own rule book. To heck with the "can't do that" types, like Frankie said - I did it my way....
The HAMB types spew period correct, but a large percentage of their cars seem to run coilovers. I prefer to think of what you're building as period-inspired. You're using new tech to solve old problems but the car will have the feel of an era long passed. That's the best of both worlds IMO.
How long of a column do you need to run with that steering setup?
That one Mod that can't even let you see a wheel over 16" rubs me raw! You know who I'm talking about! He makes me so mad sometimes I don't go back for days!
How does the steer clear work, is it a chain drive or meshed gears?
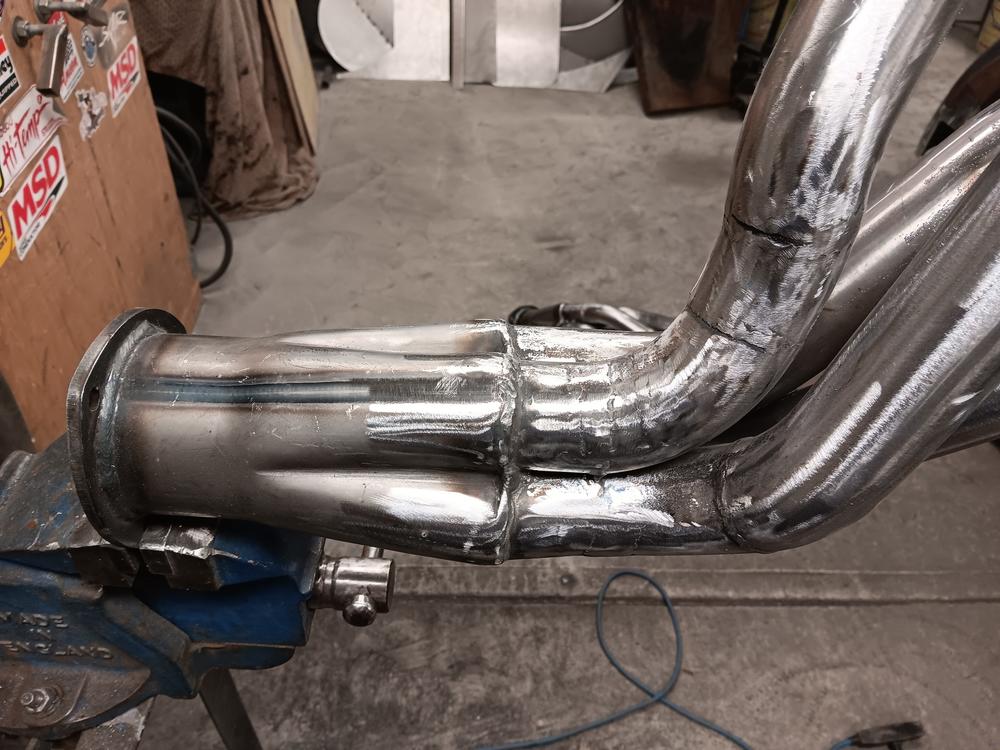
Finished up welding and sanding the headers - to weld the parts of the pipes I couldn't get to once it is assembled, I cut a window, welded inside then weld up the window piece.
http://ratrodsrule.com/forum/attachment.php?
attachmentid=176424&d=1681258791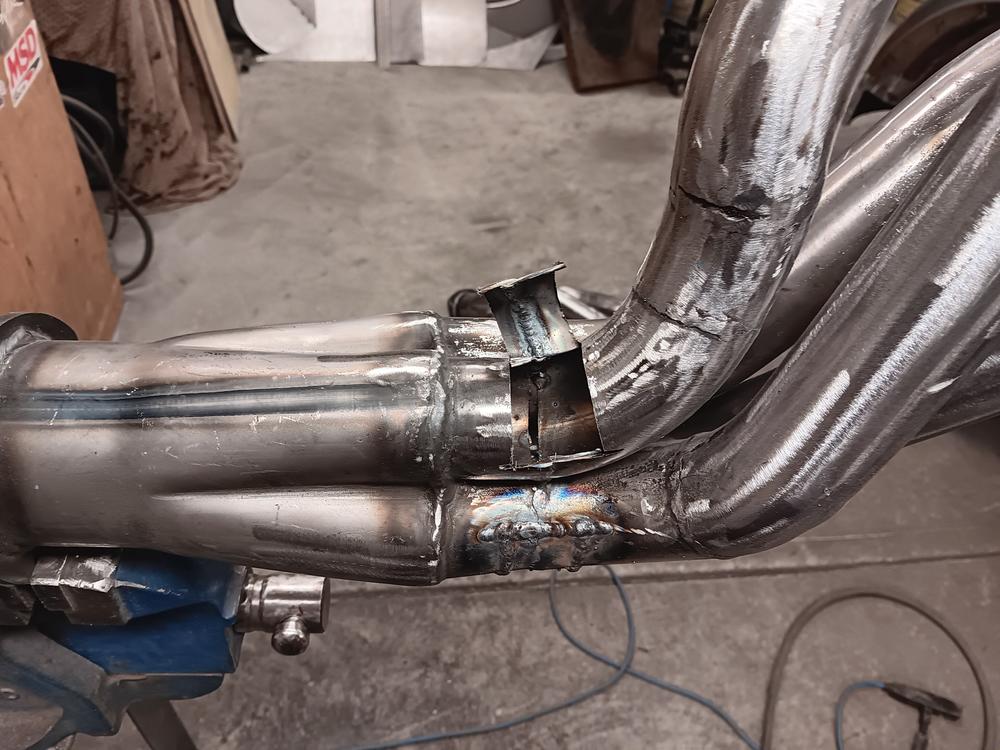
Enter your email address to join:


