
You are using an out of date browser. It may not display this or other websites correctly.
You should upgrade or use an alternative browser.
You should upgrade or use an alternative browser.
1936 chevy low cab build 1.5T
- Thread starter CORPO
- Start date
Help Support Rat Rods Rule:
This site may earn a commission from merchant affiliate
links, including eBay, Amazon, and others.
52bombshell
Well-known member
- Joined
- Aug 10, 2008
- Messages
- 58
hey if a guy wanted basicly the same bracket as you but a bit wider on the 4 radius arm arm mounts could you maybe make some for a price if you had the right mearsurements
truckster
Well-known member
Thanks for the link to your thread. I spent some time and couldn't find it.
Only problem, now I have spent all afternoon reading through this thread, start to finish, and didn't get anything done on mine today.
Superlatives aren't enough. This is unbelievable! You have to have some machining background/experience to be able to visualize and build the components that you have.
Now I have to go back and read it all again in more detail. Looking at your work has given me some (numerous) ideas to solve some of my hold ups.
Absolutely unbelievable on the rear axle. Didn't think it possible.
Love those duallies!
48 roadster dually - http://www.ratrodsrule.com/forum/showthread.php?t=12620
Remember: half the people you know are below average
Only problem, now I have spent all afternoon reading through this thread, start to finish, and didn't get anything done on mine today.
Superlatives aren't enough. This is unbelievable! You have to have some machining background/experience to be able to visualize and build the components that you have.
Now I have to go back and read it all again in more detail. Looking at your work has given me some (numerous) ideas to solve some of my hold ups.
Absolutely unbelievable on the rear axle. Didn't think it possible.
Love those duallies!
- -- - - - -
48 roadster dually - http://www.ratrodsrule.com/forum/showthread.php?t=12620
Remember: half the people you know are below average
CORPO
Buildin' it his way, one piece at a time...
Thanks for the complements truckster....sorry i distracted you from your build haha....... no i am not a machinist. i just have never been afraid to just try to work stuff out.. great work on you build.... it will be wild for sure
i thought about how to do the rear axle for a while before i did it... i knew i wanted to use the old skinny rims.... and to me this seemed like the best solution... total cost of the rear $0 although i do need to rebuild the wheel cylinders..
Hopefully ill make some progress on mine soon... something that is worth showing to you guys anyway...
39chev
Well-known member
Love the build Im glad these old 1 ton and up trucks arnet getting left out. My father has a 37 and a 40 1.5 ton and I would love to build one like this keep up the amazing work.
Gregster
Well-known member
Chop , yes . Section -- ? I don't think you'll need it , it looks really sharp !
CORPO
Buildin' it his way, one piece at a time...
thanks gregster...
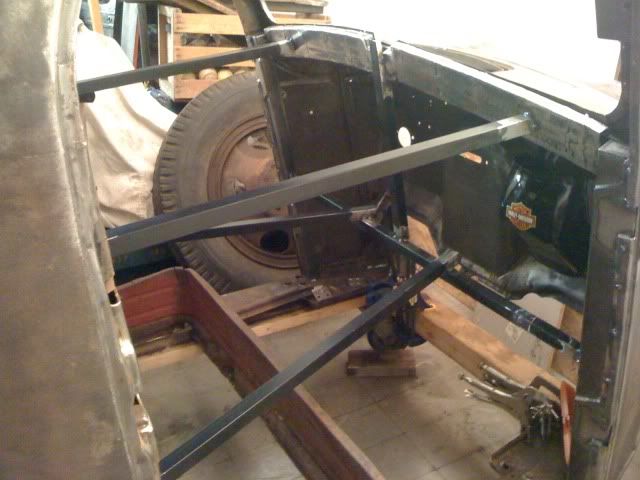
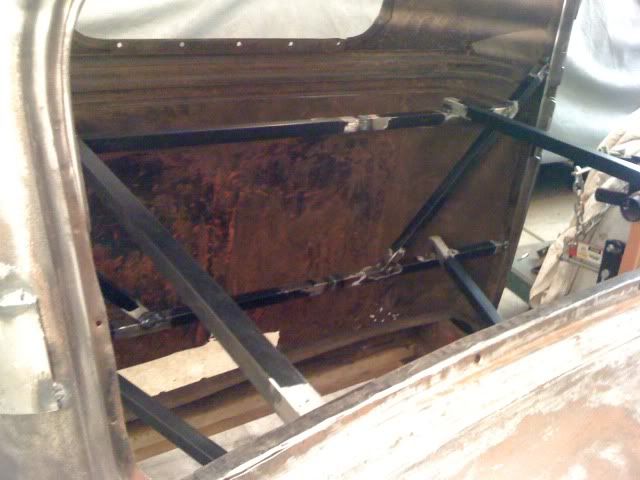
the section is out for now.. proportionality i probably dont need it.. i would have liked to do it, just cause the dash is so high....but i have plenty of body work to do with out the section.. if i section it .. it will never get done.. maybe the next one.. haha
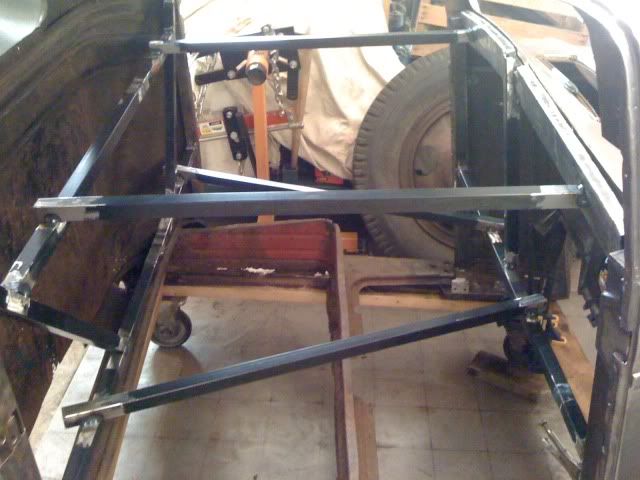
I have gotten the door columns in and the cross piece for the dash welded in the cab, it is so much stronger already... and it really helped with that tin can sound.. im now bracing up the cab to swap in the floor from the other cab... this could be tricky but ill figure it out... once the floor is swapped then im going to hang the doors and give it a hair cut and patch in the lower section on the rear and the cab corners.. all this i would like to have done before spring...
the section is out for now.. proportionality i probably dont need it.. i would have liked to do it, just cause the dash is so high....but i have plenty of body work to do with out the section.. if i section it .. it will never get done.. maybe the next one.. haha
I have gotten the door columns in and the cross piece for the dash welded in the cab, it is so much stronger already... and it really helped with that tin can sound.. im now bracing up the cab to swap in the floor from the other cab... this could be tricky but ill figure it out... once the floor is swapped then im going to hang the doors and give it a hair cut and patch in the lower section on the rear and the cab corners.. all this i would like to have done before spring...
CORPO
Buildin' it his way, one piece at a time...
Love the build Im glad these old 1 ton and up trucks arnet getting left out. My father has a 37 and a 40 1.5 ton and I would love to build one like this keep up the amazing work.
yeah... most guys would just take the cabs off the big trucks and put it on a different frame.. these are the sane people... me on the other had wanted to try and use it all.. keep it on as much of a budget as possible...
schine
Well-known member
i think i love everithing about your truck, its nicely coming, congrats!
White Trash Renegade
Well-known member
Good stuff Corpo! I love it!

schine
Well-known member
i recall, yours was the first truck i ever saw that came from this site, thats why i joined....thanks..
CORPO
Buildin' it his way, one piece at a time...
this worked pretty good.. so i thought i would share it with you guys.. i had a crease in the corner of my cab... i had a really poor excuse for a slide hammer.. one where you have to drill holes and put screws in the panel to pull by and i definitely didnt want to put a bunch of holes in my cab.... so
i welded a 3/8" nut to the back of my vice grips... you could easily make the slide part with some 3/8" rod and a nut welded to a washer for the stop and any sort of heavy piece of tubing...
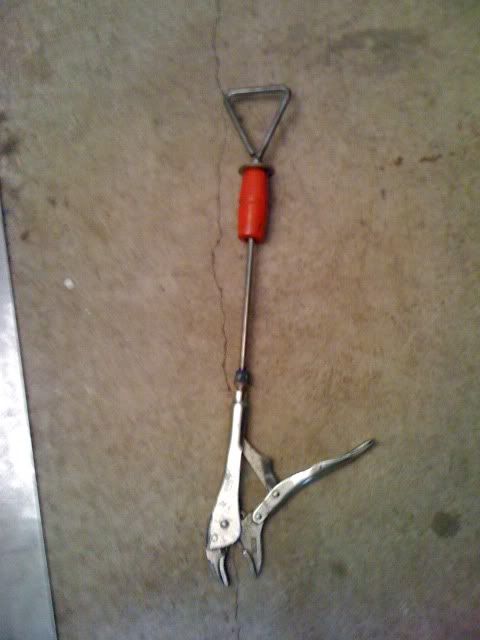
and i used ends from tig rod and intentionally stuck them to the body to use as pulling points...
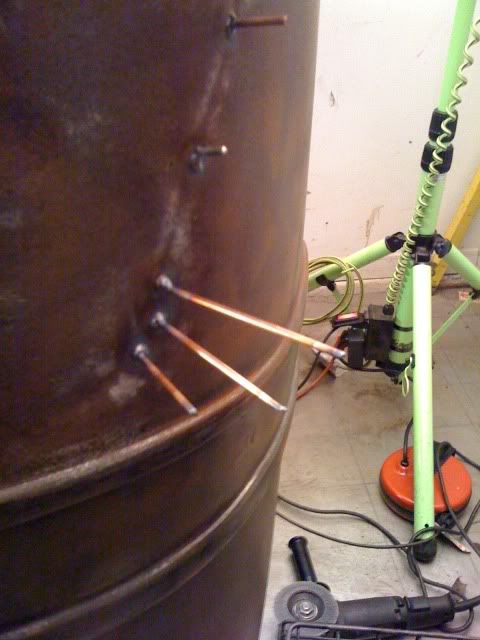
i dont know how well this will work for others.. cause i know not a lot of you guys have tig welders...
Speaking of tools... got a free drill press today.. its old school probably from the 40's but it works great so im not complaining.. also got like a dozen free 6 and 8" c clamps.. can never have too many clamps.. one says 1880 on it.. its really ornate.. i might look that one up before i go and mess it up..
i welded a 3/8" nut to the back of my vice grips... you could easily make the slide part with some 3/8" rod and a nut welded to a washer for the stop and any sort of heavy piece of tubing...
and i used ends from tig rod and intentionally stuck them to the body to use as pulling points...
i dont know how well this will work for others.. cause i know not a lot of you guys have tig welders...
Speaking of tools... got a free drill press today.. its old school probably from the 40's but it works great so im not complaining.. also got like a dozen free 6 and 8" c clamps.. can never have too many clamps.. one says 1880 on it.. its really ornate.. i might look that one up before i go and mess it up..
bob w
Still crazy after all these years!
Great idea Corpo. I've been whining to myself about the holes I'll need to drill in my door to get a crease out. I don't have TIG but will gas weld rod on instead.
You have done a nice job of bracing. Everything should stay in alignment.
You have done a nice job of bracing. Everything should stay in alignment.
39chev
Well-known member
That is a great idea for a slide hammer I might have to try it. [cl
CORPO
Buildin' it his way, one piece at a time...
Great idea Corpo. I've been whining to myself about the holes I'll need to drill in my door to get a crease out. I don't have TIG but will gas weld rod on instead.
You have done a nice job of bracing. Everything should stay in alignment.
That is a great idea for a slide hammer I might have to try it. [cl
glad i could help
Reverend D
Well-known member
Mig welders can just tack a small screw or bolt on the crease and use your device to pull the dent. Heh, in a extreme case on a 67 T-bird beater I had I tacked a bolt to a VERY deep crease and hooked a chain to the bolt and nut and hooked it to the company forklift since I was doing it at work and gently eased back until I pulled it out. Since the car was indeed a beater I was just trying to get it pulled enough to be in the general vicinity of where it should have been. I then cut the tack off removing the bolt, ground the tack smooth and primered. Of course if we were going for perfect the rear quarter panel should have been replaced, but I actually got it straight enough where I could have probably mudded it although it would have been thicker than I like doing it.
Regards,
Rev. D.
Regards,
Rev. D.
international rat
Well-known member
I like the vise grip idea. Here's one i made to use with my uni spotter. I made it out of 1/4 inch plate a simple hinge and a nut and bolt. Works great for larger dents. I made the slide hammer as well ")
Attachments


Similar threads
- Replies
- 16
- Views
- 1K