
You are using an out of date browser. It may not display this or other websites correctly.
You should upgrade or use an alternative browser.
You should upgrade or use an alternative browser.
1946 Chevy Bobber Truck Chop Build
- Thread starter 401ton
- Start date
Help Support Rat Rods Rule:
This site may earn a commission from merchant affiliate
links, including eBay, Amazon, and others.
401ton
Well-known member
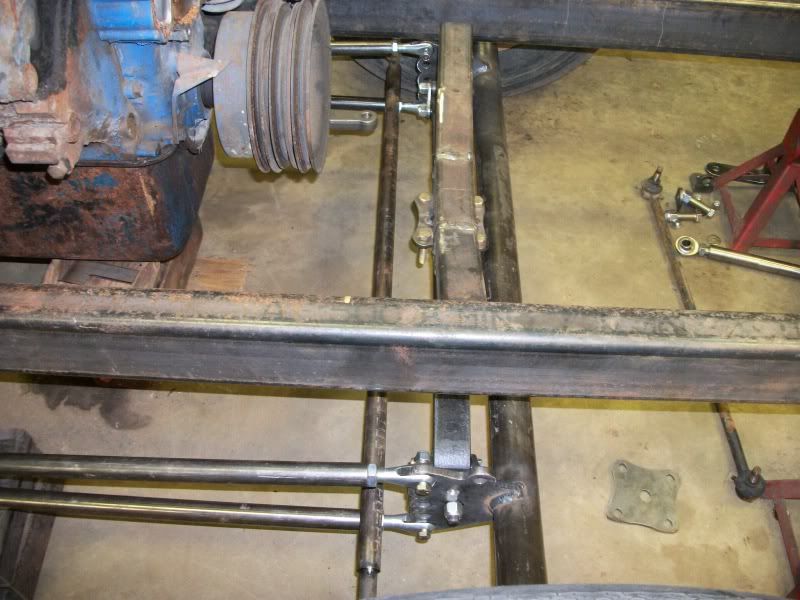
I got busy last night and decided to fix my link issue.
I did alot of reading about Panhard (track) bars vs. diagonal locator links like I made. It seems most say the diagonal link doesn't hold up well for street use. The curbs, humps and turning all wear out the link ends alot sooner than just a panhard bar. Ofcourse I did find a few who say just run the diagonal bar and it would be ok too...
Anyway, I had the parts yet to make the panhard bar and went that route.
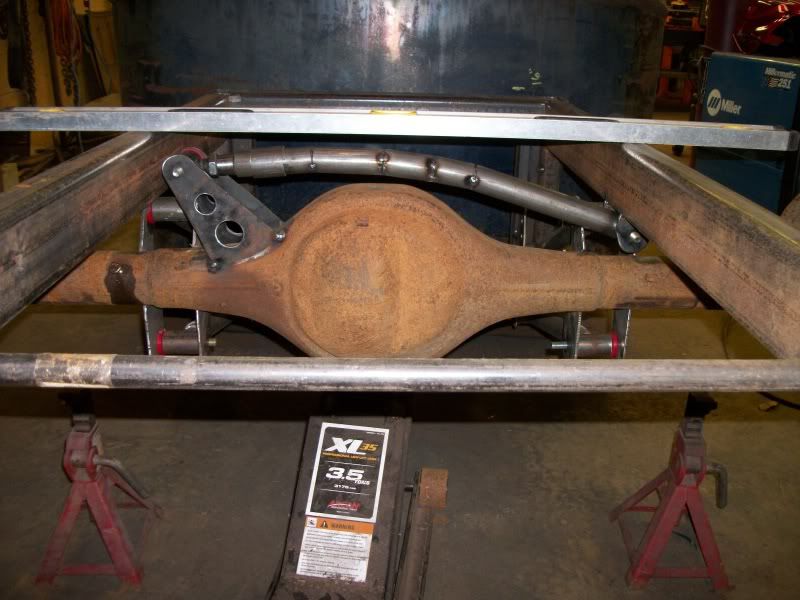
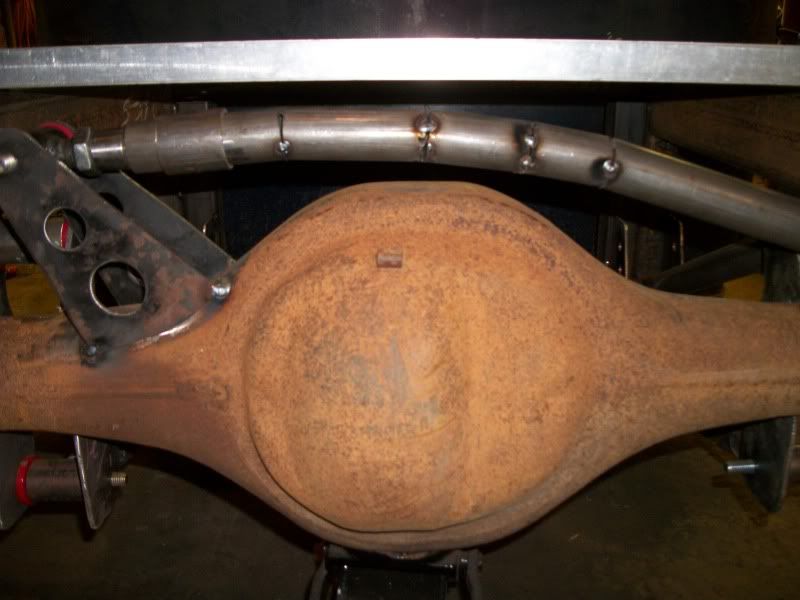
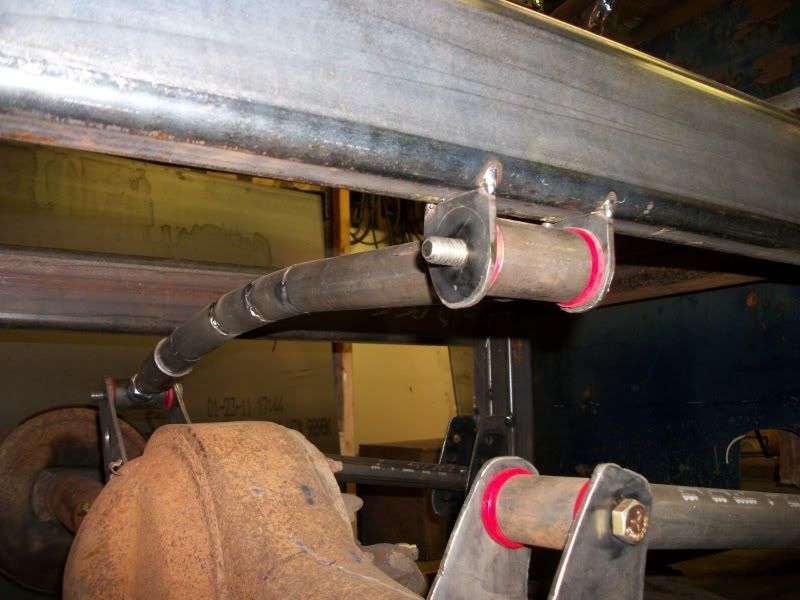
Stuffed height with about an inch of clearance on the frame, beneath my level and on top of the rearend.
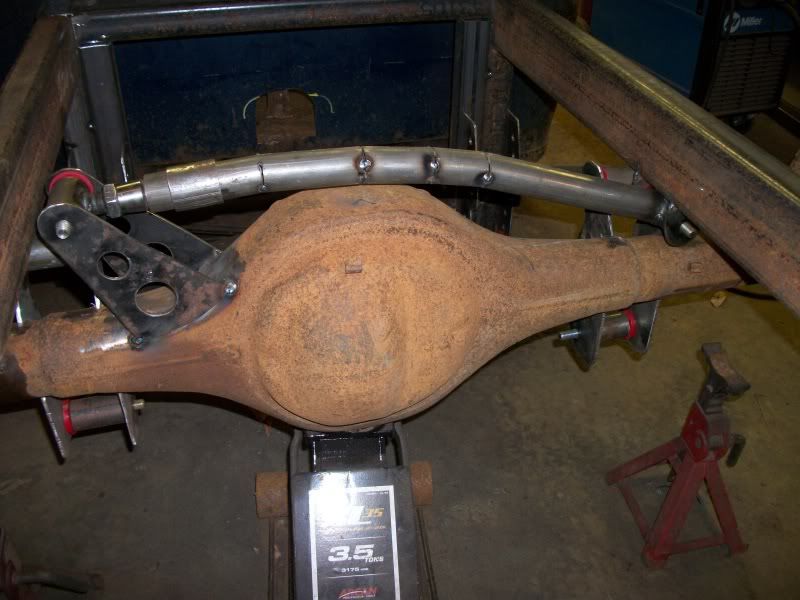
Approximate ride height.
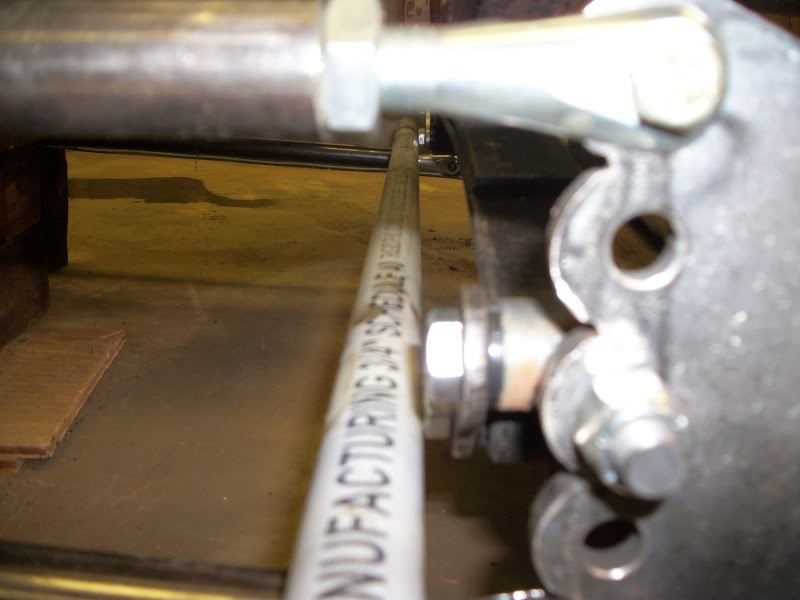
26" bar length hole to hole. The side to side arc of the bar moves only about 1/4" so hope it drives good.
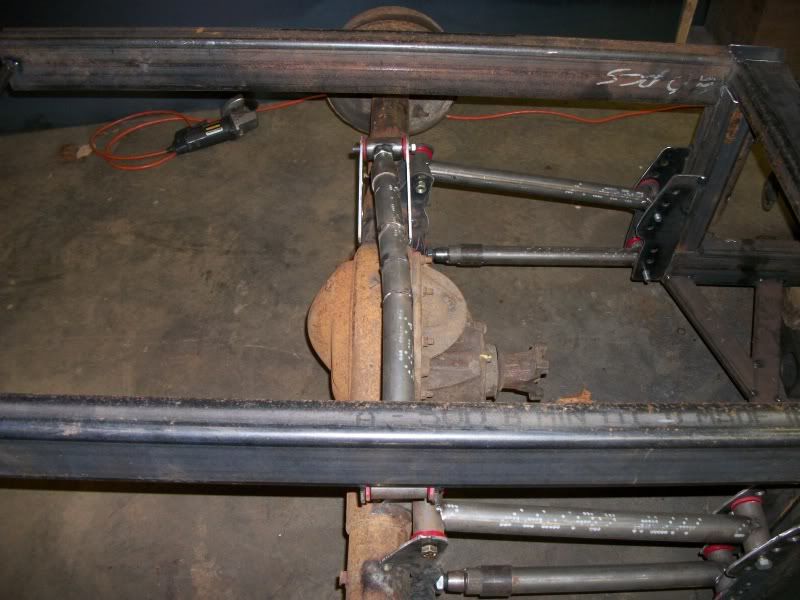
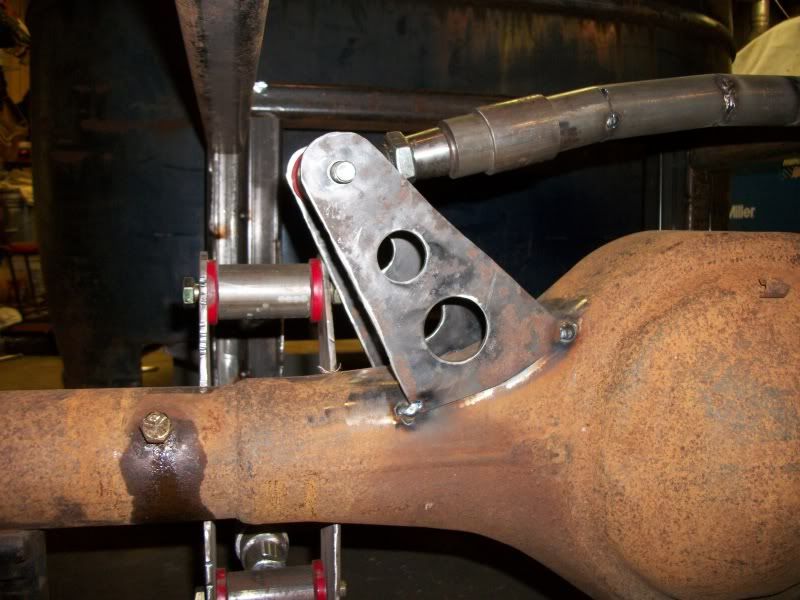
With the arc that the rear end makes moving up and down, the urethane does bushing does bind a bit, so a rod end could help this out too. I located it at ride height after a few slice and dices and the slight binding will only be at dropped height. Minimal though as with no weight on the body it was still easy to raise the rear end to dropped height. This time everything was done with the Jam nut tightened so I didn't get fooled again...hopefully...
I did alot of reading about Panhard (track) bars vs. diagonal locator links like I made. It seems most say the diagonal link doesn't hold up well for street use. The curbs, humps and turning all wear out the link ends alot sooner than just a panhard bar. Ofcourse I did find a few who say just run the diagonal bar and it would be ok too...
Anyway, I had the parts yet to make the panhard bar and went that route.
Stuffed height with about an inch of clearance on the frame, beneath my level and on top of the rearend.
Approximate ride height.
26" bar length hole to hole. The side to side arc of the bar moves only about 1/4" so hope it drives good.
With the arc that the rear end makes moving up and down, the urethane does bushing does bind a bit, so a rod end could help this out too. I located it at ride height after a few slice and dices and the slight binding will only be at dropped height. Minimal though as with no weight on the body it was still easy to raise the rear end to dropped height. This time everything was done with the Jam nut tightened so I didn't get fooled again...hopefully...
401ton
Well-known member
Got the rest of the firewall put back in place this weekend. I don't have it all welded back in, but looks like it will turn out OK when done.
I put it back in pieces because it had to be narrowed about two inches and I wanted to leave the curve I had to start with.
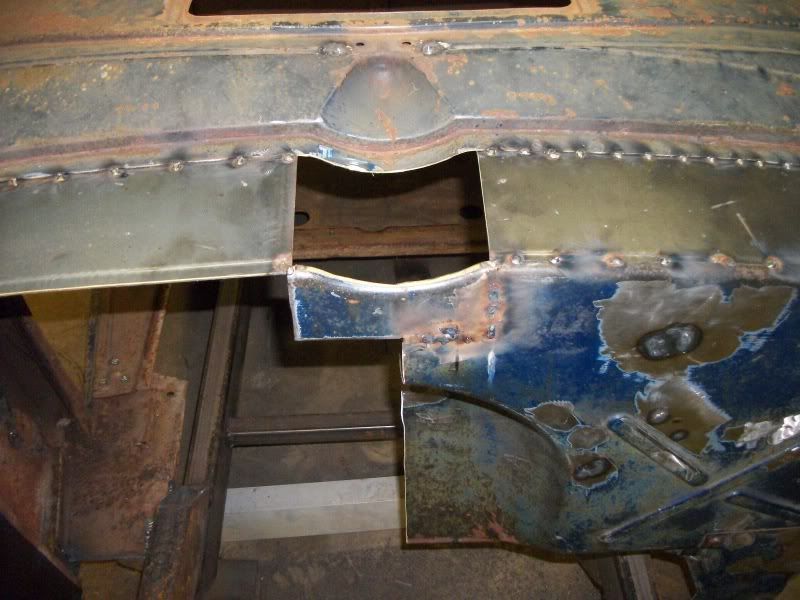
I don't have a sand bag and teardrop shaped mallet, so I used a piece of pipe, bfh and 2 x 4"s to make my shapes.
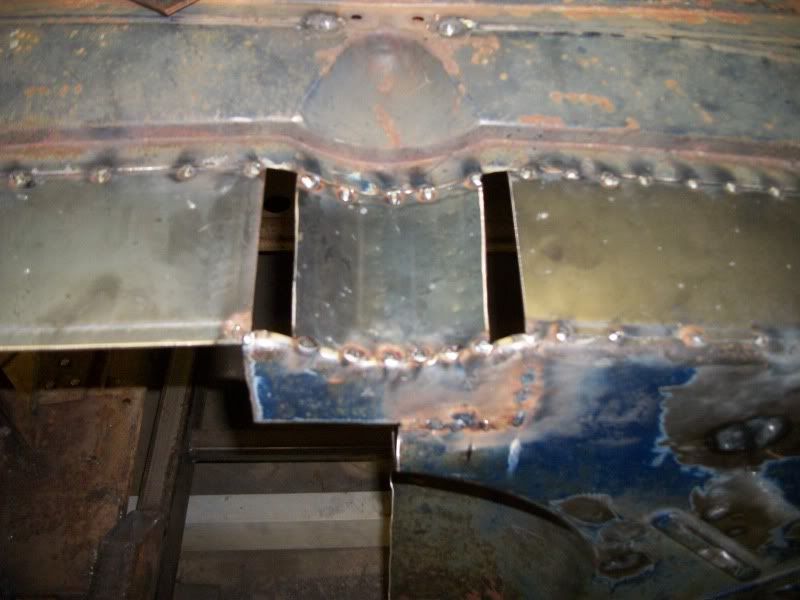
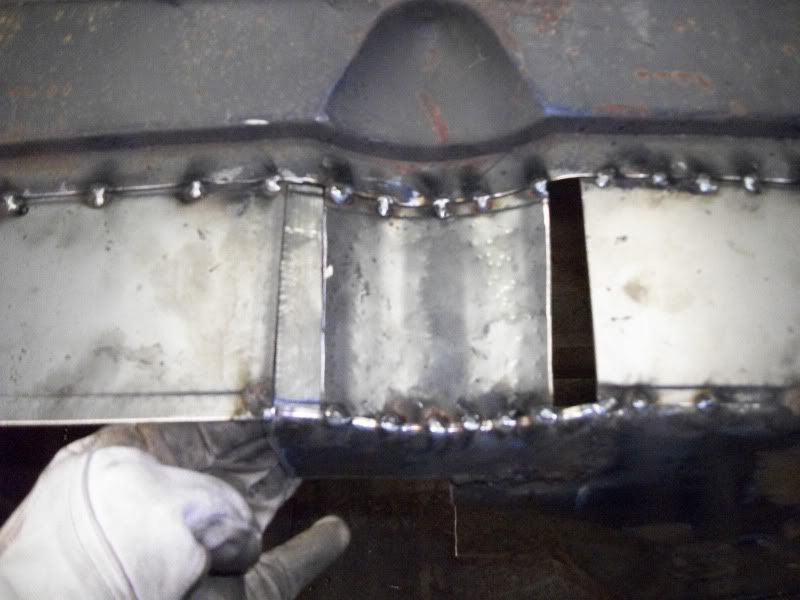

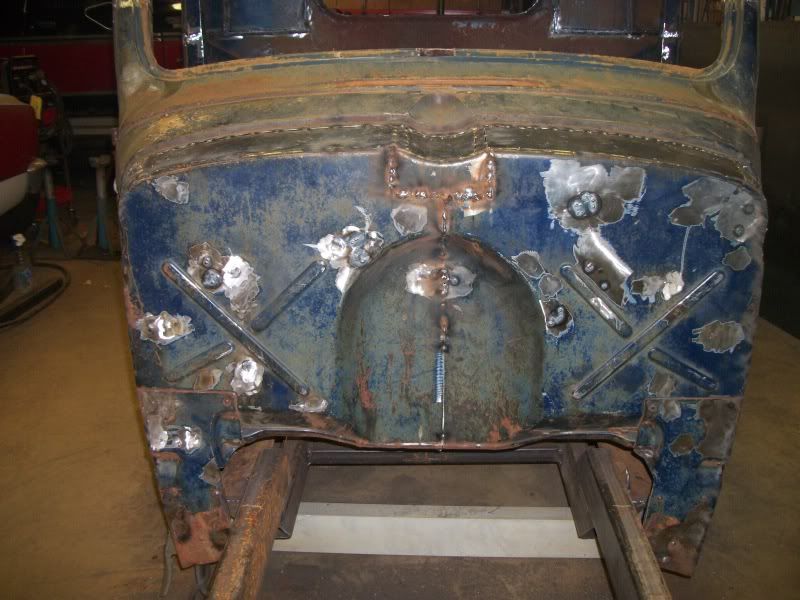

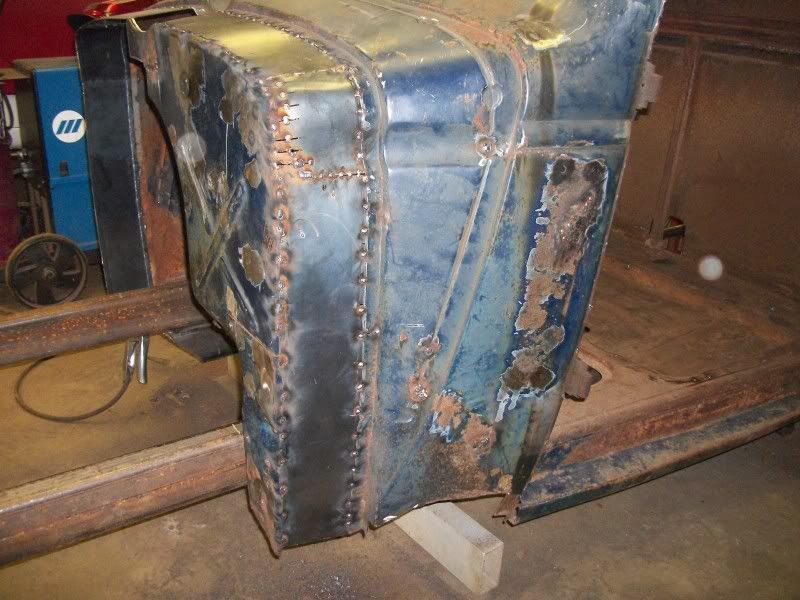
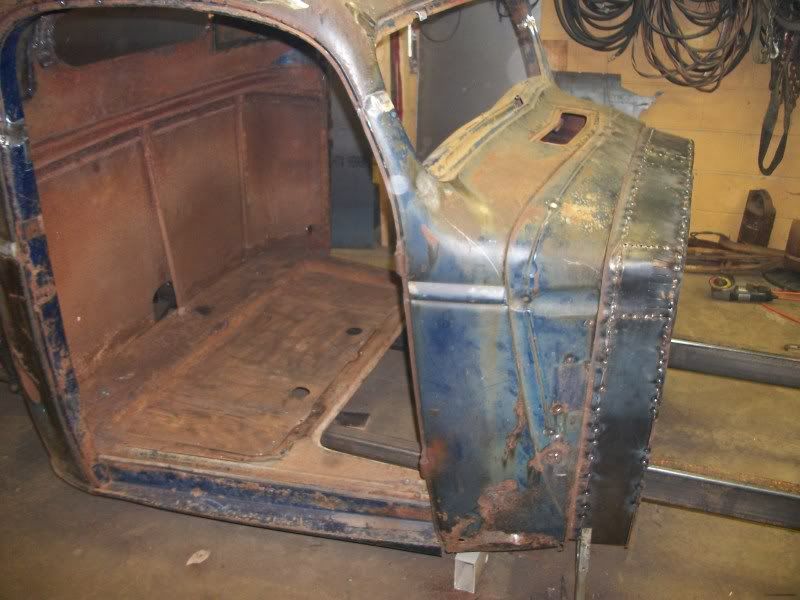
Alot of work, but will gain 4" of inside leg room...
I put it back in pieces because it had to be narrowed about two inches and I wanted to leave the curve I had to start with.
I don't have a sand bag and teardrop shaped mallet, so I used a piece of pipe, bfh and 2 x 4"s to make my shapes.
Alot of work, but will gain 4" of inside leg room...
rvreddog
Well-known member
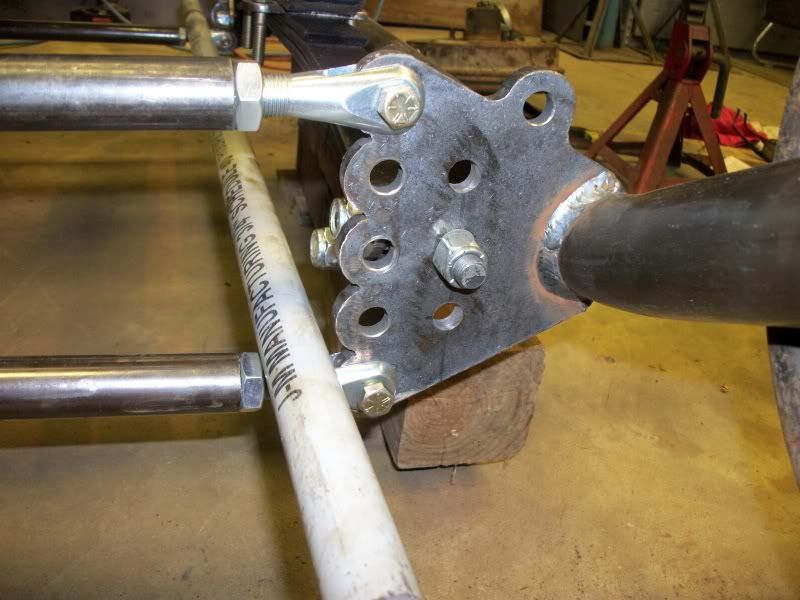
Wouldn`t you be ahead of the game if you moved your locating bracket from under the frame rail,to the side of the frame rail with a straight bar?
Your build is looking good,keep up the great work.
401ton
Well-known member
Wouldn`t you be ahead of the game if you moved your locating bracket from under the frame rail,to the side of the frame rail with a straight bar?
Your build is looking good,keep up the great work.
Thanks for the comments.
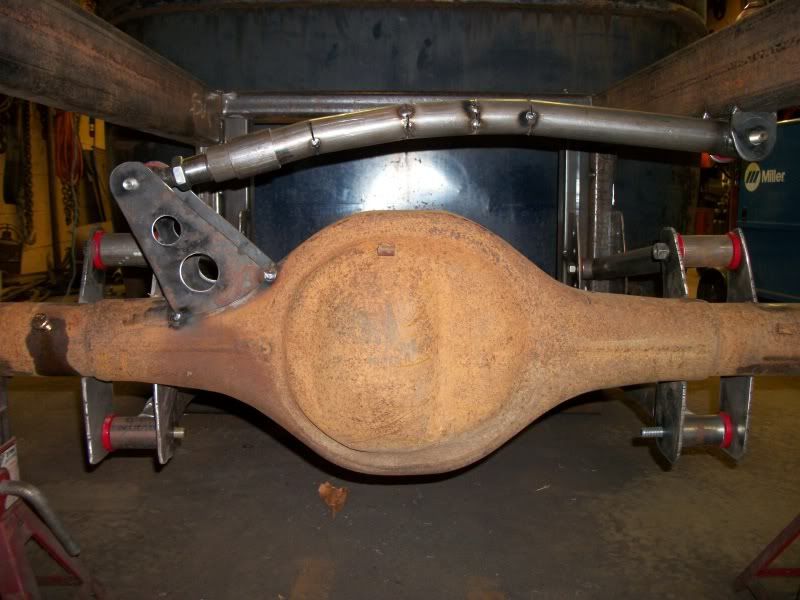
I get two advantages with it underneath the frame as I see it. First the bar is longer so the left to right axle travel is less. Second with the stuffed picture your looking at, the axle bracket is higher than the frame bracket. When it is at ride height, it is lower than the frame height. Basically it's mostly centered in the axle travel so when the axle is cycling it only moves about 1/4" either way instead of 1/2" one way (actually less than that). It should feel less bump steer then.
401ton
Well-known member
Progress has been a little slow lately. Seems all the time has been spent on parts, the doner rig dismantlement and I bought a couple 50's COE Ford trucks along the way.
Yesterday was Fathers Day and I couldn't disapoint dear old Dad, but after lunch and dessert I talked my Mom, Dad and Brother into going out to my Brothers farm house and dragging a couple old vehicles from behind the chicken house. (I'm sure I sound like a Hick now...lol)
My Brother has been wanting to haul them away because the building was in bad shape. I was holding up progress because I wanted some parts off both vehicles.
The truck is a 1951 Chevy long box. It's got good bed sides and decent running boards.
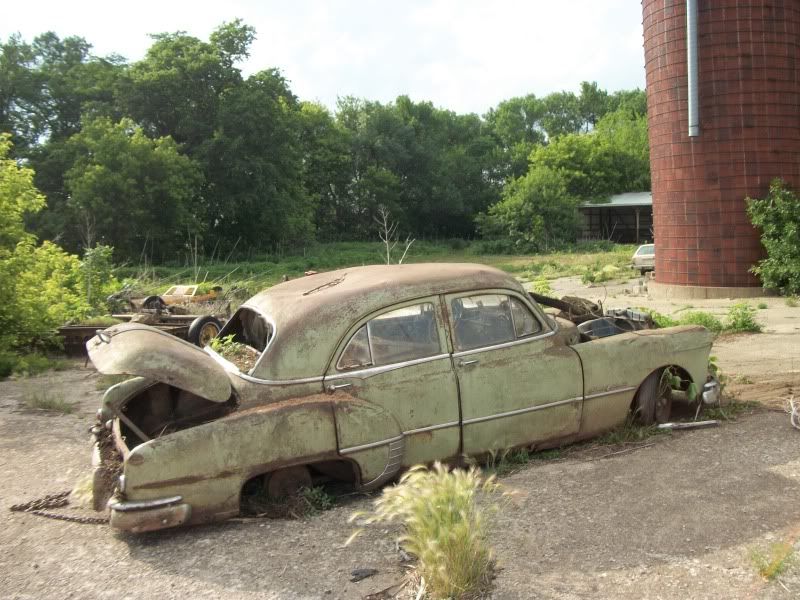
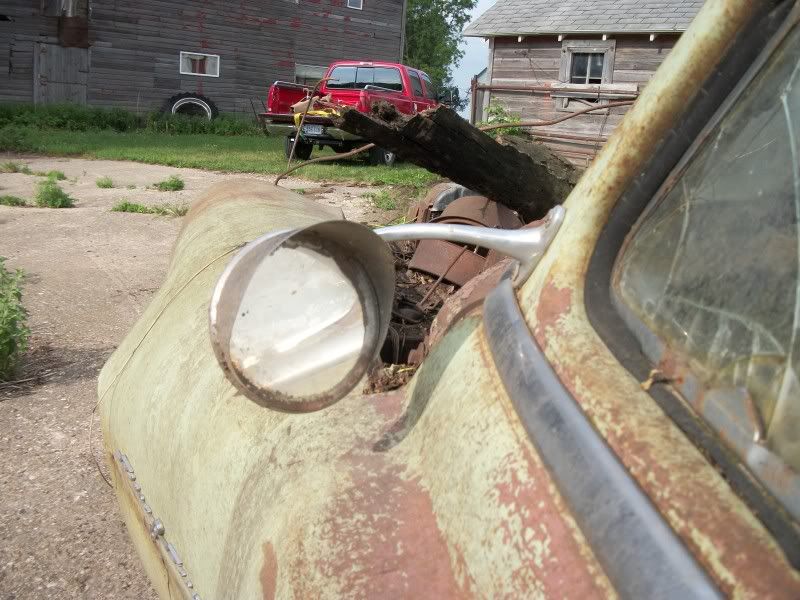
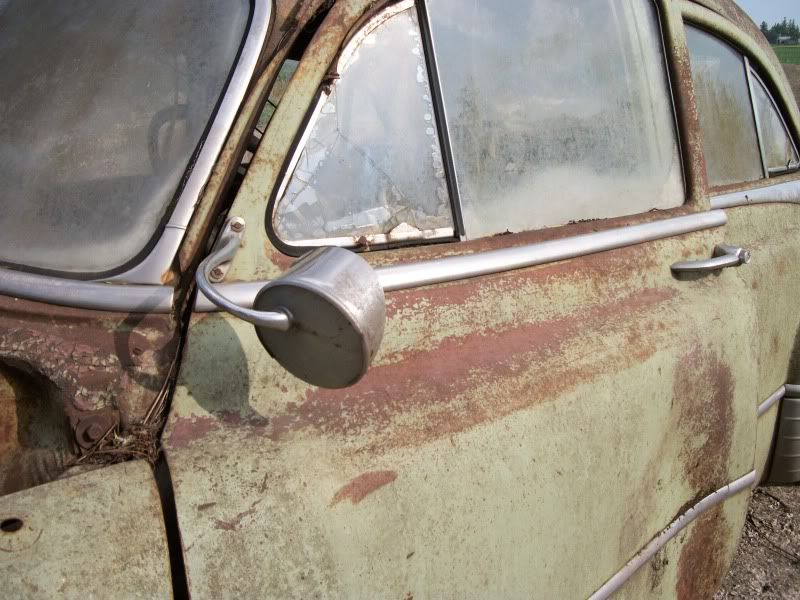
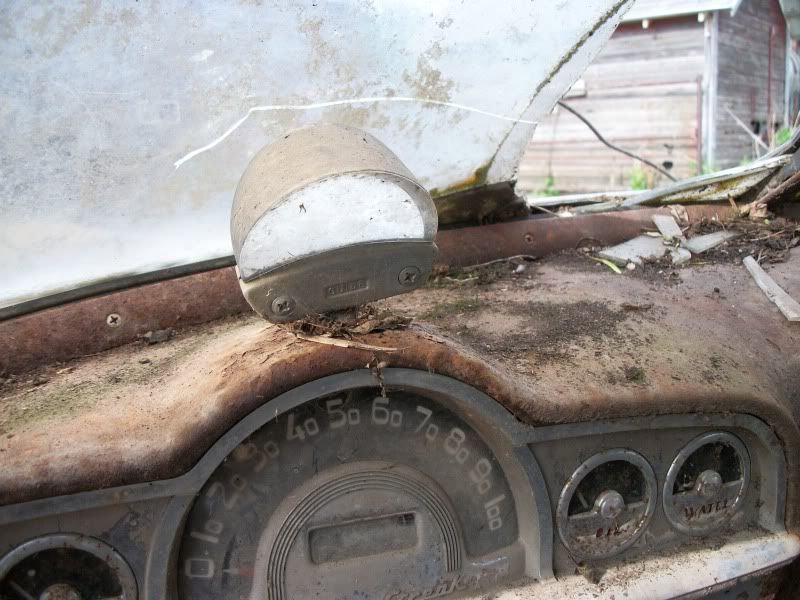
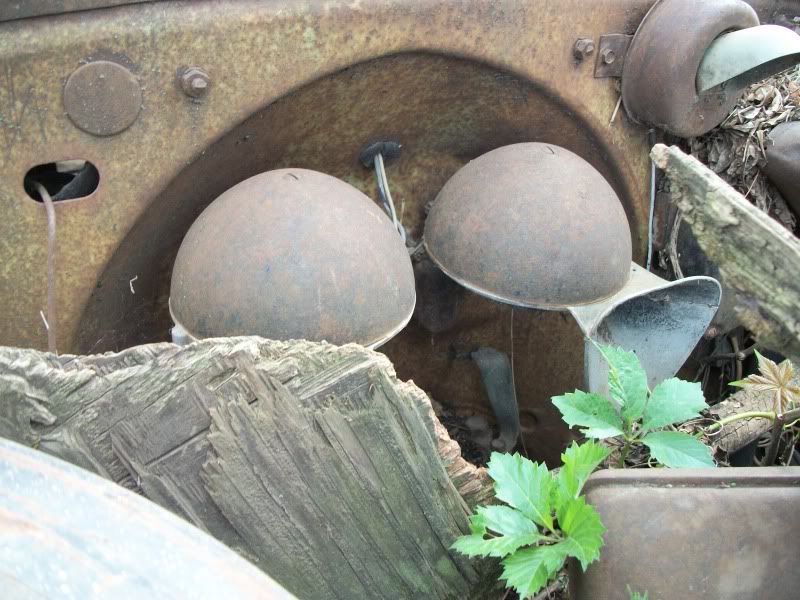
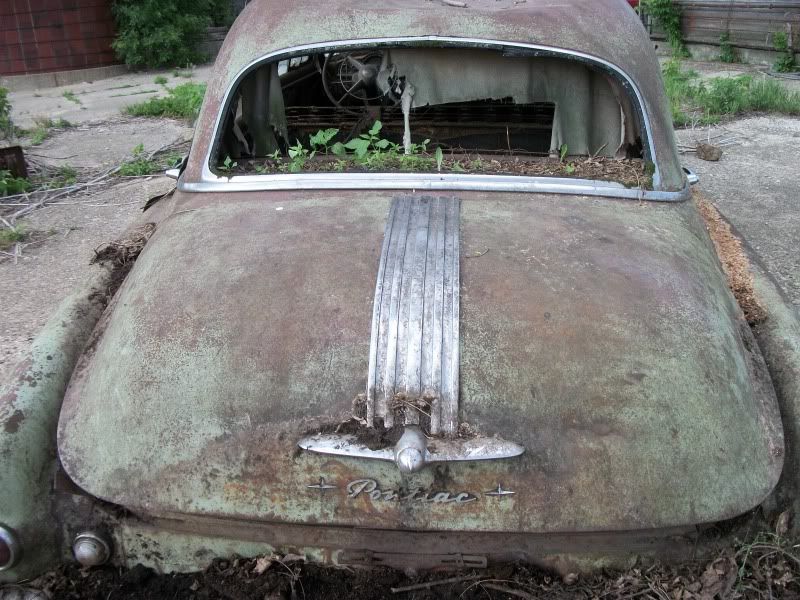
The car is a 1949 Pontiac Silver Streak. I'm thinking I need the mirror, traffic viewer (Guide), horns and a few trim pieces.
It took my Super Duty pulling the front end of my Brothers "M" Farmall down to get both of them out of thier 46? year slumber. A local ground hog is gonna need a new place to hide too.
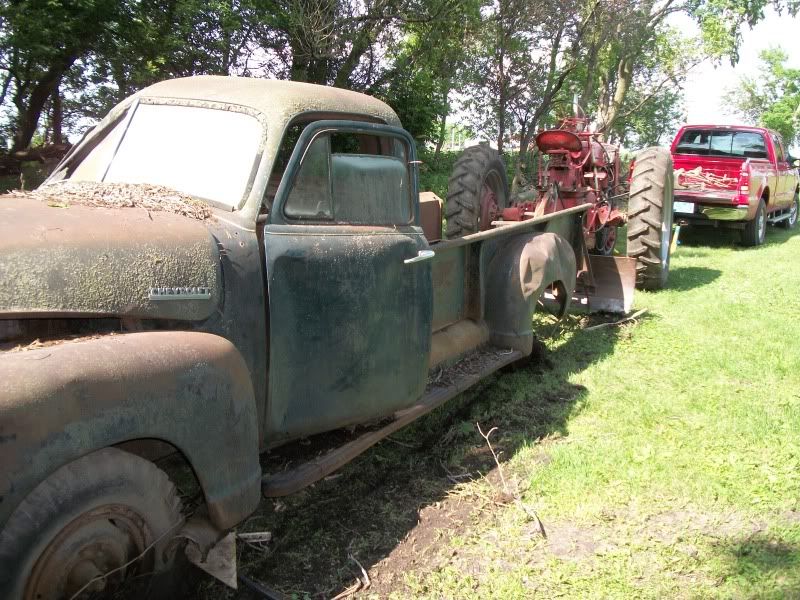
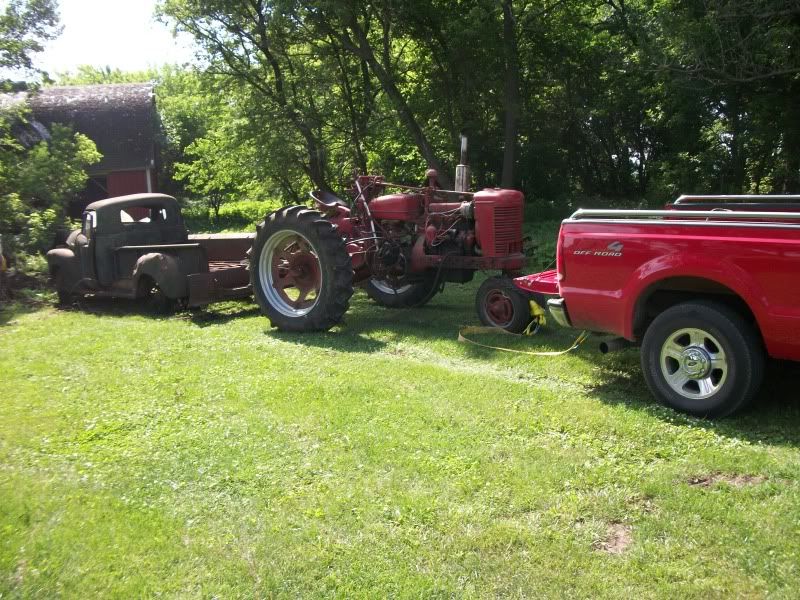
I hope to get the motor between the frame rails in the next couple weeks or so.
Yesterday was Fathers Day and I couldn't disapoint dear old Dad, but after lunch and dessert I talked my Mom, Dad and Brother into going out to my Brothers farm house and dragging a couple old vehicles from behind the chicken house. (I'm sure I sound like a Hick now...lol)
My Brother has been wanting to haul them away because the building was in bad shape. I was holding up progress because I wanted some parts off both vehicles.
The truck is a 1951 Chevy long box. It's got good bed sides and decent running boards.
The car is a 1949 Pontiac Silver Streak. I'm thinking I need the mirror, traffic viewer (Guide), horns and a few trim pieces.
It took my Super Duty pulling the front end of my Brothers "M" Farmall down to get both of them out of thier 46? year slumber. A local ground hog is gonna need a new place to hide too.
I hope to get the motor between the frame rails in the next couple weeks or so.
401ton
Well-known member
I'll let you know. My Brother was wanting a few parts off it himself, so I'm not sure about the dash yet. I was kinda thinking the clock/(speaker?) was cool too although I haven't figured out where it would fit best yet.

klink
Well-known member
The firewall extension looks great! I'm not sure about your material choice for a driveshaft though... if you're going to use PVC I'd at least increase the diameter.
401ton
Well-known member
Progress has been moving along the last few weeks at a moderate pace.
About 3-4 weeks ago I installed a large window air unit in my shop so I feel lucky to be doing anything because of the heat and humidity here. The A/C unit doesn't make the shop into a ice box, but does a decent job of maintaining temp and removing the humidity.
Iowa actually had one of the highest heat indexes in the country. I think I heard up to 129 Heat index at one time.
The PVC driveshaft idea isn't going to work as well I was hoping, so trying to piece together as much old F-250 stuff as I can find...lol
The old Pontiac was taken to the crusher before I could get all the parts I wanted. The car was two hours away and we had it for all of my life, but then all of a sudden there was a big rush to get rid of it...grumble...
My Dad and Brother did save the Guide traffic light viewer, mirror, horns and trunk ornament, but not the dash i was wanting. Oh well, easy come, easy go... My Dad had forgotten what a view finder was. After I explained it to him, he took it to the coffee shop the next day and was amazed at how no one else knew and now he was the smart one...lol
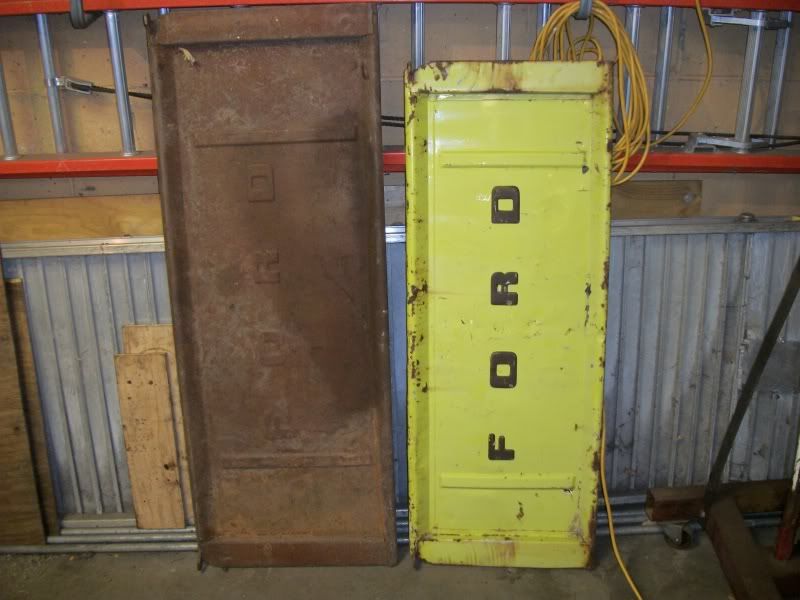
Last week I scored a 1955 F-100 box, fenders, running boards and tailgate for a $100. I had a better tailgate off the same year truck, but now can use the better one for my 1954 Ford COE and the rear fenders as well because the 46' won't have rear fenders.
Here's a few pics:
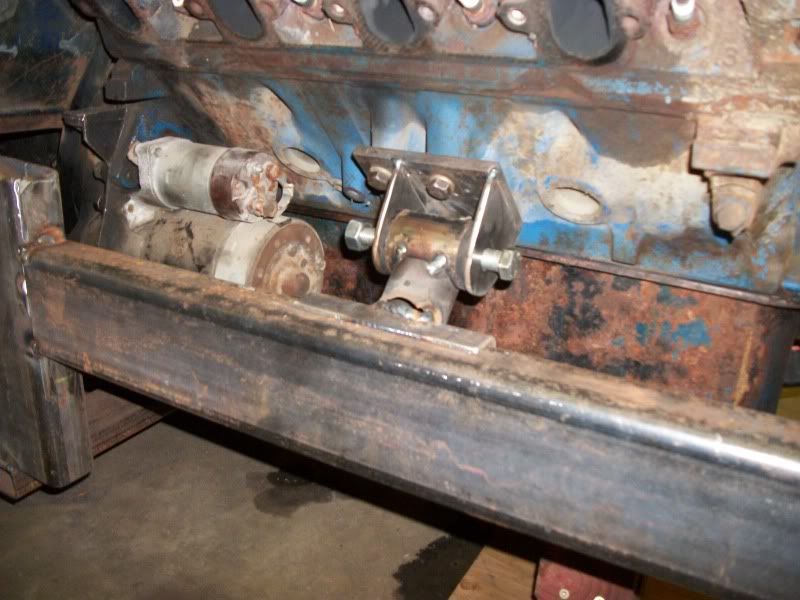
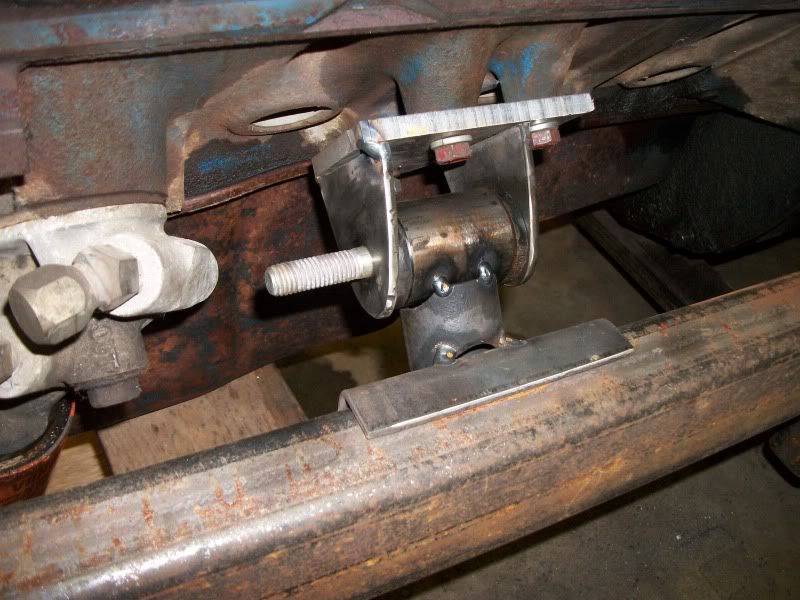
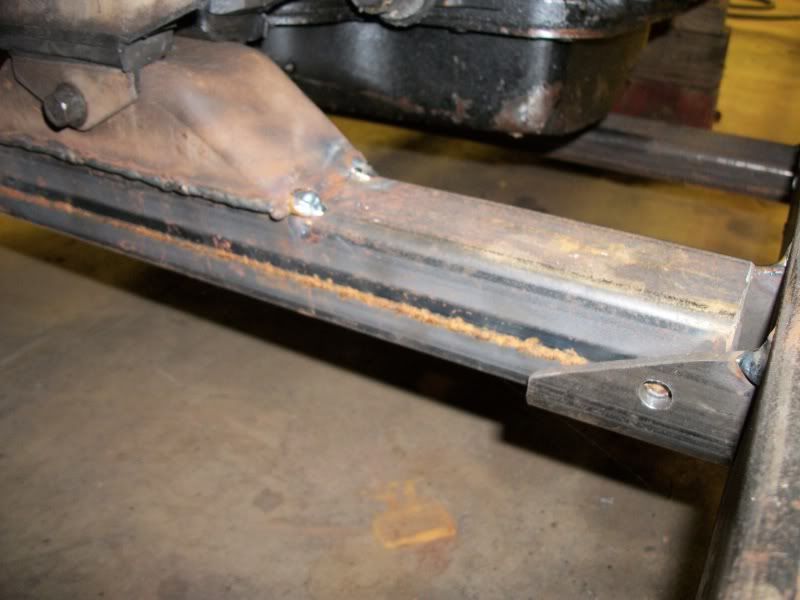
Motor mounts-
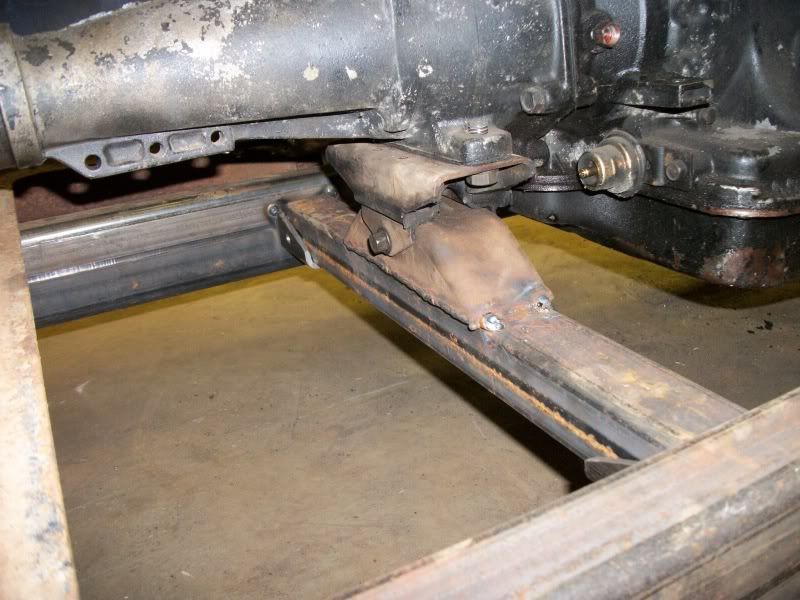
tranny mount
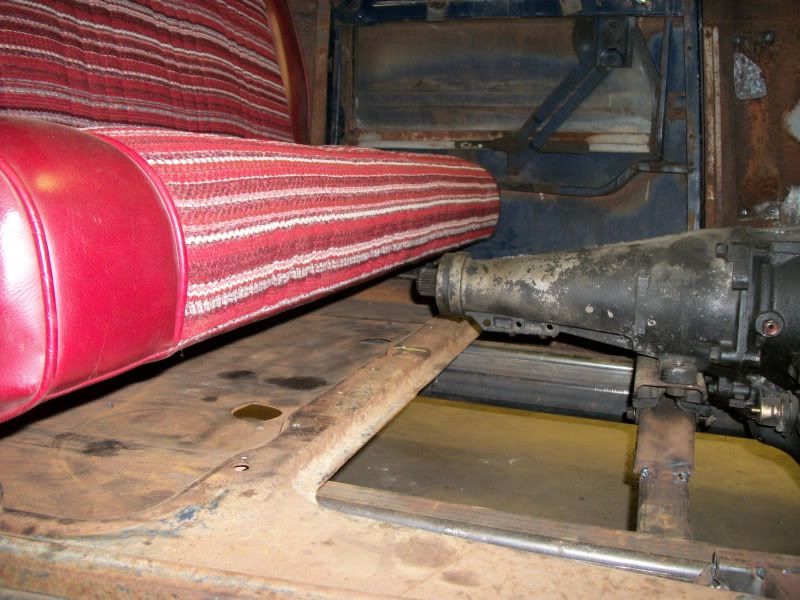
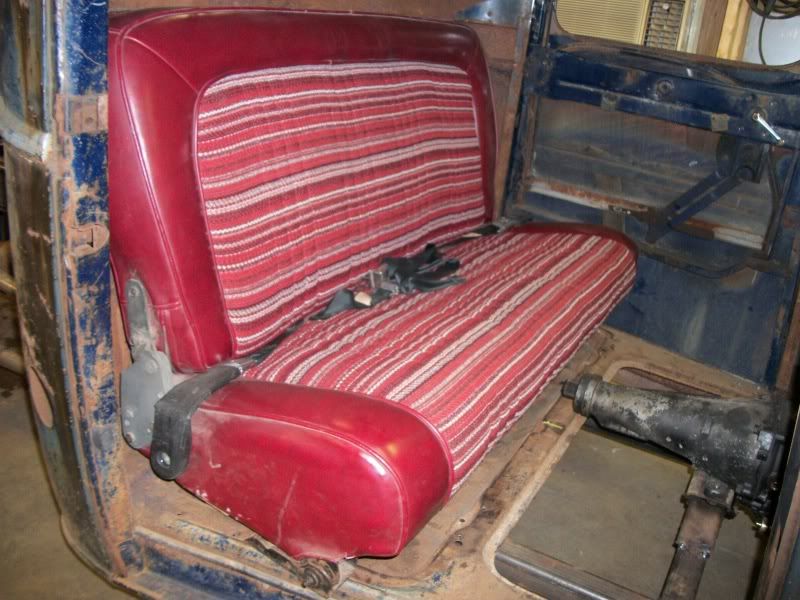
The seat is off the 79 Bronco rear seat. It doesn't need a seat cover, but needs narrowed at the front corners and needs a space for the future driveshaft hump. I havn't cut any seats apart before, so not sure if that is a good idea or not yet.
About 3-4 weeks ago I installed a large window air unit in my shop so I feel lucky to be doing anything because of the heat and humidity here. The A/C unit doesn't make the shop into a ice box, but does a decent job of maintaining temp and removing the humidity.
Iowa actually had one of the highest heat indexes in the country. I think I heard up to 129 Heat index at one time.
The PVC driveshaft idea isn't going to work as well I was hoping, so trying to piece together as much old F-250 stuff as I can find...lol
The old Pontiac was taken to the crusher before I could get all the parts I wanted. The car was two hours away and we had it for all of my life, but then all of a sudden there was a big rush to get rid of it...grumble...
My Dad and Brother did save the Guide traffic light viewer, mirror, horns and trunk ornament, but not the dash i was wanting. Oh well, easy come, easy go... My Dad had forgotten what a view finder was. After I explained it to him, he took it to the coffee shop the next day and was amazed at how no one else knew and now he was the smart one...lol
Last week I scored a 1955 F-100 box, fenders, running boards and tailgate for a $100. I had a better tailgate off the same year truck, but now can use the better one for my 1954 Ford COE and the rear fenders as well because the 46' won't have rear fenders.
Here's a few pics:
Motor mounts-
tranny mount
The seat is off the 79 Bronco rear seat. It doesn't need a seat cover, but needs narrowed at the front corners and needs a space for the future driveshaft hump. I havn't cut any seats apart before, so not sure if that is a good idea or not yet.
401ton
Well-known member
I made some mounts for my air comp. and battery.
I had a good plan to make lots of room for everything then my buddy convinced me to add a cooler holder in the back. A little more work and I haven't cycled the suspension yet so hopefully everything clears.
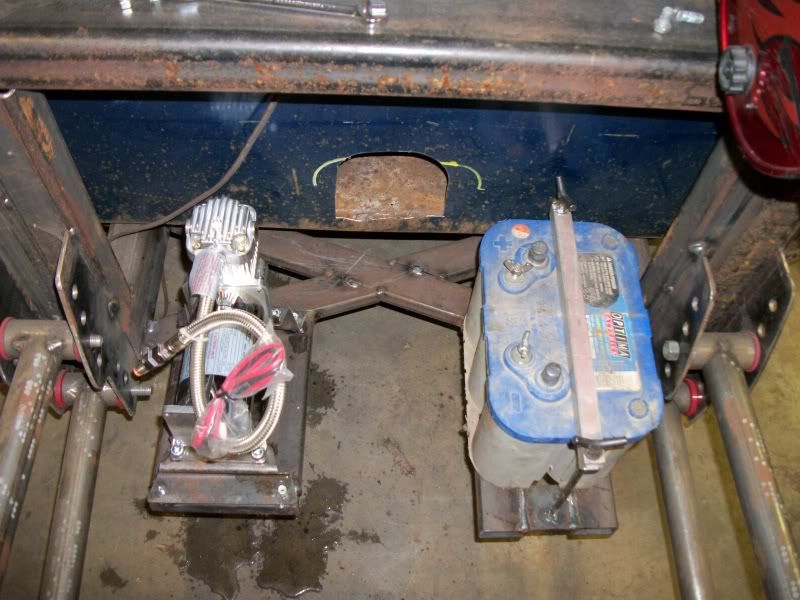
some "Z" brackets for the air comp.
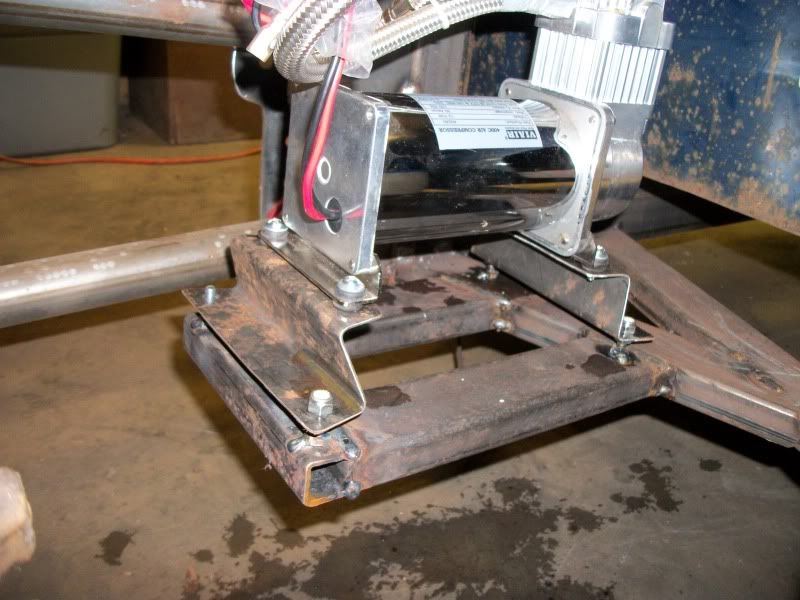
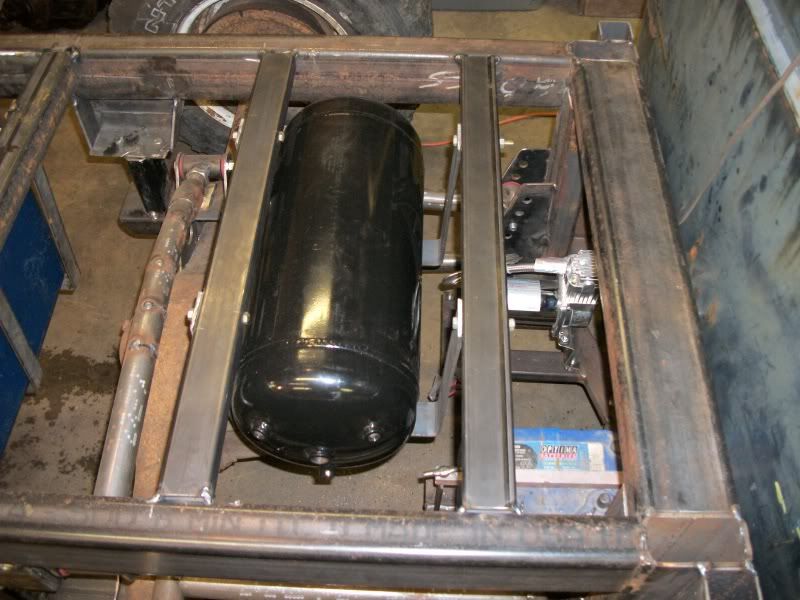
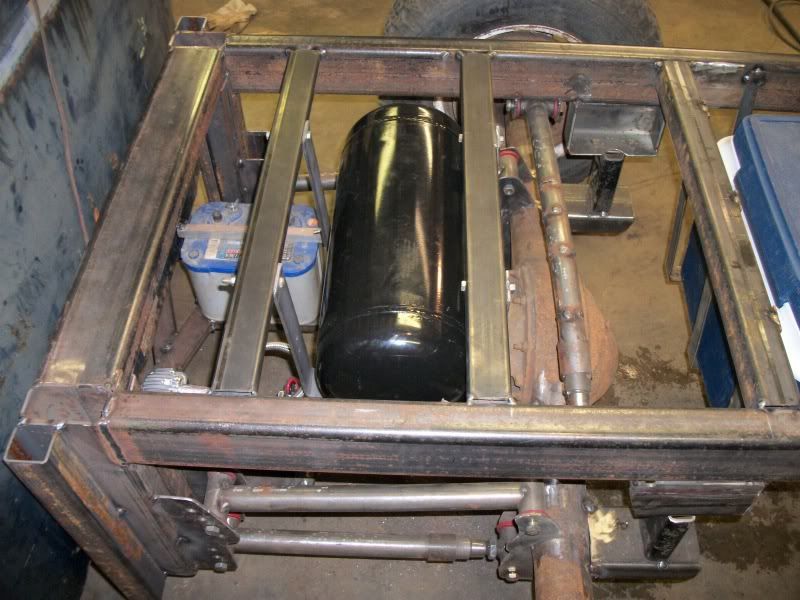
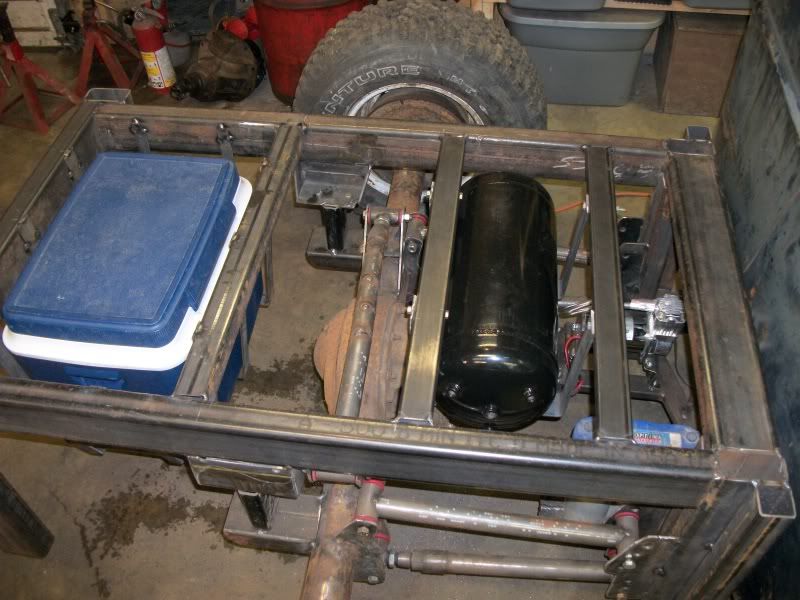
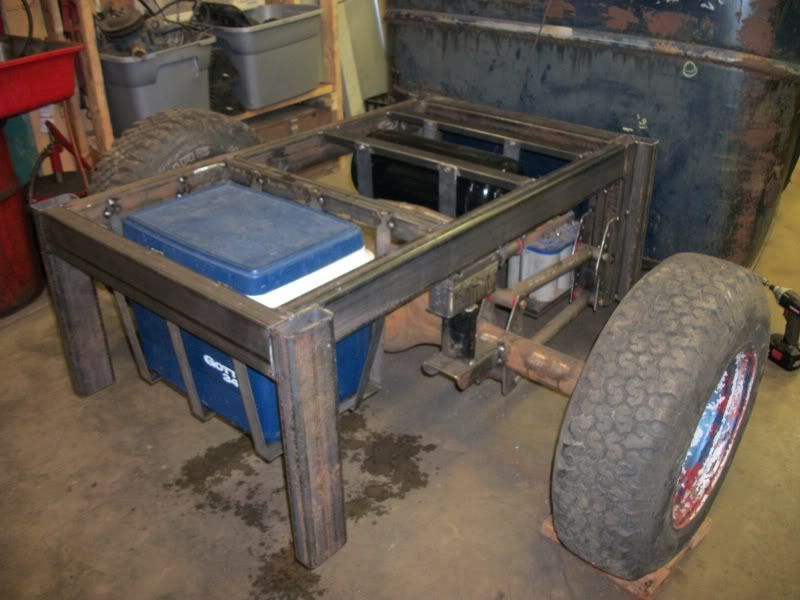
The top of the steel tube will be the bottom of the bed floor. This will leave about 6-8" of bed height inside plus the angle of the sloped bed sides too. Tailgate will be solid mounted to the rear. Needed to space out the bed sides to make room for the air bags I moved recently. I thing it will work out better than the location they were at before. Hopefully everything is nearly placed because I'm ready to weld up solid a few things.
I had a good plan to make lots of room for everything then my buddy convinced me to add a cooler holder in the back. A little more work and I haven't cycled the suspension yet so hopefully everything clears.
some "Z" brackets for the air comp.
The top of the steel tube will be the bottom of the bed floor. This will leave about 6-8" of bed height inside plus the angle of the sloped bed sides too. Tailgate will be solid mounted to the rear. Needed to space out the bed sides to make room for the air bags I moved recently. I thing it will work out better than the location they were at before. Hopefully everything is nearly placed because I'm ready to weld up solid a few things.
deerchooper
Well-known member
- Joined
- Apr 3, 2010
- Messages
- 744
good looking build, maybe i missed it but where is the gas tank going?
deerchooper
Well-known member
- Joined
- Apr 3, 2010
- Messages
- 744
ah i see, the kegger gas tank. continue with the good work.
401ton
Well-known member
You got it, old style keg in the bed. Should end up just below the window. I'll probably make some removeable pins or pivots to get at everything underneath.
Waiting for front axle, suspension and steering parts to arrive shortly.
Can't wait for it to roll on all fours!
Waiting for front axle, suspension and steering parts to arrive shortly.
Can't wait for it to roll on all fours!
zzrodder
It ain't grey hair, it's chrome!
Nice to see a guy with his priorities in order, beer cooler location all sorted out [cl[cl.
401ton
Well-known member
Nice to see a guy with his priorities in order, beer cooler location all sorted out [cl[cl.
My buddy with the cooler idea actually drinks Busch NA. I think his real reason is when you get to a show or cruise they never have any Non-alk beer and he SOL... His other reason is just to mess with my plans when he stops over too.
401ton
Well-known member
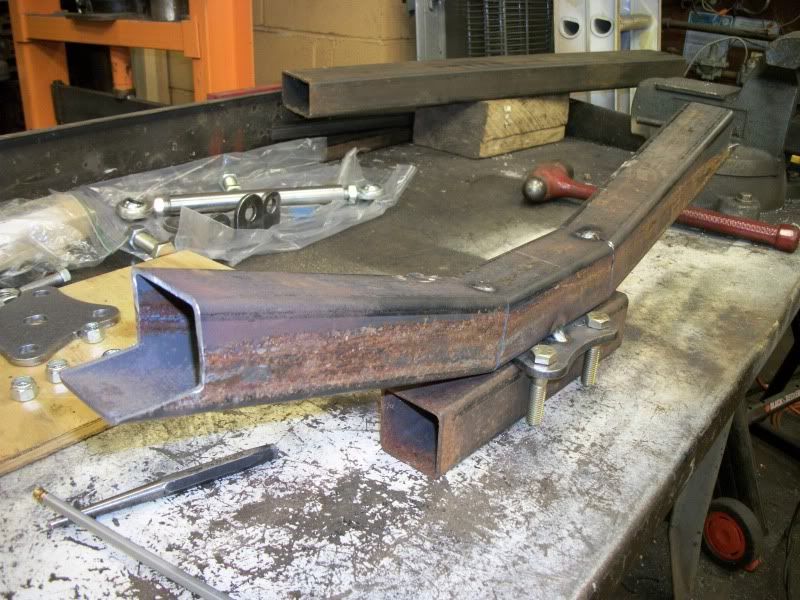
More progress. Axle and spring arrived.
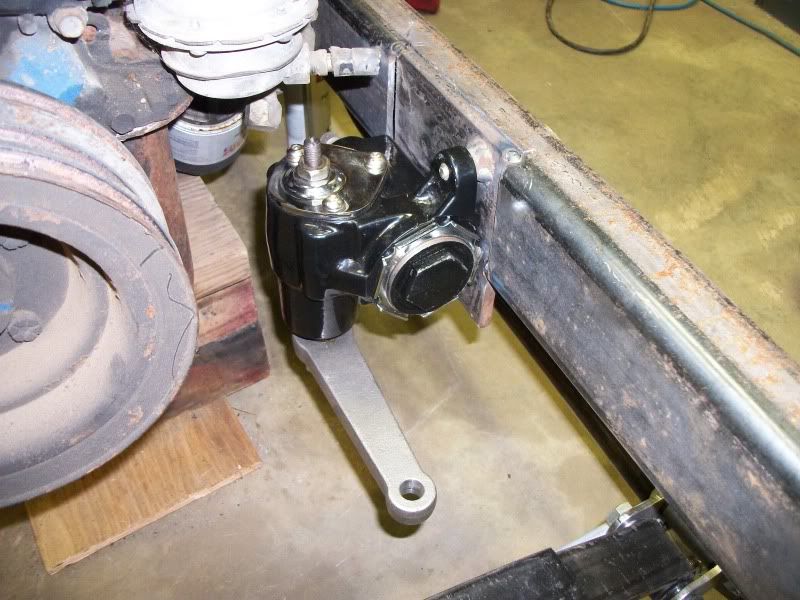
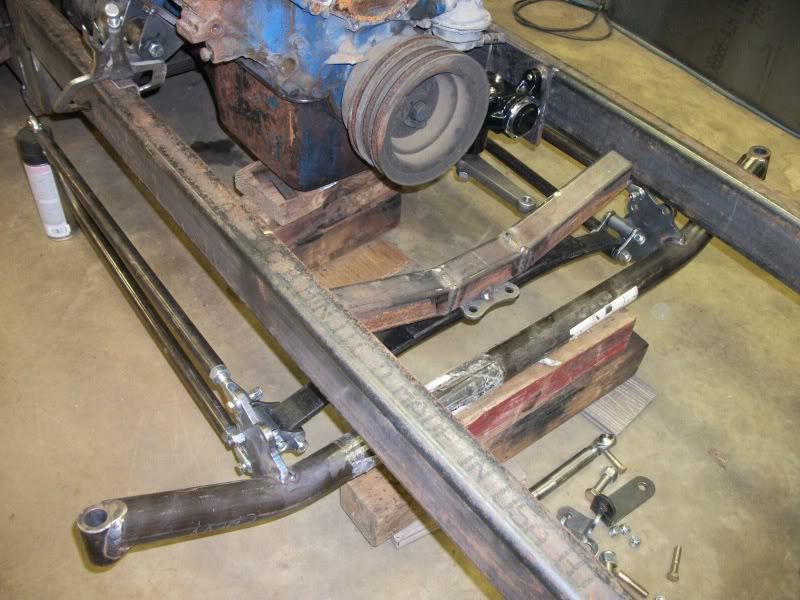
Steering hit spring shackles on the spring behind axle. Heated and bent steering arms then redrilled bat wings to make room.
I got enough room now, but spring is going to be close to the axle. I'll clearance and adjust where needed when I get that far.
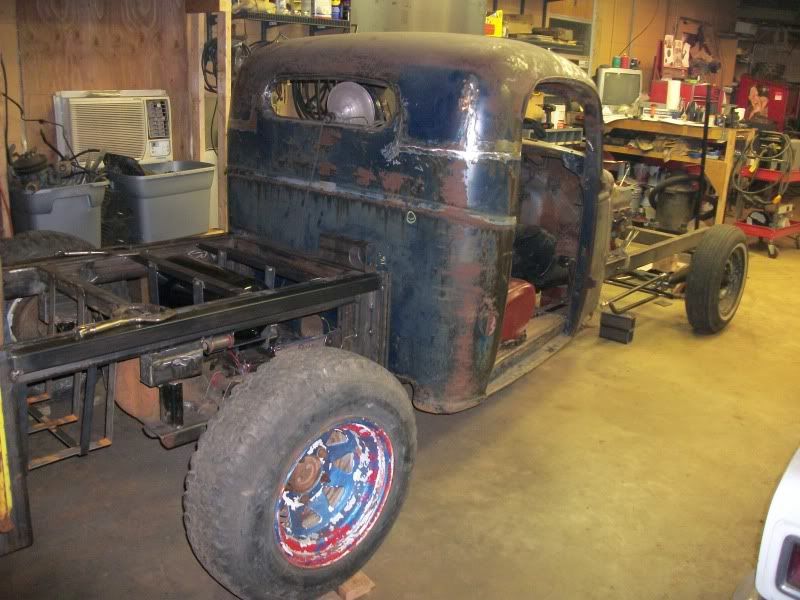
The rig is actually setting on all fours! I bought the bare cab last August, so no record pace being set here...
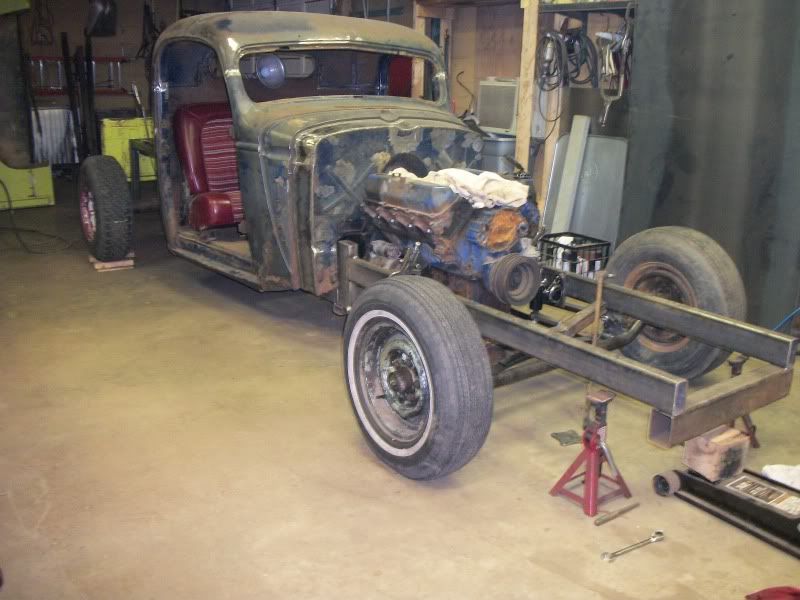
Time for the tailgate and bed to be altered.

Steering hit spring shackles on the spring behind axle. Heated and bent steering arms then redrilled bat wings to make room.
I got enough room now, but spring is going to be close to the axle. I'll clearance and adjust where needed when I get that far.
The rig is actually setting on all fours! I bought the bare cab last August, so no record pace being set here...
Time for the tailgate and bed to be altered.
401ton
Well-known member
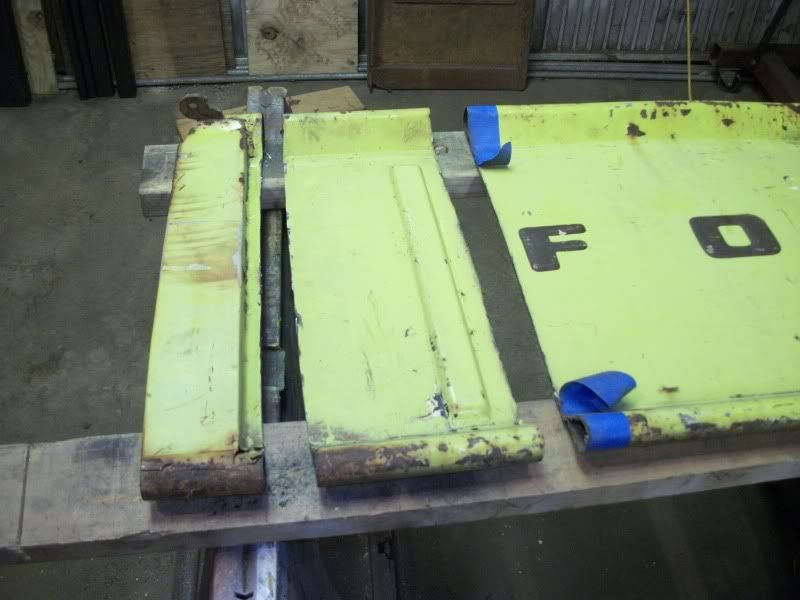
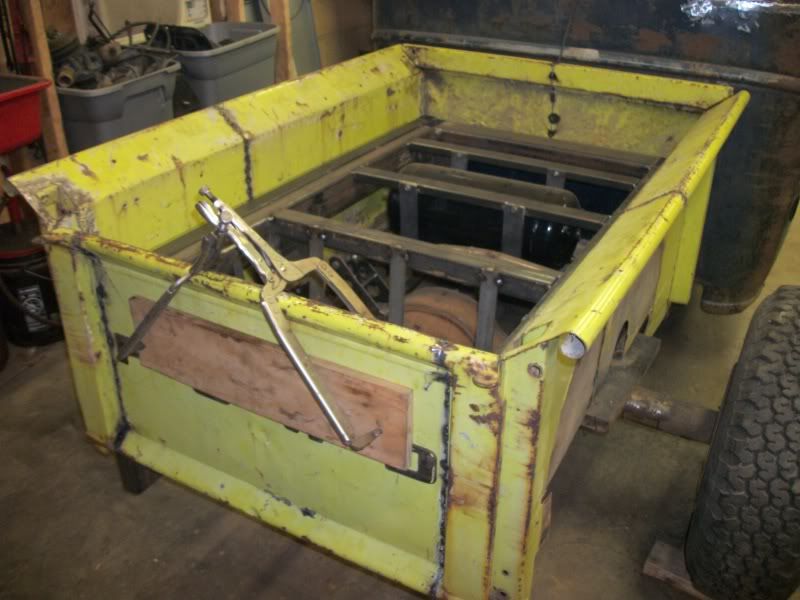
Cut the tailgate, bed sides and front panel apart and welded back together.
I cut 23" out of the sides and 14" out of the tailgate and front panel.
After looking a bit at the other tailgate I had, it turns out that one was longer and wider. I am gonna assume it was off a longbed model, but who knows.

I was going to cut the side supports off instead of cutting down the center of the box sides but one of the box sides was bent worse than I wanted and it really was a pain to find all the spot welds on the front panel corner so I just split it and welded back together.

I'm still planning on 32-33" tall tires so the side view is decieving now. I tryed to center the tire in the box side. I also think I will lower the air rear air bag mounts. Right now I have close to 8" of rear frame clearance.
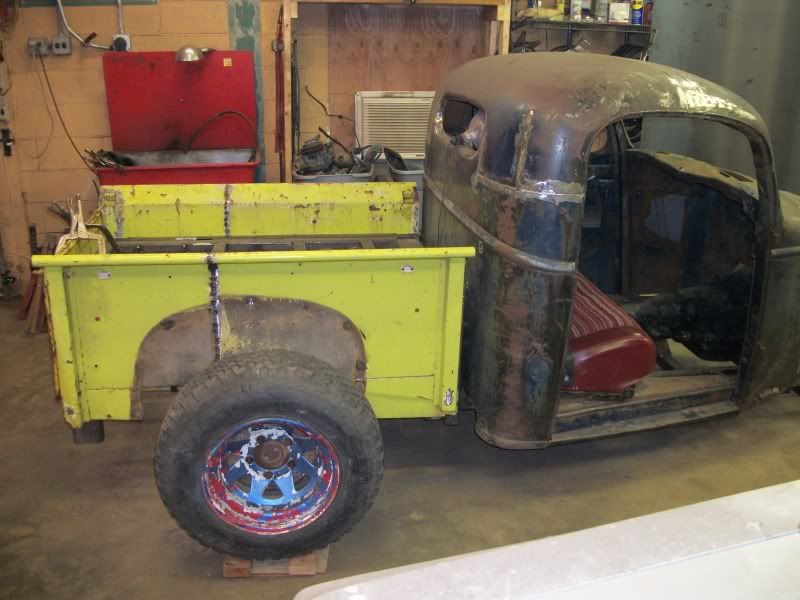
Need to decide on tail lights and where to put the license plate yet.
I thinking old style tail lights off to the lower corners of the box.
The license plate may get mounted below the tailgate in some type of bracket. Any thoughts?
I cut 23" out of the sides and 14" out of the tailgate and front panel.
After looking a bit at the other tailgate I had, it turns out that one was longer and wider. I am gonna assume it was off a longbed model, but who knows.
I was going to cut the side supports off instead of cutting down the center of the box sides but one of the box sides was bent worse than I wanted and it really was a pain to find all the spot welds on the front panel corner so I just split it and welded back together.
I'm still planning on 32-33" tall tires so the side view is decieving now. I tryed to center the tire in the box side. I also think I will lower the air rear air bag mounts. Right now I have close to 8" of rear frame clearance.
Need to decide on tail lights and where to put the license plate yet.
I thinking old style tail lights off to the lower corners of the box.
The license plate may get mounted below the tailgate in some type of bracket. Any thoughts?