My 1941 Dodge Truck Build

Rat Rods Rule

Help Support Rat Rods Rule:

This site may earn a commission from merchant affiliate links, including eBay, Amazon, and others.
I like the driver's side with the bent in rocker better than the passenger side. Just trim the bottom of the cab to match - or not.

The ZZ's behind the cab look awesome!

Thank you! I like the look of the bent rocker better also.

I'm thinking an oval fuel tank right in between the rear frame rails would be cool. I like the long rocker myself.

I was also thinking of an oval tank, but on top of the frame rails. I can't put anything in between the frame rails because it will interfere with the suspension push rods.

I really like the look of the tank Dan (DJ3100) has on his truck. I also like the look of '33-34 Dodge gas tanks. Does anybody know what the dimensions are on these tanks?

bm0tgx14.jpg


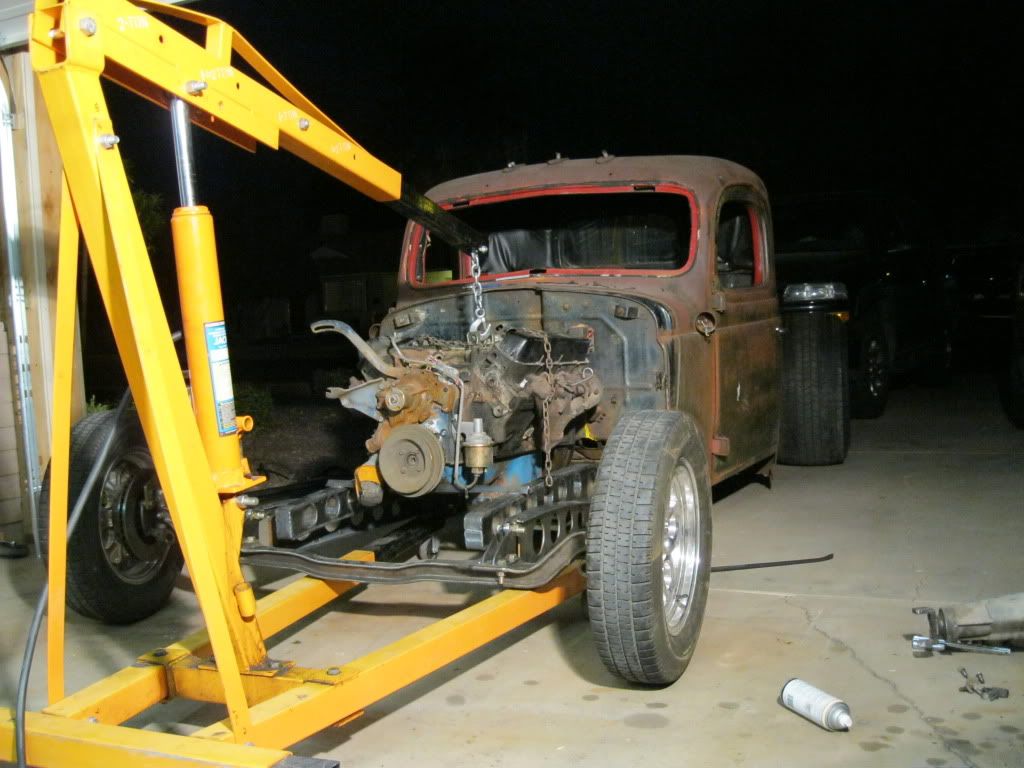
Looks like your cab is the same as my 39 Chevy. The cab covers the frame naturally with no channel needed . By not channeling I was able to keep the floor nice and sturdy as it came from the factory . I chopped mine 3 " and with me at 5-11 the head room is just right . I also use bomber seats which have the narrow back and lower seat profile . A reg seat and a reg back section would make my interior very crowded . A lot of the available head room is above the top of the windshield ,ducking down to see traffic lights gets old when driving around town . My sunvisor also cuts about 1" from my view , making it the same as a 4" chop . I couldn't drive it if it was any lower .

The rockers hang below the frame. The middle section of the frame is 2"x4" tubing and the rockers are something like 6.5". My plan is to have the truck lay frame, and with the rockers at 6.5", there will be problems. Also, the bent rocker is almost FUBAR.

If I trim the rockers so they're only 1" long and channel the cab 2-3", I'd be able to lay frame without the sheet metal touching the ground, and I'd still cover up the frame rails pretty well.

I'll chop the top the last thing. I want to be sure that I don't end up with a cab that I can't see out of. Like you mentioned, ducking to see traffic lights gets really annoying really quickly.

Your truck is awesome! [cl

The frame I’m planning for my project is along the same line as yours. Nice to see one done, makes me feel a little more confident in what I’m trying.

Thank you!

Your frame looks really nice. Are you going to box it?
 
Great set up, are you going to keep the lights on top of the cab? I think they could be pretty cool. If we were in a race with our builds I'd say you're defently beating me...haha, Looks great!

Paul
 
I just read through this whole thread.....

Man, awesome build!! You can not possibly quit updating this thread...or I will come to your house and take pics myself!!

Very cool, and nice work man!!
 
I was thinking about doing an oval tank. But then I figured out that the radius on the bottom of the tank made it harder to mount, would hold less fuel and would not show anyway, so I squared it off.

On your truck I think the oval tank would look just right on top of the frame rails - Maybe you should put some 3" holes through it like the frame.

That oval tank in the photo would be pretty easy to make if you hammer formed the ends and a couple baffles. Only one long seam and the ends to weld.
 
I especially like the carrying handles on the oval tank! it would look killer.
 
Great set up, are you going to keep the lights on top of the cab? I think they could be pretty cool. If we were in a race with our builds I'd say you're defently beating me...haha, Looks great!

Paul

Thanks, bud! :)

I'd like to keep the lights on top of the cabs, but I don't know if I can find the lenses for them. I will be keeping the side lights on the cab and using them as turn signals. I don't know what they were originally, though.


Here is one of those type tanks , they sure look good when done right .

That whole truck is infected with the sickness! [dr [dr

Thanks for posting it! :)

I just read through this whole thread.....

Man, awesome build!! You can not possibly quit updating this thread...or I will come to your house and take pics myself!!

Very cool, and nice work man!!

Thank you for the kind words! :)

I was thinking about doing an oval tank. But then I figured out that the radius on the bottom of the tank made it harder to mount, would hold less fuel and would not show anyway, so I squared it off.

On your truck I think the oval tank would look just right on top of the frame rails - Maybe you should put some 3" holes through it like the frame.

That oval tank in the photo would be pretty easy to make if you hammer formed the ends and a couple baffles. Only one long seam and the ends to weld.

What thickness sheet metal do you think I should use?

I especially like the carrying handles on the oval tank! it would look killer.

I know, the handles look awesome.

Thanks, and yes, I just didn't have it shown yet in the drawing.

Ah, I see. It would look killer! [;)

-------------

I spend most of last night trying to buy an air compressor. My old American Craftsman compressor that I bought used in high school finally bit the dust. It's an oil-less direct drive and a replacement motor is over $400 for it. It'd be smarter to just buy a new one.
 
If you made 2 baffles using the same hammerform as the end caps, but with holes to let the fuel pass and if your tank was about 36" long, that would mean the outside of the tank would be supported every 12".

!8 ga would be plenty strong enough for that (I used 18 ga). Many commercial tanks are 16 or 14 ga depending on size. If you use 16 ga and have to form the shell by hand I'd suggest you get some AK sheet or a big helper.

Another thought would be to use 3003 alum, .08 for the shell and .060 for the end caps and baffles. Light and no rust.

Also, at IMS they have some sheet with a flash of galvanize (it is gray in color). One trade name is Paint Lock - not sure what they call theirs. I usually scout the drops section in the warehouse (usually the gray is scratched - that's ok). Anyway, it forms much better than the cold rolled sheet they have (not as easy as AK, though). Be sure to sand off the galvanizing in the weld joint before you weld, though.
 
I don't have a sheet metal roller, so forming the tank would have to be done all by hand. I've also never done this kind of sheet metal work, so it'll be good fun! :)

I haven't taught much about making my own gas tank yet, but I like the idea of using aluminum. Like you said, it doesn't rust and it feels a little more exotic than steel. I saw a video clip a while back about annealing sheet aluminum at a low temperature with a torch to make it easier to form. Is this process useful in my application?

Also, what is an AK sheet? Aluminized?
 
AK stands for Aluminum Killed I believe. It forms almost as easily as aluminum.

IMS carries 3003, 5052 and 6061 Sheet. Of the 3 3003 is the easiest to form, 6061 impossible - it will crack. 5052 works well where you are doing a little forming and want some ridgity. Use it for interior panels for instance.

For the tank, you can probably hammer form the ends without annealing the 3003. But if you have to anneal you use the acetylene only and lay black soot down on the piece. With a neutral flame held 6-10 inches away from the panel and moving constantly, burn the soot off. The panel will be annealed when the soot is gone. Of course, heat it too much and the panel is gone, too.

Interestingly aluminum drops are or were $1.50 / pound. The cost per square foot ends up being about the same as cold rolled steel.

If you need help with the hammer forms or forming the shell, let me know. Welding, you're on your own - looks like you have the welding well under control, anyway.
 
This tank on Dons t bucket looks mighty good . Maybe Don will tel us where he got it . And post the pic with the girls in it .
 

Attachments

  • Dons low T bucket.jpg
    Dons low T bucket.jpg
    64.2 KB · Views: 87
just make a marine plywood buck slightly undersize from the end tank sape. clamp the 2 halves of the buck together sandwhiching the metal inbetween. Leaving 3/4" outside the buck all around. Then you can hammer/heat/hammer the flange all the way around. then you cna just repeat for the other end and baffles. measure around the circumference for the length of metal for the outside of the tank. being oval you can preety much find a pipe the radius of the small curve of the tank to bend the sheet around. The top and bottom curves you can just fold over the end caps/baffles as you go. just tack in the center bottom and slowly work outand around till you get to the top seam. Of and do the baffles first! Or work from one end cap to the other. no way to get to it with both ends on! see, easy as that you have a tank! Now it is your turn! [P[;)
 
just make a marine plywood buck slightly undersize from the end tank sape. clamp the 2 halves of the buck together sandwhiching the metal inbetween. Leaving 3/4" outside the buck all around. Then you can hammer/heat/hammer the flange all the way around. then you cna just repeat for the other end and baffles. measure around the circumference for the length of metal for the outside of the tank. being oval you can preety much find a pipe the radius of the small curve of the tank to bend the sheet around. The top and bottom curves you can just fold over the end caps/baffles as you go. just tack in the center bottom and slowly work outand around till you get to the top seam. Of and do the baffles first! Or work from one end cap to the other. no way to get to it with both ends on! see, easy as that you have a tank! Now it is your turn! [P[;)

The only thing I'd add or possibly do differently is to use a router and a 1/4, 3/8, or 1/2" rounding bit to radius the edges of the buck. Also, we use MDF for the buck if we won't be making a lot of parts. Oak or maple works better.
 
If I remember right, the cowl lights were basically your parking lights. I also thought of using those for my turn signals if I choose to run blinkers, I haven't really descided yet.
As for finding lenses for your cab lights, I looked on vintagepowerwagons.com, they have a lot of parts that will work on civilian trucks too, but I could not find them there. You could try to call them and see if they have some - they do have a lot of NOS parts. Also, I am part of a '39-47 dodge group on yahoo, It is a great place to find out specific things about that era of dodges, I could ask on there to see if anyone knows where you could get some.

Just let me know if you want me to ask them, Like I said before; I think it would be cool if you kept them, but your truck is cool anyways so I don't know how much trouble you want to go through for them - Just let me know, I'll try to help you if I can.

Thanks,
Paul
 
The only thing I'd add or possibly do differently is to use a router and a 1/4, 3/8, or 1/2" rounding bit to radius the edges of the buck. Also, we use MDF for the buck if we won't be making a lot of parts. Oak or maple works better.

yup. thats 100% right. Marine ply last longer than reg ply due to more layers. Maple is best but it is pricey. Never thought of MDF. always thought it would disintigrate after a while. Good for one or 2 pieces like you said. You could also router in a design in the center of one piece. You could hammer the design into the face of the panels afterwards for strength for extra stiffness and athsetics.
 
AK stands for Aluminum Killed I believe. It forms almost as easily as aluminum.

IMS carries 3003, 5052 and 6061 Sheet. Of the 3 3003 is the easiest to form, 6061 impossible - it will crack. 5052 works well where you are doing a little forming and want some ridgity. Use it for interior panels for instance.

For the tank, you can probably hammer form the ends without annealing the 3003. But if you have to anneal you use the acetylene only and lay black soot down on the piece. With a neutral flame held 6-10 inches away from the panel and moving constantly, burn the soot off. The panel will be annealed when the soot is gone. Of course, heat it too much and the panel is gone, too.

Interestingly aluminum drops are or were $1.50 / pound. The cost per square foot ends up being about the same as cold rolled steel.

If you need help with the hammer forms or forming the shell, let me know. Welding, you're on your own - looks like you have the welding well under control, anyway.

I know about the formability "issues" of 6061-T6, kind of learned it the hard way, LOL.

Thank you so much for offering to help me with sheet metal work. Sheet metal forming is something I have no experience in and I believe it's safe to say you're a master at it. I will definately bug you when I get started on the tank. Thank you so much! :)


This tank on Dons t bucket looks mighty good . Maybe Don will tel us where he got it . And post the pic with the girls in it .

It looks like a Speedway tank. They're nice, but I think an oval tank would look better on mine.

just make a marine plywood buck slightly undersize from the end tank sape. clamp the 2 halves of the buck together sandwhiching the metal inbetween. Leaving 3/4" outside the buck all around. Then you can hammer/heat/hammer the flange all the way around. then you cna just repeat for the other end and baffles. measure around the circumference for the length of metal for the outside of the tank. being oval you can preety much find a pipe the radius of the small curve of the tank to bend the sheet around. The top and bottom curves you can just fold over the end caps/baffles as you go. just tack in the center bottom and slowly work outand around till you get to the top seam. Of and do the baffles first! Or work from one end cap to the other. no way to get to it with both ends on! see, easy as that you have a tank! Now it is your turn! [P[;)

Nice! Have you checked to see if the tank you built leaks or not? ;) ;)

Thanks for the walk through bud. I appreciate it. :)

If I remember right, the cowl lights were basically your parking lights. I also thought of using those for my turn signals if I choose to run blinkers, I haven't really descided yet.
As for finding lenses for your cab lights, I looked on vintagepowerwagons.com, they have a lot of parts that will work on civilian trucks too, but I could not find them there. You could try to call them and see if they have some - they do have a lot of NOS parts. Also, I am part of a '39-47 dodge group on yahoo, It is a great place to find out specific things about that era of dodges, I could ask on there to see if anyone knows where you could get some.

Just let me know if you want me to ask them, Like I said before; I think it would be cool if you kept them, but your truck is cool anyways so I don't know how much trouble you want to go through for them - Just let me know, I'll try to help you if I can.

Thanks,
Paul

Thanks for the link, Paul. I briefly looked at that site and it looks like they have a lot of good stuff. It looks like they might have the weather stripping that seals the windshield frame to the cab. My cab has a swing-out windshield (I think yours does too) and the seals is all rotted.

Would it be too much trouble to ask about the lenses? At the very least, I need to locate the lenses for the side/cowl lights. I hope it's not much trouble for you. I really appreciate your help.

Thanks again Paul! :)

---------------

I didn't do any work on the truck tonight. Like I said last night, I was in need of a compressor and I finally bought one tonight. I got the 60 gallon Husky unit at the Home Depot and I don't think I'll ever out grow it. It supposedly flows 11.5/10.2 SCFM at 40/90 PSI, which is a lot more than I will ever need.

I also ordered a Colossol Tech plasma cutter a few days ago that arrived today. Gregster (member here) seemed to like his a lot and I have read mostly good reviews on it. The price was pretty good too ($329 shipped) so I bought one. It's a 50 amp unit and supposed to clean cut up to 3/4" and severe 1" thick steel. It's again more than I'll ever need. Hopefully it won't crap out, LOL. Sorry to show off like a little kid! :D

CopyofIMG_0193.jpg


Thanks for looking! :)
 
Today was one of those days. Whenever I start working with a positive attitude, things tend to go wrong. Nothing big went wrong, just little things. Frame slipped off the dollies like 4 times and fell, bolts wouldn't come off, casters wouldn't go over the concrete seams, the usual fraustrating crap, you know.... Good times!! :) :D :rolleyes:

I managed to bring the engine in, throw it on the frame to take a quick look and take some measurement for the mounts. I also marked how much of the firewall I need to cut.

IMG_0194.jpg


IMG_0199.jpg


The transmission isn't attached to the engine in the above picture. I took it off, but I couldn't get the torque converter bolts off, so it stayed attached to the flex plate. I sprayed some penetrating oil on them. Hopefully they'll come off in the morning.

I also got started on the motor mounts. I had some stuff water jetted that I'll have to weld together. Hopefully I can do that tomorrow.

IMG_0195.jpg


Busy day tomorrow, I hope I can wake up early! Haha :)

Thanks for looking! :)
 
LOOKIN' GOOD !! The Caddy looks right at home there. When I mounted the Caddy in my frame, I used some leftover poly bushings for Chev pickup leaf springs for mounts, made ears to bolt to the Cad, and used a crossmember running right under the motor.
Keep the good stuff comin'.
 

Attachments

  • dec 3 04 007a.jpg
    dec 3 04 007a.jpg
    80 KB · Views: 71

Latest posts

Back
Top