48 Willys....Project 4Low

Rat Rods Rule

Help Support Rat Rods Rule:

This site may earn a commission from merchant affiliate links, including eBay, Amazon, and others.

FiveNdime

Member
Joined
Jan 14, 2012
Messages
20
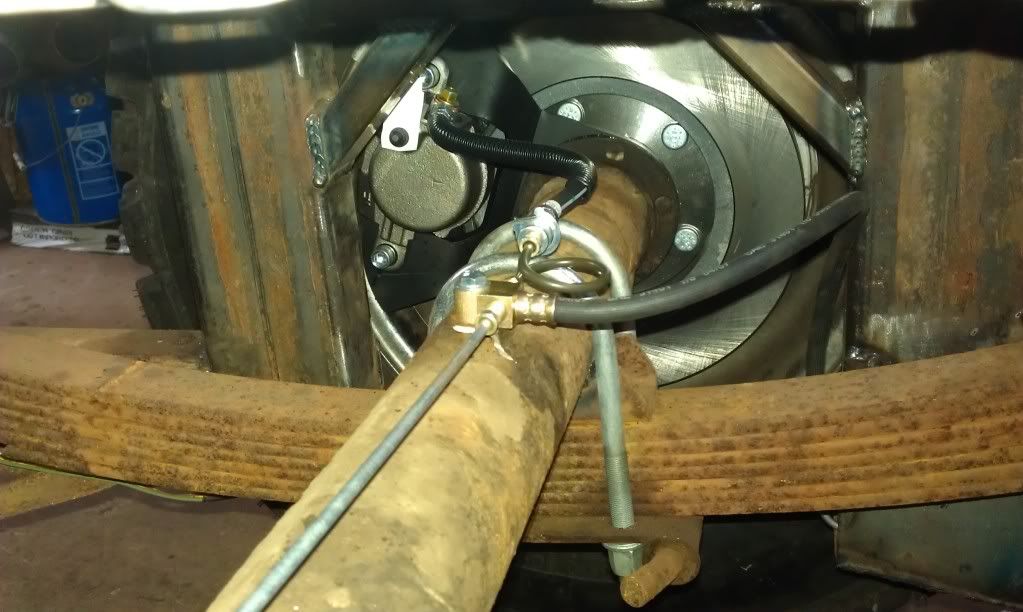
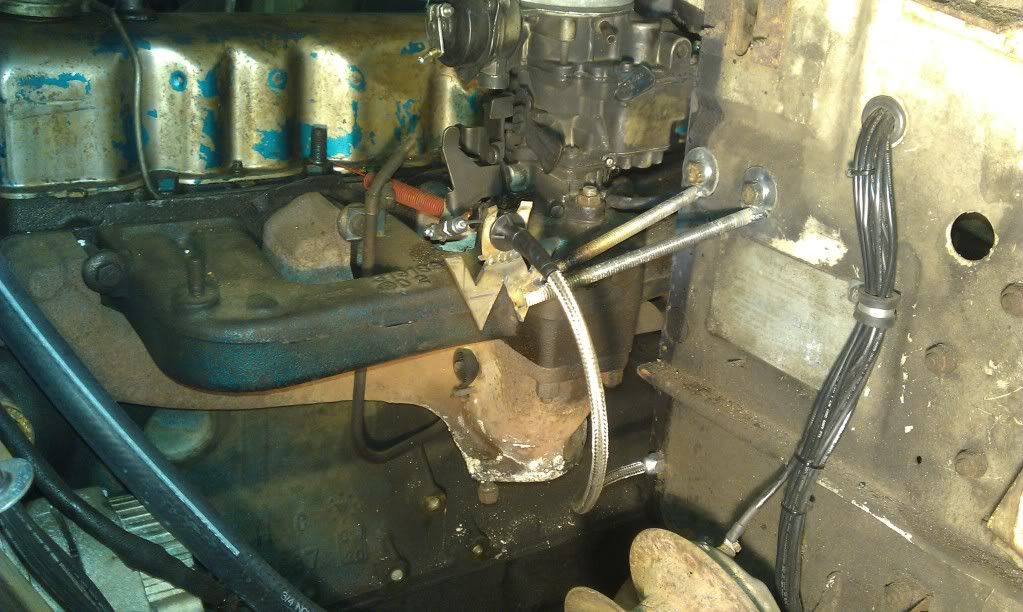
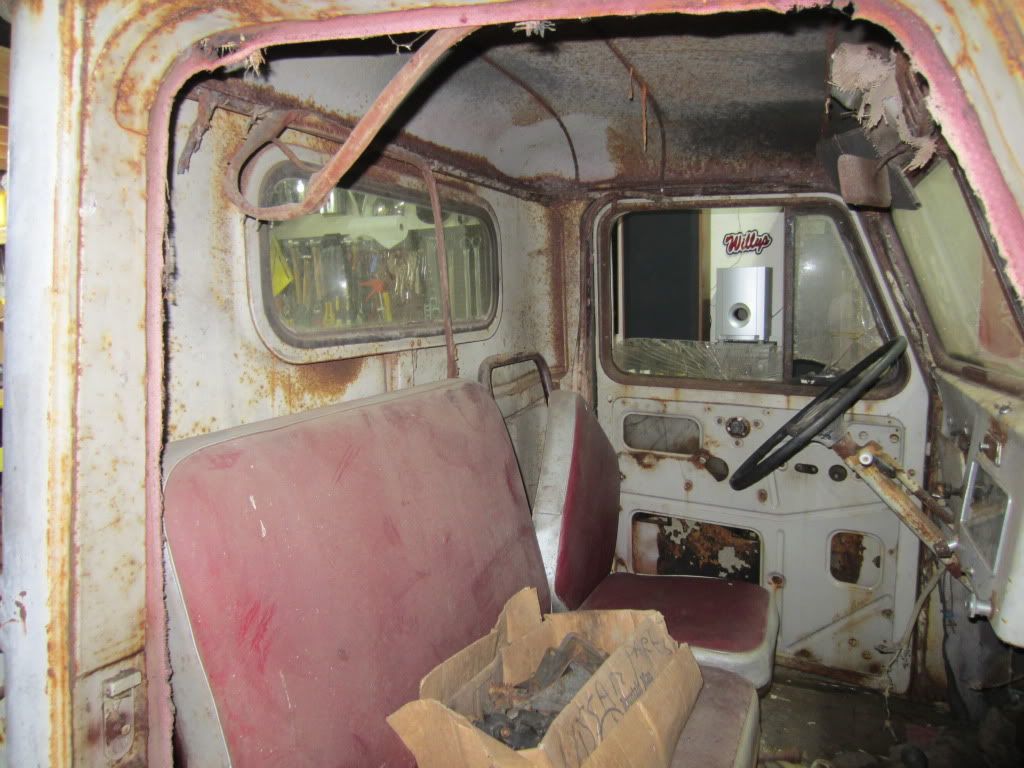
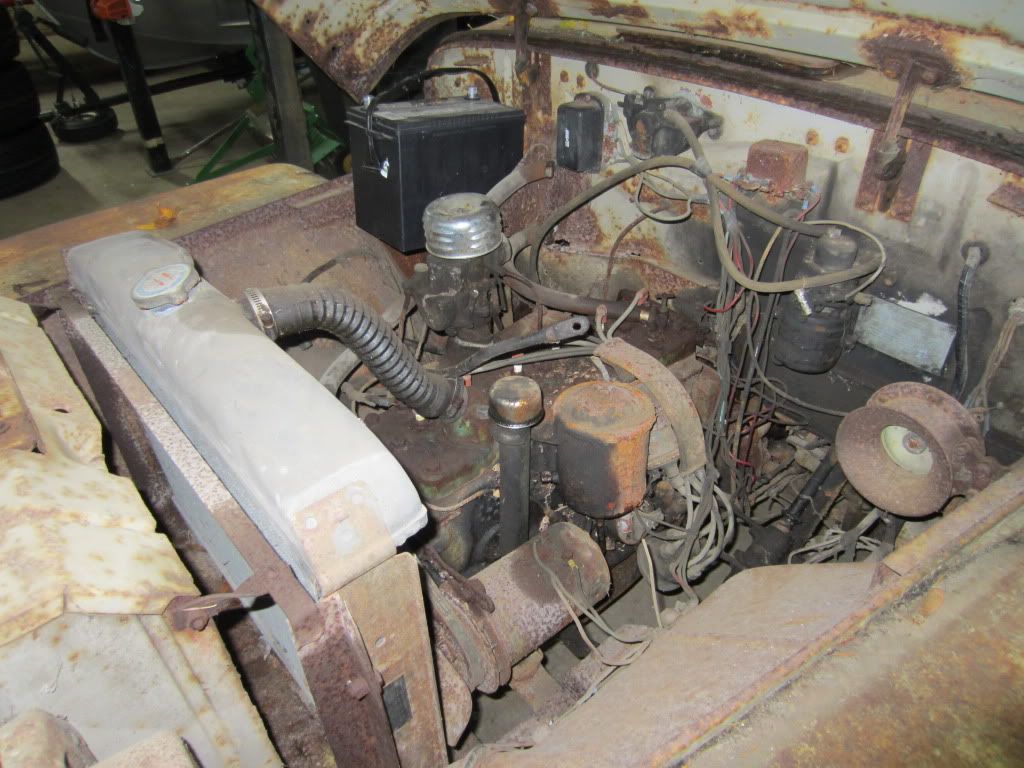
Well, here it is, my build thread. I did some trade work for my dad who had this thing sitting in the shop for years. He had plans for it but the plans changed and I talked him out of it so I could start my favorite rat rod platform. It was basically stock when I got it minus the flat six motor that was in it. I've been working on this thing for a few months now when I have time. Its coming along and I should have it done soon. My build cost budget was set for 2000 bucks, but has gone up to quite a bit due to keeping it 4wheel drive still and to some safety issues that needed fixing like upgrading the brakes from drum to disk which will help me stop it much better. Well enough talking, on to the pictures.

The day I brought it to its new home.
IMG_0608.jpg

IMG_0601.jpg

IMG_0612.jpg

IMG_0614.jpg

IMG_0605.jpg


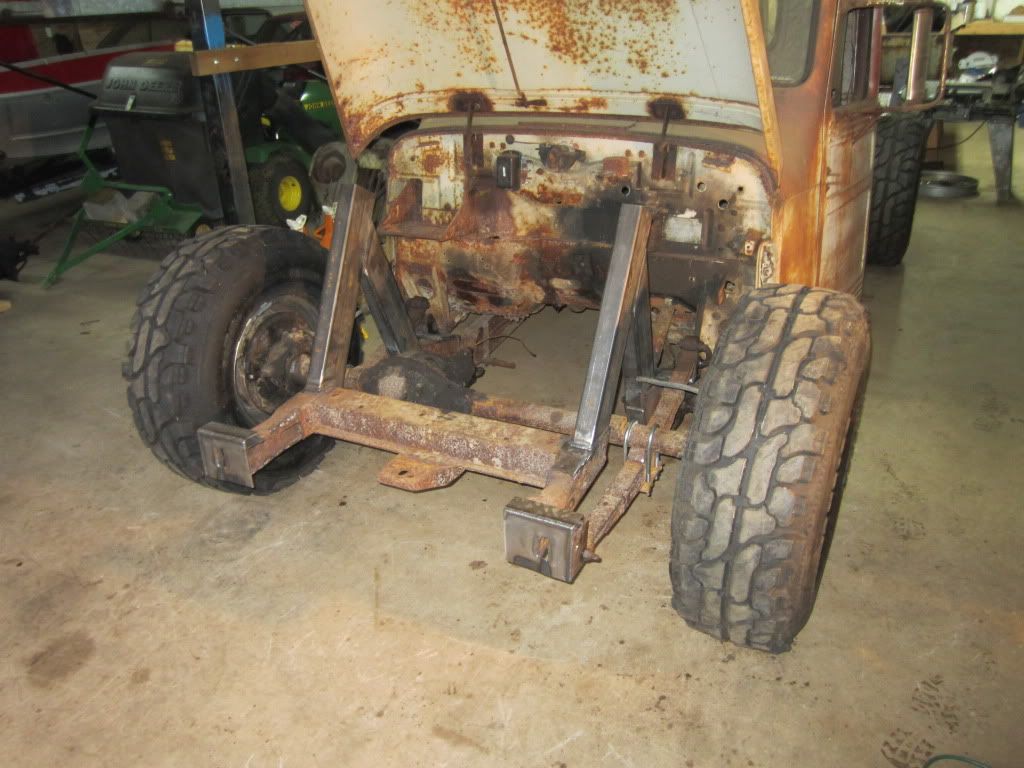
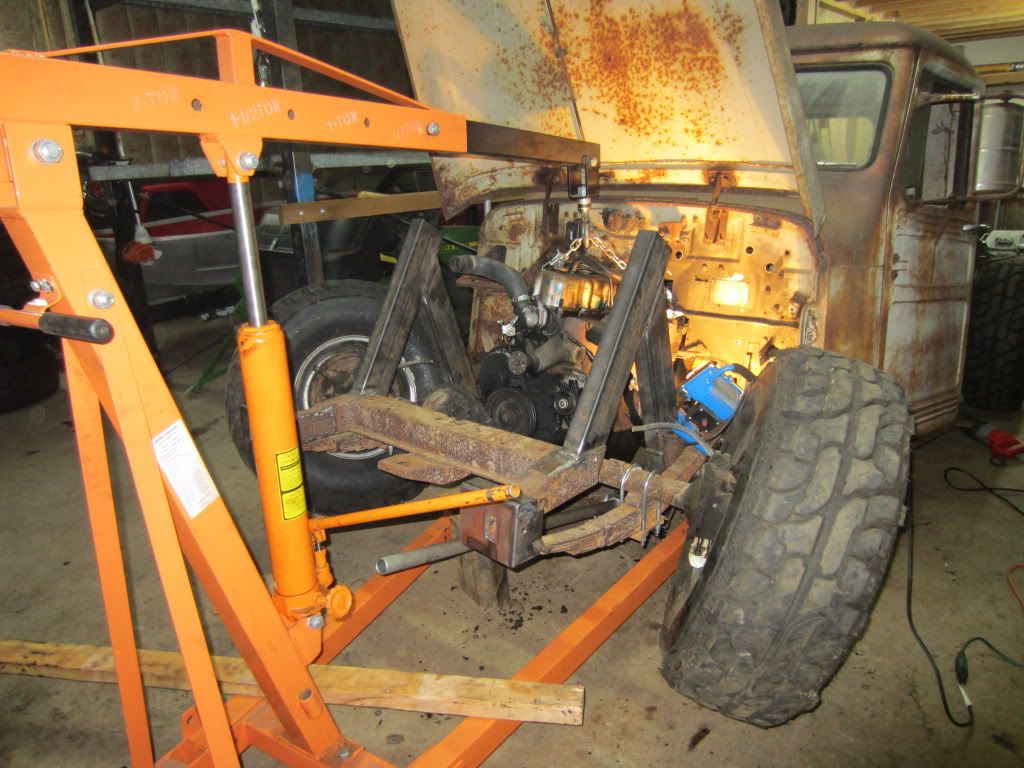
mock up of the ride height.
IMG_0637.jpg


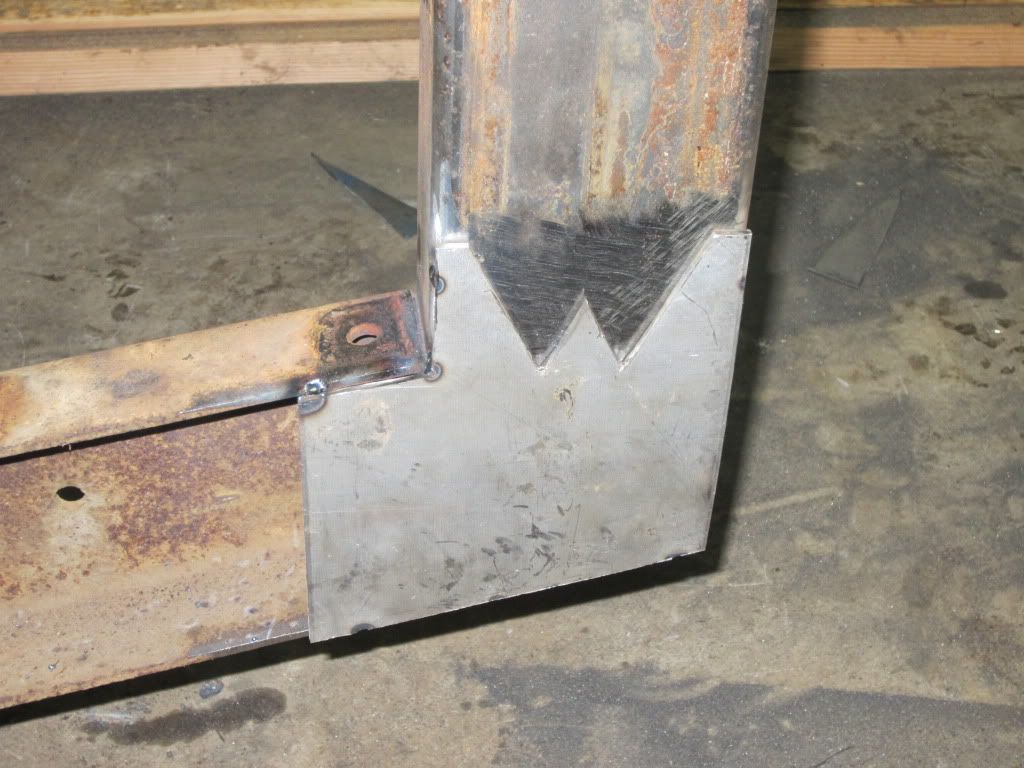
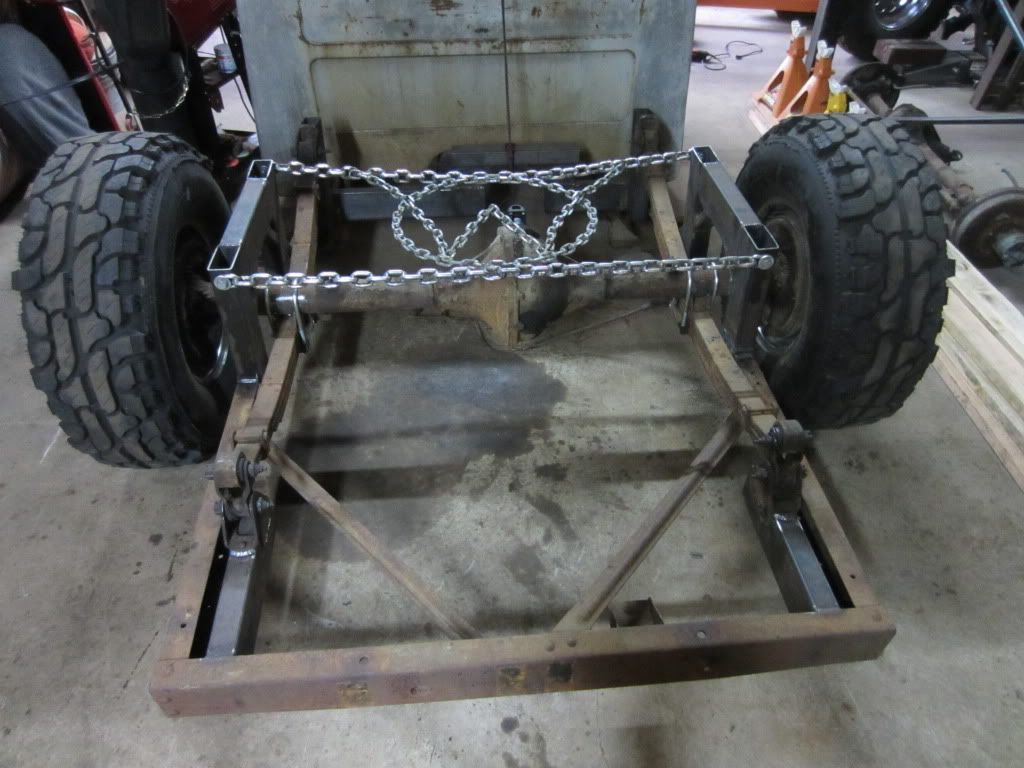
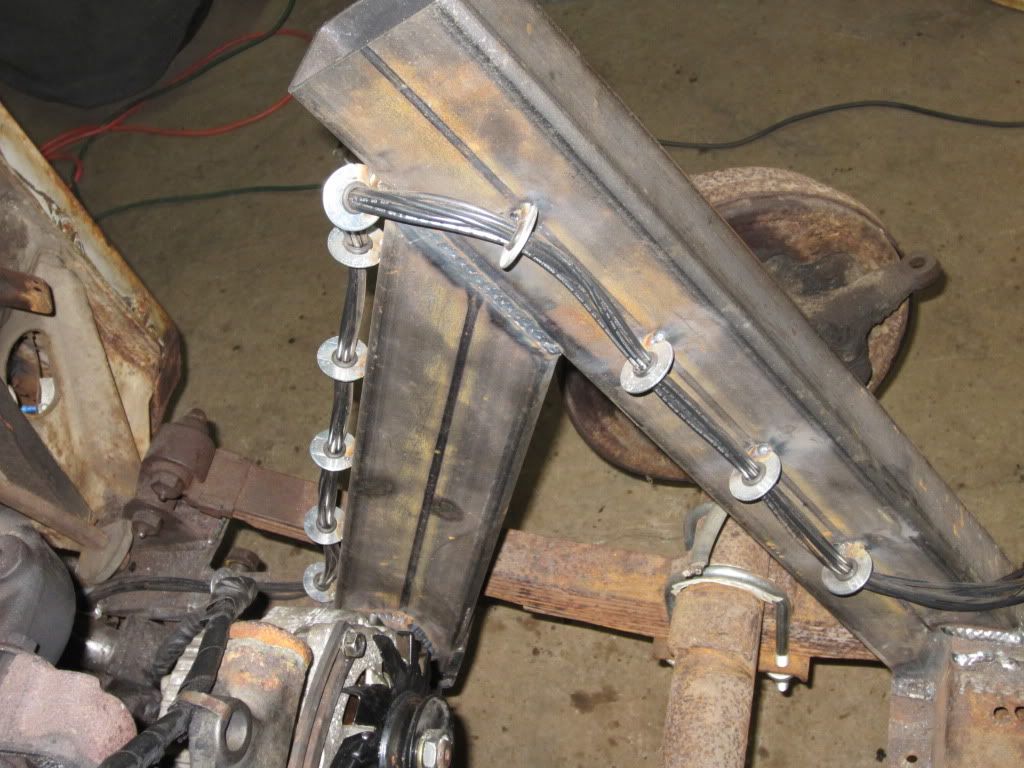
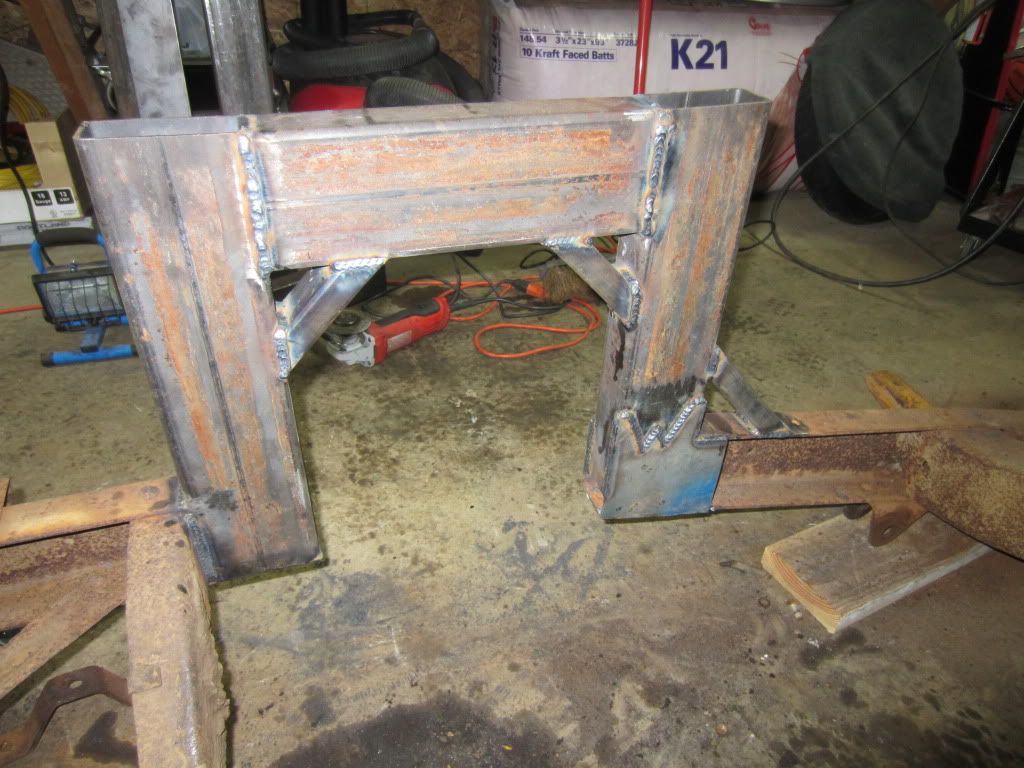
The start of the rear susension. I took the original leafs and brackets off the bottom of the frame. I then seperated the leafs and took a few packs out and reassembled them. I then made a place for the new/old brackets to weld up to on top. I also flipped the shackle to the opposite swing direction.
IMG_0635.jpg

IMG_0639.jpg

IMG_0643.jpg
 
Now for the front suspension work. I did basically the same theory as the rear. I took the stock front bracket and moved it to the rear which moved my shackle to the rear giving it a better ride quality. I then made a pocket for the front part of the spring to sit in. I also moved the springs outboard of the frame rails.
IMG_0713.jpg

IMG_0714.jpg

IMG_0731.jpg

IMG_0718.jpg

IMG_0721.jpg

IMG_0733.jpg


I sourced out a 72 Jeep 258 inline six mated with a 3spd and a dana 20 transfercase. I am ditching the dana 20 in favor for a twin stick dana 18 with either a stick or electric overdrive. This is so I can get the rear output to be on the lower side of the case instead of out the middle which is up high. and more inside the cab which means more tunnel work then needed.
IMG_0749.jpg

IMG_0753.jpg

IMG_0740.jpg
 
I then tackled the floor and tunnel. The floorboards were swiss cheese so I couldnt leave them like that, since its just not safe. I ended up cutting the old tunnel and moving it up and back so I could hopefully put the sticks for the transmission and transfercase in the stock areas.

IMG_0754.jpg

IMG_0757.jpg

IMG_0761.jpg

IMG_0758.jpg


Here are some random photos. I built a crossmember out of chain for the rear notches. its surprisingly rigid but took me hours to weld up lol
IMG_0710-1.jpg


Here is how it sits without a motor or bed.
IMG_0739.jpg
 
Well after a few hours of cut and bend and weld and bend and cut and well you get the idea, I had a set of pedals that I think will work. I now need a skinny gas pedal. Good thing I dont have fat feet or I may not be able to drive this thing. I also snaped a few more photos of the tunnel work which is now finished.

I never did put a pic up of why the tunnel is what it is. Here is where the motor sat.
IMG_0747.jpg


Here is the passenger and drivers side looking at it from the engine bay.
IMG_0781.jpg

IMG_0780.jpg

IMG_0793.jpg


Interior shots of the finished tunnel on drivers and passenger side.
IMG_0784.jpg

IMG_0782.jpg


This is how I ran my wire loom for the front lights and signals. I took a bunch of washers that had the correct inner diameter for some rubber grommets I wanted to use and then welded the washers in place. I then pulled all the wire throught. I have never seen it done like this so here is what my idea looks like.
IMG_0787.jpg


Thats it for now. Back to work!
 
There is a local 4wheel drive shop that specializes in the older 4 wheel drive rigs and they make a near bolt on kit for around 500 bucks. It comes with all I need including new bearings, seals, backing plates, calipers, brake hose, longer wheel studs and so on. I was finding it hard to put drum back on the front. I could have been cheap and went with just new shoes and wheel cylinders but naa....might as well go disk to be a little safer. Here is what I found after pulling the brakes, this thing was a mess. The dirtyest brake job I have ever done thus far.


Sorry for the fuzzy pictures. I only have my phone to take shots right now.
Here is the front Dana 25 stock drum brake setup. Grease everywhere!
IMAG0231.jpg


Here is what is left that stays. I have to clean up the knuckle and hubs to re-install.
IMAG0238.jpg


Here is the back. Same old grease story. What a mess
IMAG0237.jpg


This is whats left of the rear. The kit I am buying basically gives me everything I need new so I dont have to mess with cleaning the old parts.
IMAG0236.jpg
 
Got most of the brake lines installed and bent up, just need a few more random things to finish it off so I can put fluid in. Put the front clip back on and did the finish wiring to the headlights and turn signals. So far everything is working great. I even got the original hood latch to work like it should so I can latch it without those side hooks Jeep uses. Found out that my factory radiator is not going to work out. My outlet hole is in a terrible spot so now I need to find a suitable replacement. Well, onto the pictures!

Here is a couple shots of the front. You can tell how much room I had for the tie rod (none). A bunch of random custome junk went into the steering components but its hard to tell since I used most of the factory parts, just cut them up and re-welded them to work.
IMAG0338.jpg

IMAG0339.jpg


Rear shot
IMAG0341.jpg


Interior dome light I mentioned before. Came from a military trash can. Works perfect minus a few crack in the cover.
IMAG0342.jpg


Shot of the pedals. Gas pedal from a Jeep Cherokee is just sitting there for now. I need to figure out where to put it exactly.
IMAG0343.jpg


A shot of how it sits right now. Its so close to being on the road!
IMAG0345.jpg
 
Been busy with my new Chocolate Lab puppy. I cant belive how much attention those little squirts need so I have put the rat on the side burner till I get my dog fence in and puppy prepping done. I am almost finished with that stuff. My brother is making a radiator for me from a scrap radiator at his shop from a mitsubishi Evo 8. I have still yet to get my transfercase and overdrive unit which is basically what I need to continue. I will keep you guys posted.
 
boxed

on the top of the square tubing you used are you gonna cap the tops?

it would look better and add a little bit more strength.

l like it :D

l want to see it,[P are you doing any shows when it's finished in the south sound area?
 
on the top of the square tubing you used are you gonna cap the tops?

it would look better and add a little bit more strength.

l like it :D

l want to see it,[P are you doing any shows when it's finished in the south sound area?

Thanks guys for the compliments, Im trying to do my best with the resources I have.
Im not going to cap them as of yet but I do plan on putting some fish plates on both sides of where they join and maybe a cross bar or gusset under the weld where the two meet. Im trying to build it as safe as possible with the limited funds. I have a lead on some polyurethane pieces I could plug the hole with but im not sure yet, kinda like it to run wild. I will be going to shows as soon as its done. I cant wait to show it for people to see. South Sound is up north from me and a bit of a drive is this but I may tow it up and drive it around but I hope its comfortable enought to drive it for hours! Is there any rat rod shows up north in Washington state?
 
Thanks guys. Ive been fighting with a transfercase issue. The stock Dana 20 T-case is a center output up high with a single stick engagement, and I want a lower output with a tripple stick. I want to be different and one off so I am making things hard for myself yet again with this project. I want to build a twin stick with an old manual overdrive unit. So the way I have found out how to do this is to take the Dana 20 case and pull all the guts out of it. Then I take the guts from the Dana 18 and swap them in. Easier said then done though. Some parts interchange and some dont, then I must find a gear with the 10 spline output for the T14 manual transmission. Bottom line, I am going to end up with a dana 18 in a dana 20 case with a stick for the overdrive, a stick for the hi and low range, and a stick for engage or neutral. That is 4 sticks in my cab to shift [S Im going to love explaining that one to the guys who have no idea about 4x4's. I have been busy with my new puppy so work on this thing has been slim. I built the trottle linkage, pedal, and bracket setup and it turned out good. I need to get some photos up some day on my progress. Oh, changed the oil and filter, and put on my heater core hoses. My brother should be finished building my radiator tomorrow so that can go in soon! A gas tank is all I will then need to start it up!
 
Here is a quick shot of my trottle linkage. kinda hard to see, but I used some all thread, fender washers, a brake line clip, and a "W" for willys that I cut out of some sheet steel to make it.

IMAG0391.jpg
 
What about an off-set Dana 44 rear end to match the off-set T-case? Might be a better rear end with more stuff available too.

I actually purchased a set of axles for this but that would have required a different bolt pattern wheel or adapters which would have cost me more money. It would have also meant different gear ratio's from the front end unless I swapped the front end as well which I ran into the huge problem of the axles housing being way to large to clear the motor or front crossmember. Just one of those things I never mentioned I guess. It was going to be a real pain to swap in new axles. The truck originally came with an offset t-case, but the newer style jeeps came with a center out up high on the dana 20. I ended up dropping all the parts off at my local 4x4 shop and there going to put it together for around 250 bucks which is way worth the hassle of doing it myself. This low budget truck is slowly turning into a high budget truck. Just got a deal on a set of shocks too. Im sticking a set of these on just to be one off :D Fully extended will be 3 feel long and fully collapsed will be 21" long. Time for some quality time with my welder and bender building shock towers!

RanchoShock.jpg
 

Latest posts

Back
Top