'46 Chevy Skoolie Project

Rat Rods Rule

Help Support Rat Rods Rule:

This site may earn a commission from merchant affiliate links, including eBay, Amazon, and others.

Tango88

Member
Joined
Dec 28, 2012
Messages
18
Location
Houston, TX
5631568461_3161a6ca4c.jpg

5631569137_85030d29ec.jpg

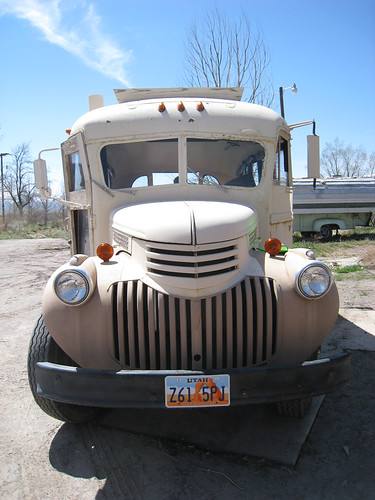
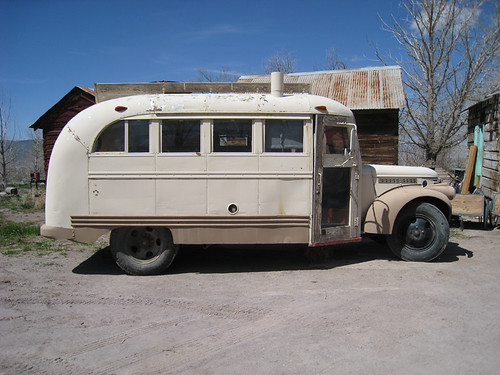
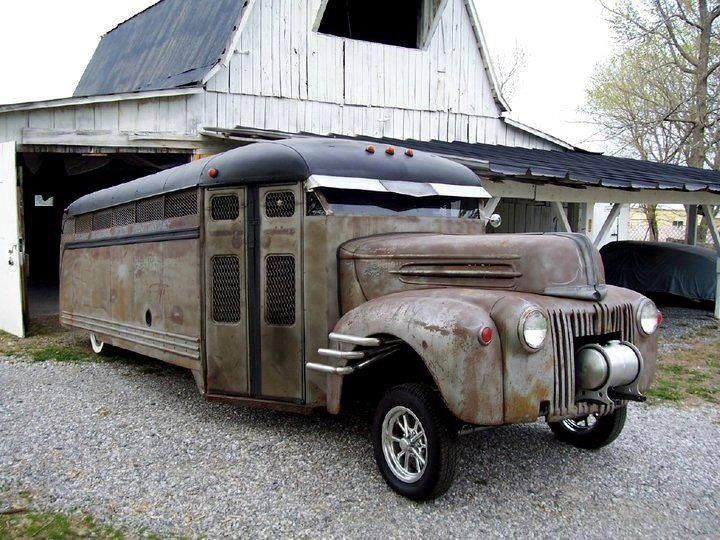
As I bought it in Utah. Real short.

Howdy All --- I don't know if my little project is what most folks would call "Rat" or not but here goes. It's a 1946 Chevy school bus that I'm converting into a mini-RV & traveling rig. Plan to keep the outside pretty much as was but replacing the most of the driveline. Have a rebuilt Cummins 4BT (turbo/diesel) that I'm hooking up to a brand new from the factory Allison 6-speed auto. Stuffing it all in the narrow, Art Deco front end should be ... interesting.

I'm a year and a half into it with still a long ways to go but at least my engine & tranny are about ready to start shoehorning in. I do have an album over on Flickr that shows most of it to date. You can see it here...

Tango's Progress Pix

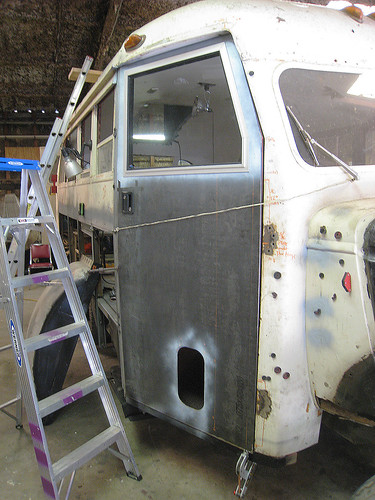
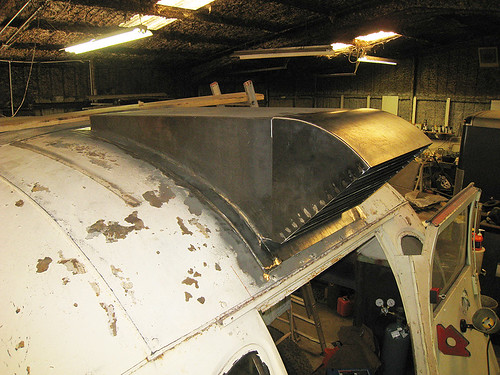
The plan involves keeping the body and chassis pretty much stock. I am building an all steel front door, deleting a couple of windows on each side, constructing a housing in the roof for a window unit A/C and adding a roof deck. The interior will have minimal living quarters. A little jack knife sofa bed, tiny kitchenette and a combination shower/toilet. The rear will be open to carry some of my cement sculpting gear that I tote around the country to teach classes. I have also installed a 44-gallon fuel tank and an equal sized black/gray water tank. One will extend my over the road range to about 1300 miles on a single tank and the other my boondocking stay to about a month.

The bus had a perfectly good 350 Chevy motor and the original, non-synchro 4-speed tranny when I got it, but the combination was only good for about 6 mpg and maybe 45-50 mph. I bought a used Cummins 4BTAA turbo diesel and have rebuilt it throughout and just laid down some big bucks for a factory fresh Allison 2200MH 6-speed auto that together should get me up to highway speeds and yield about 30 mpg. Big difference. I gave the Chevy motor to a bud who runs the ArtCar Museum here in Houston and he is already running it in a sweet little '49 Furd Rat Rod that you guys would love...I'll try to get some pix of it too. I traded the 350 out for assistance installing the diesel package into the bus (and need all the help I can get). Good news is that my friend is calling in his helper who was a diesel mechanic and radical car builder for twenty years, so hopefully it will go about as smoothly as any of these things can ever go.

The biggest challenge at the moment is the rear end. I want to keep the original 20" wheels & tires but getting the gearing right has turned into a nightmare. I had been "told" that the bus had the factory stock 5.43 ring & pinion but it turns out that it was equipped with the "optional" 6.17 granny set. And wouldn't ya know it...the computer model shows that the 5.43 would have been perfect for keeping the Cummins dead on the 1800 rpm sweet spot with the double-overdrive Allison! Problem is, it appears that just about everyone back in those days ordered the granny gears and the "standard" 5.43 sets are scarce as hens teeth. Ya gotta' remember that this bus was built before there was a national highway system and most people were more concerned with hauling a load at 45 than cruising at 65 on rough dirt & gravel roads.

I have been on the hunt for over a year now and no luck so far.

The other option would be to splice a newer center section with more gearing options onto my axles, but I don't have the skill set some of you guys have or the budget to job a project like that out. Not sure where to go from here on this one. I am certainly open to any ideas you folks might have. In the meantime, I have put a ring & pinion request over on the parts wanted section of the forum. Who knows, maybe someone here has one left over from upgrading their project.

5681972723_66a7e98a28.jpg

This is the basic interior layout done in the free, Google SketchUp program.

6018435393_77a2ca7081.jpg

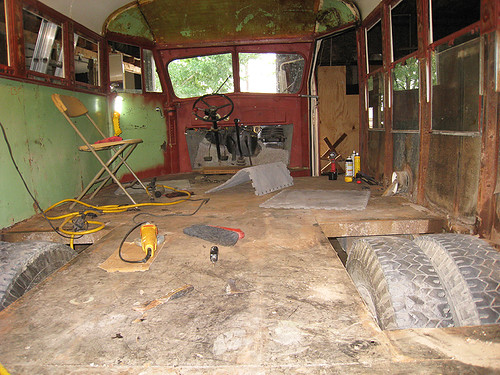
Early stage of gutting the interior. The floor was in surprisingly good shape.

6018987684_802b47fe73.jpg

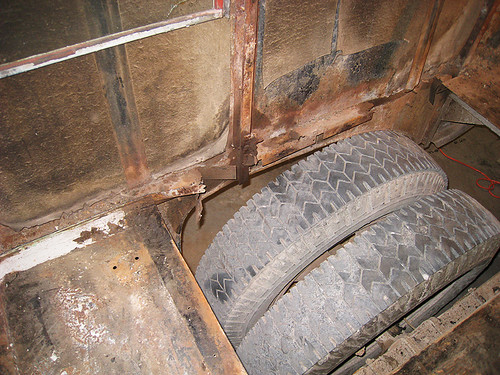
The worst rust was (surprise) around the wheel wells. Had to remake all of the body spacers that fit between the floor & outer skin.

6444075905_0f5b2cc2c6.jpg

Made the new ones out of galvanized. Should outlive me.

6444175609_555ef82f9f.jpg

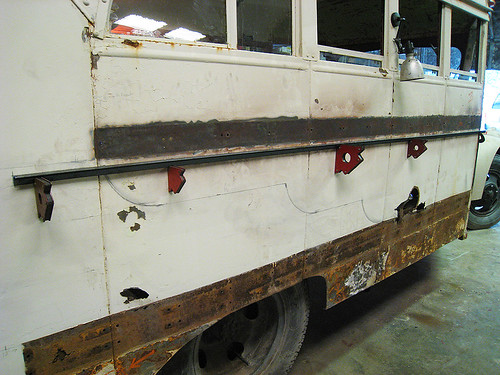
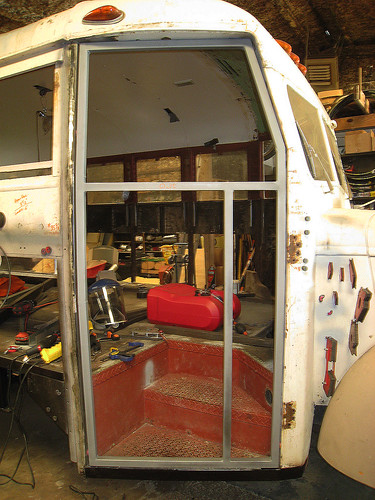
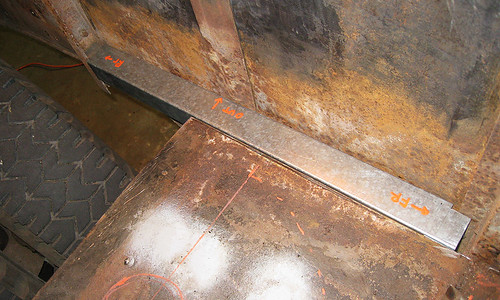
After pulling off the rub rails, I decided to replace all the lower sheet metal. Here's the guide tacked in place for cutting.

6484284329_0f998f4056.jpg

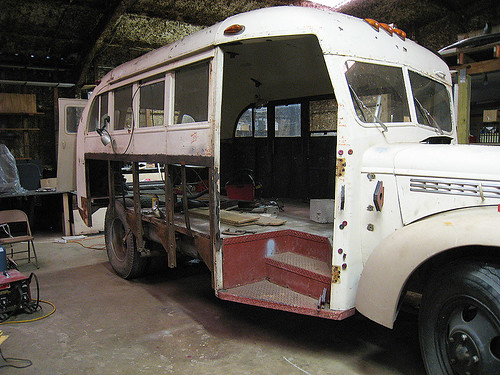
...and here's the metal cut away. Much easier to get to the tanks and such now.

7034076393_05835b8012.jpg

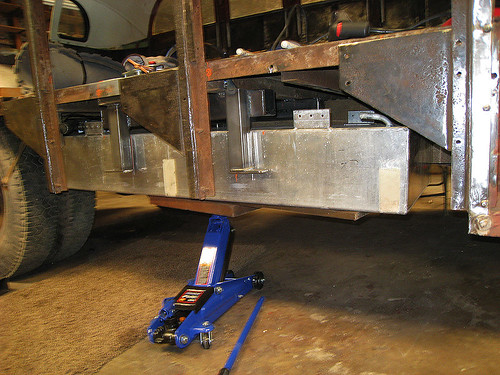
Here's the 44 gal. fuel tank being fitted into the mounts I added. It now has a steel rock guard covering the bottom.

7457993302_c542b1ea65.jpg

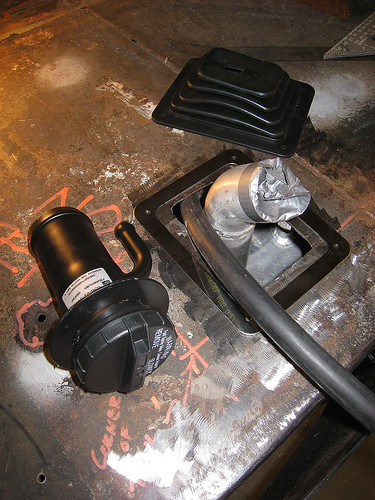
The fill neck now comes up through the floor and will be fitted into a locking hatch on the outer skin...some day.

Will post more as time allows, but once again, many thanks to the folks who built this forum and all the creative geniuses who make it so cool & inspiring.
 
Thats a cool project, Im just a bit jealous of that bus. The wife and I have talked about building one. Keep up the progress and we love pics.
 
Thanks folks. Buses are kinda fun. If anyone is looking for one, they are located at a wonderfully wacky campground called "Mystic Hot Springs" just outside Monroe, Utah.

And in case anyone was wondering...yes, the seal around the fuel neck is indeed a floorshift boot die cut to fit snugly and keep dirt and critters out. There will also be a metal box over the whole thing.

As for the drivetrain...
here's the skinny on the Engine & Tranny......

Engine: Rebuilt Cummins 4BTAA
(4 cylinder, turbocharged, intercooled diesel - 238ci)
Holset hx35w Turbo
130 hp @2300 rpm
327 ft/lbs torque @1700 rpm

The bus originally came with Chevy's "Loadmaster" 235 ci straight six rated at 90hp and 189ft/lbs so the little Cummins should be more than adequate with 44% more hp and 42% more torque.

The transmission is a brand new 4th generation Allison 2200MH 6-speed auto with a parking pawl. It is a double overdrive with a .71 fifth gear and .61 sixth. With any luck, the combination should be good for "around" 30mpg and reasonable highway speeds.

I looked all over for one of the Allisons used but finally gave up. The only "used" units I could find were either in serious wrecks or fires and they still wanted over 5 grand. Turns out getting a new one from the factory was about the same as rebuilding a trashed unit. Plus...this one comes with a 5 year, 200K warranty. Even in my rig.

I will have some pix of them mated here shortly and hope to get started on the transplant soon.

7126292785_d985004d07.jpg

The entry door frame took a couple of tries and is still in progress. There is a very slight curve in the sides of the body that made fitting it a bear. Complicates just about everything else too. Having a master ship builder around would'a been handy.

8137327159_b3d7724926.jpg

Here it is with the 14g. outer skin on and the large window in place. The hole at the bottom is for a "curb viewer". Actually, it's a boat window that goes in there.

I am in the process of skinning the interior of the door with 20g which will get some laminate applied. Once again, more pix to follow.

8156331695_419887a590.jpg

Here's another view of the A/C box in the roof. I will also be adding a full length deck around it with fold up side rails and a place for an umbrella. Hey...a fella's gotta' have a good spot to sit & sip Margaritas at the end of the day. After all, the back porch isn't going to be all that big.

More on that later.
 
I love buses, thanks for sharing your project. If there is an old bus done up at a car show, I am instantly drawn to it. Making one into a camping rig makes it even better.

Keep at it!
 
Howdy All --- I'll pick up on constructing the A/C box. I decided early on that I did NOT want a typical RV rooftop unit. They are way overpriced, less than reliable and notoriously bad about shedding the cheap covers that have virtually zero UV resistance. I also wanted to be able to replace one easily if it died out on the road so I designed an all steel box that will fit most 8000 btu window units. This way, it's just a quick trip to WallyWorld and just plug & play.

Cutting a big ol' hole in the roof was a bit scary, but the way it is configured, even if I have to remove the A/C, I won't be left with a hole that rain & snow can pour into until a replacement is found.

8003269586_364055f56c.jpg

The first cut is the deepest...

8069406255_024f9b895d.jpg

Since the old sheet metal appears to be Leadnesium, I decided that a fair amount of reinforcing was in order prior to placing the box.

8069402886_75f3b41a27.jpg

Had my friendly, neighborhood sheet metal shop bend the box to my specs. It's about 4 feet long x 22" x 18" in 14 g cold-rolled steel.

8078845118_74d6145cd3.jpg

Here it is in place for a test fit. All that was needed was a little "adjusting" to match the interior curve.

8078841870_ebc6b4ef10.jpg

On the inside, only a small portion of the box & A/C protrude.

8156332933_55f059a819.jpg

Making the rain shroud was fun. I wanted it to be removable for maintenance purposes. It will also get an aluminum filter fitted inside to keep mud-daubers and such outdoors where they belong while letting the hot exhaust air out.

Still have more to do on it (like everything else) but it's moving along...slowly. I'm guessing that like most of you, I can work on this project only as life allows. At the moment, I have a large commission project going that will require just about all of my time for the next couple of months so the bus will pretty much be at a standstill for a while. Hey...I gotta' pay for all the bits & pieces somehow.

Will try to post more over the next few weeks.

Hope everyone is enjoying a great start to the New Year. All my best.
 
Among (many) other things, I need to alter the rear wheel cut-outs. There is no way in Hell anyone could change a tire on this thing without a forklift and even then it would be tricky. The wheels are on 20 x 5 rims and right at 37" tall, but for whatever reason, Wayne Coach Works put the tiny little cutaways on this rig you see below...

7086273775_1f8e98e850.jpg

...and...they just looks funny too.

Since I am replacing all the lower sheet metal, I figger why not open them up a bit? Can't be that involved, right? Well, you know how one little thing leads to another and before you know it, "little" projects are somehow the ones that wind up the most complicated. Here is where I want to get to...

7086274017_fdd60874d3.jpg

Definitely looks more appropriate and Art Deco and makes the tire more accessable...but also involves more than just the outer sheet metal. The real trick is going to be tying the inner wall above the wheel to something that will seal the outside...out. The well cover (the nice rust colored area) will also have to be cut away and new interior skin fitted to it. Then there is the issue of closing the gap between the two skins. That will take forming a 'U" shaped piece to fit the length of the new opening. And since my local sheet metal shop can't fab a one piece outside curve deep enough to lap over both skins, they will each have to be cut & welded from three pieces. Fun.

What can I say except that...if it was easy, everybody in America would be driving 67 year-old, Diesel Bomber school bus RV's. Ya, right.
 
This bus is great!...I think you could make the wheel opening a little smaller, Have you jacked up the bus to see how far the rear end drops? Even if you make the opening as big as the tire or bigger you still need to jack it up to change the tire.
 
This bus is great!...I think you could make the wheel opening a little smaller, Have you jacked up the bus to see how far the rear end drops? Even if you make the opening as big as the tire or bigger you still need to jack it up to change the tire.

I agree, I'd jack it up and see how much the axle droops before deciding for sure on a cutout. We have a '67 Serro Scotty camper trailer and the wheel openings are very small - you have to droop the entire axle to get the tire off - even then it's difficult (last time we actually had to dig out the driveway gravel underneath to get them off to grease bearings!) - so I know where you are coming from!
 
I have jacked it up and the best scenario seems to be to raise the body a ways with one jack and then the axle just enough to clear the ground with another. Had a small Toyota camper that was a bear to change tires on too for the same reason. Don't want to go through that with these wheels & tires. They probably weigh over a hundred pounds each.

I am planning on a slightly smaller opening but still close to what you see above.
 

Latest posts

Back
Top