Roadster pickup from leftovers.

Rat Rods Rule

Help Support Rat Rods Rule:

This site may earn a commission from merchant affiliate links, including eBay, Amazon, and others.
Don,
the bed looks great, I think the proportions of the bed are right on the money and those license plate lights are perfect!. keep posting pics this build is one of my favorites.
 
Thanks, Sawzall. :) 
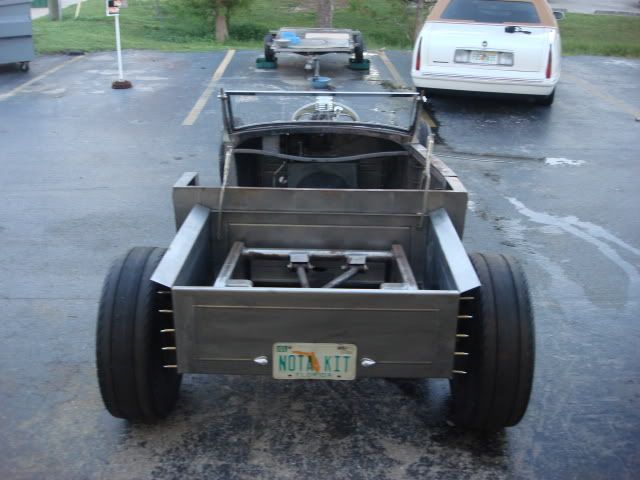
One thing that is helping is that the temperatures down here are FINALLY starting to drop........I guess Fall is here. [cl When I went to the shop tonight at 6pm the temp was only 81 degrees, and it dropped down into the mid 70's when I left the shop. Normally it would have been in the mid 90's and the humidity would have been so bad I would have been sweating all over the bare sheet metal.

This is the weather we wait for all Summer here in Florida. :D

Don
 
Don, everything you've done on the bed looks outstanding. The lights are perfect and terminating/starting the beads there works out well. This is my favorite car coming out of the Don & Son's Rod Shop.
 
Thanks guys, I appreciate all the encouragement. The main reason I have been doing the bed now is because I have been avoiding the bodywork.........I HATE bodywork ! :( When I worked at a bodyshop (I was an office guy) I would see our techs out there sanding and hammering all day and wonder how they did it. To me the worst part of the build is bodywork and painting. But I guess I can't put it off forever. :eek:

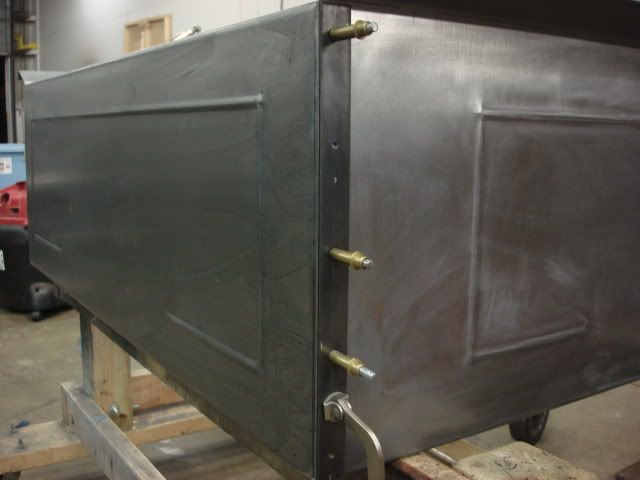
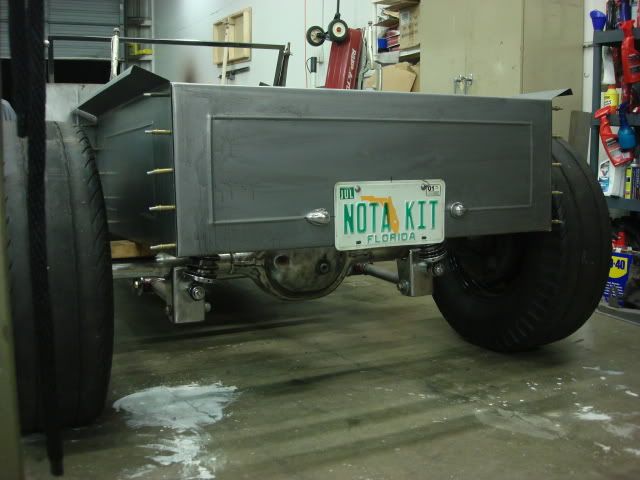
I think that bare area above the license plate will be a good spot for some simple pinstriping maybe.

Don
 
Hi , I read alot of the other build on the one you sold and learned alot. now I'm readin this one and enjoying it also.(and still learning) Thanks for sharing the knowledge.
hey I'm in florida also, clermont -west of orlando, we vacation out by you .
 
Thanks Raven. We used to go boating and fishing on the Clermont chain of lakes, really beautiful up where you live. Where do you vacation down here ?

Oh, by the way, tonight I got the front panel done for the bed, now it has 4 sides ! [cl But I forgot my camera, so it will be tomorrow before I can post pictures. Next step is to figure out the way I will bolt or rivit the four sides into one big box, and how I am going to add reinforcement to it.

I'm really happy to get the part done where I have to use the nibbler to cut pieces of 18 gauge, the little C shaped pieces of steel that it kicks out are like Ninja weapons. I had to throw away one pair of work shoes because the whole bottom was covered with them. I spent an hour or so sweeping and vacuuming them up, and it looks like I got them all. Glad that part of the build is over.

Don
 
David, I actually thought of somehow getting a Ford script pressed into the center of it but couldn't figure a way to do it. I may just get some pinstriping there or maybe "Ford" lettered on it.

I cleaned up the lenses in the license lights the other night, turns out they were just dirty, so some Dawn got them like new, and then Dan buffed the stainless housings for me and those came out nice. Now I just have to drill two 1.25 holes in the tailgate for the prongs to slip into and they will be mounted.

Last night I worked on getting the final panel made for the bed, this is the front of the bed. It is virtually a mirror image of the tailgate, except the bead doesn't continue onto the lower portion because it will be below the floor and won't show.

Here is the final panel in place, those notches are for the frame kickup and driveshaft clearance:

myrpufrontbedsectiondone002.jpg


And the side view and looking forward into the bed.

myrpufrontbedsectiondone004.jpg


myrpufrontbedsectiondone003.jpg


My next step will be making a framework inside the bed to give it some stiffness and to support the floor, which I still have to make. I also have to make some crossbraces and stake pockets, and to drill holes for the button head bolts that will hold the bed together.

It will probably get wheeled outside tomorrow so I can look at it in the daylight from far away to see how high the bed should go.

Don
 
I didn't get to push my car outside today because I forgot one important step.......the bed was being held together with a ton of vice grips and clamps, there was no way it would fit on the frame with all those on there. So the first order of business was to get rid of the vice grips and use Clecos to hold the four sides of the bed together.

There are going to be 40 bolts holding the stake pockets to the bed sides and I knew there was no way I was going to be able to drill 40 holes all spaced evenly and in line. What I came up with was a little jig I made from some 1 inch x 3/16 steel strap. I drilled five 3/16 inch holes in the strap, right down the middle, all evenly spaced 3 inches apart. By clamping this jig to the corner of each bedside I was able to run a drill through the holes in the jig and then on through the 18 gauge bedsides.

There was no way to misdrill a hole because the jig forced the bit to go right where it was supposed to be. As I drilled a hole I would insert a Cleco and when all the holes in that section were drilled I removed the jig and just put a Cleco into each hole. Here is a picture of the jig in place as I was replacing the clamps with Clecos.

myrpumorebedwork001.jpg


After I got the first 20 holes Cleco'd (5 per corner x 4 corners) I was able to lift the bed onto the back of the car for a trial fit. I won't drill the next 20 holes (on the other side of the stake pockets I make ) until I actually have the pockets built. I also took the time tonight to drill the holes for my license plate, and I drilled two 1.25 inch holes so I could install the license lights, one on each side of the plate. I left some room on each side of the plate in case the frame I end up using is a little wide.

Here are some pictures of the bed that is now sitting in place on the car. I am anxious to see it outside tomorrow so that I can finalize the height the bed will be mounted at.

myrpumorebedwork004.jpg


myrpumorebedwork006.jpg


myrpumorebedwork010.jpg


Here is a close up of one of the license plate lights, I think it was mounted in the splash apron of some Ford car, I just don't know what year they came from.


myrpumorebedwork007.jpg


Don
 
Today we finally got to push my rpu out into the sunshine and stand back and look at it and take some pictures. I'm pretty sure the bed is right where I want it, so now I can start making the brackets to mount it to the frame. Here are some of those pictures:
myrpuoutside011.jpg


myrpuoutside033.jpg


I had to put one door on to see how it looked with it in place. It is starting to look like a car finally. Maybe by the Spring I will have it running and can take it to Billetproof, or at least to Turkey Run next year in November.

myrpuoutside017.jpg


myrpuoutside022.jpg


Don
 

Latest posts

Back
Top