Roadster pickup from leftovers.

Rat Rods Rule

Help Support Rat Rods Rule:

This site may earn a commission from merchant affiliate links, including eBay, Amazon, and others.
Right now I am trying to solve the alternator mounting situation. Stock aftermarket sbc ones won't work because they put the alternator too far out to look good and the ones that go on top don't fit because of my tripower intake that has the oil fill tube in front.Don

How about low on the driver's side?
 
I had that low on the drivers side mount on my 23 and it worked great, but with the Hurst style mount we built, there is no room there for it to sit. I could have also used the long style water pump and put the alternator on the passenger side, but I need as much room behind the radiator as I can for an electric fan.

I think this latest mount I am building will work well though. I am going to the shop tonight and work on it a little.


Don
 
You could make the main mount for the alternator be part of the hurst style motor mount. Then all you need is an adjuster rod...[P
 
Actually, I think I will use the Hurst style mount for the adjuster. All I have to do is drill a hole in it, and since it is already powder coated, it won't mess it up to bad.

I'm going to the shop tonight and am going to work on it a little.

Don
 
Wow, I just realized that I started this build thread in August of 2011 !!! Almost 5 years ago !!:eek: I think it is time to wrap this puppy up ! :eek::eek:

I finally got the design of the alternator mount worked out, got the pieces cut out on the bandsaw, and today had Dan weld it all up. It actually came out pretty good, and at least doesn't sit way out like the ones you buy. Now I just have to paint it and one more problem has been solved.


I was able to use the motor mount to hold the adjuster, just like I thought. I used a 5/16 rod end and a bolt. By cranking the bolt out it moves the rod end out and tightens the belt. BTW, it took me 3 trips to the parts store to get the correct length belt. I never have been successful at using a rope to approximate the length of the belt and always end up going back a few times.


Don
 
I'm saving a pic of your alternator bracket for future reference. It's really nice. Three trips to zero in on the right belt size is about right.
 
A silver powder coat would look good on that good looking bracket. Or black if you want it to just blend in and let the alternator be the focal point.

5 years sounds about like me. My shop time is limited by weather, money, and other household jobs, so it takes me a while to accomplish anything. And when I start driving one, I hate to break it back down to do anything to it!
 
Thanks, guys. I don't think I have ever gotten the right belt the first time in my life. I put a thin rope around the pulleys, cut it to length, go to the parts store and use their measuring device, and I am always off by about an inch or more. Very confusing.

Tomorrow I think I am going to start on the headers. I already have the flanges and 90 degree tubes, just have to get some more straight pieces. I think I am going to do a simple four tube setup, like Jimmy White did on his car.


Don
 
Great job on the bracket. An easy way to prevent all those trips to the parts store for belts is to save an old really long belt, I have one of the deck of my lawn mower. Cut it in one spot to open the loop. When you want to measure a belt wrap this old belt through the pulleys mark it with a soap stone where the over lap stars and make one trip to the parts store.
 
^^X2 on this trick^^ I have a serpentine belt as well as a V belt just for that purpose. The rope will fall down into the V and the measurement will come up short. The altrernator bracket came out great. [P
 
That's a good tip about the cut up belt........I will have to remember that one.

Today I worked on my headers, bolted the flanges on and started mocking up bends. I called Summit to get some 8 foot straight pieces of exhaust tubing and they were completely out, so I rethought the process.

If I get Dan involved to weld them up for me, it will be a very long, drawn out affair. He can never do anything simple, and his own headers took him two weeks to build. I really don't want them to drag out that long or to try to corral him long enough to finish them up for me, so I went to plan B.

I was planning on ordering these headers for my altered project from Speedway, so I called them and will have this set on Wednesday:


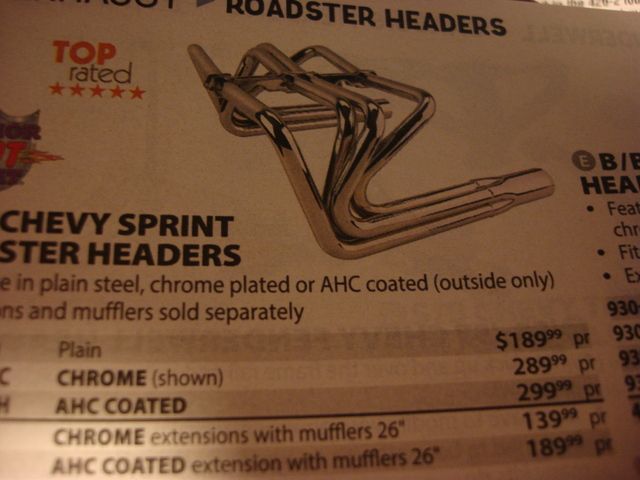
I got the coated ones and if I don't like the look on the rpu, I will simply put them away for the altered and go to plan C. (I don't have a plan C yet. :eek:)

I am just tired of messing around with this rpu project and want to get on to the altered asap, so this will get one more problem out of the way.

My original plan was to have The Brassworks build me a radiator for this one, just like they did for my 27, but they are a little pricey. I don't feel like spending another $1000.00 on a radiator, so I called PRC, who has built some aluminum ones for us in the past (my 23 had one and so does Dan's rpu). They are at $ 500.00, so I am going to order it there, probably next week or so.

Don
 
Well, plan B failed. Got my headers from Speedway today and bolted them on. Didn't care for the look, much too shiny for the look of this car, so they are going to be stored away and used on my altered. But for $ 299.00 plus $ 45 shipping, they really are a very nice piece. Complete with bolts and gaskets.

Guess we will be building a set of headers that look a little more like the rest of the car.

Don
 
Nothing has been going on with my rpu build for the past two months. Finally, this weekend I was able to get my Son Dan to give me some time to help me build the headers for the rpu though. We scrapped the plan B, the four tubes per side just didn't look right when we started laying them out, so I ordered a Limefire header kit from Speedway and it came in this week.

It is a pretty nice kit for the money (about $150.00) and we are modifying it to fit what we think looks the best. The kit comes unwelded, but it has every part, even the gaskets and all nuts and bolts.

Today we got this far, and I think I like the way it is coming out.


Don
 
Last edited:

Latest posts

Back
Top