Roadster pickup from leftovers.

Rat Rods Rule

Help Support Rat Rods Rule:

This site may earn a commission from merchant affiliate links, including eBay, Amazon, and others.
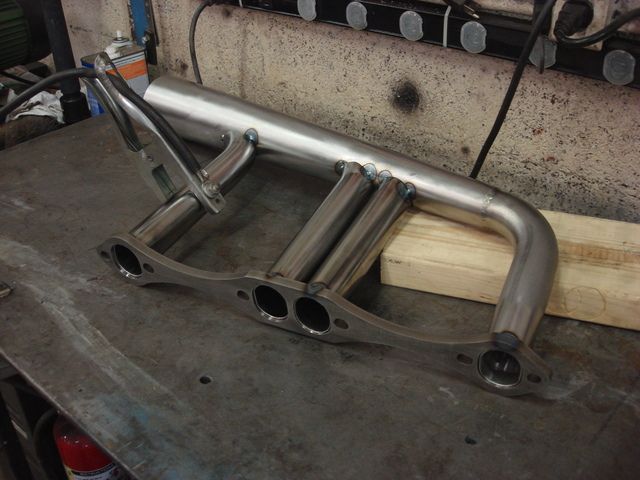
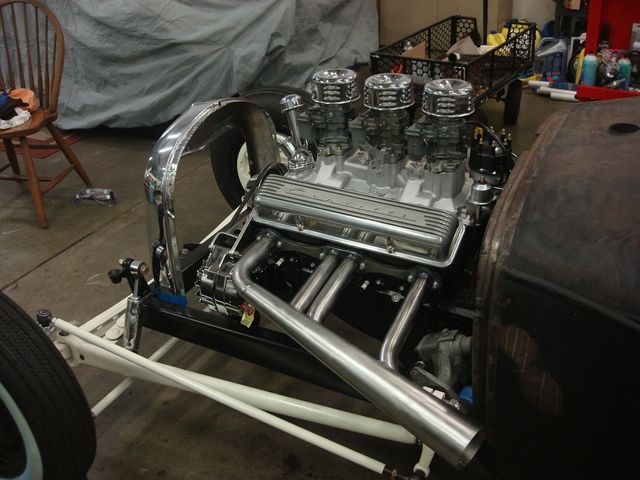
Thanks guys. I too am happy that I settled on these. We tried fitting the four tube per side headers, and it was a nightmare. No way to get all 4 tubes to lay in the same plane without a lot of bending and fitting on the top end. Plus, when they were assembled, the top part of the tubes all ran at different levels and just didn't look right.

It is pretty time consuming to fit the tubes to the megaphone and I am glad Dan is as good as he is and is doing 99% of it. You cut a little, grind a little, then try a tube. Then you cut a little more and grind a little more and do that over and over again till it fits tight.

I'm glad to have him doing most of the work for me, I don't have the eyes or patience for this any more, not to mention the welding skills. This should be the last of me needing to take him away from his own projects, I can do the bodywork, wiring, etc all by myself.

Don
 
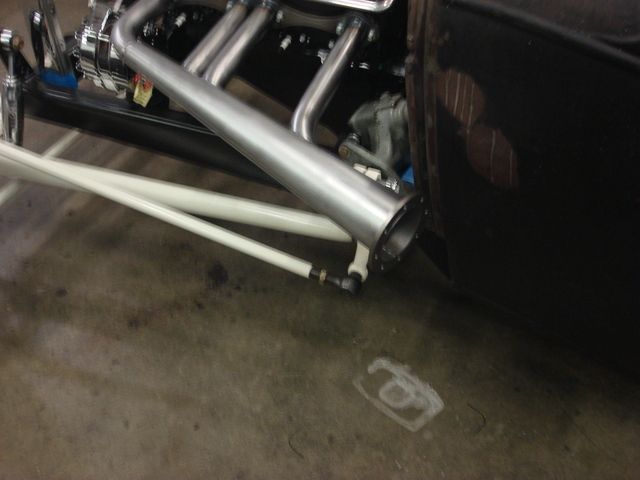
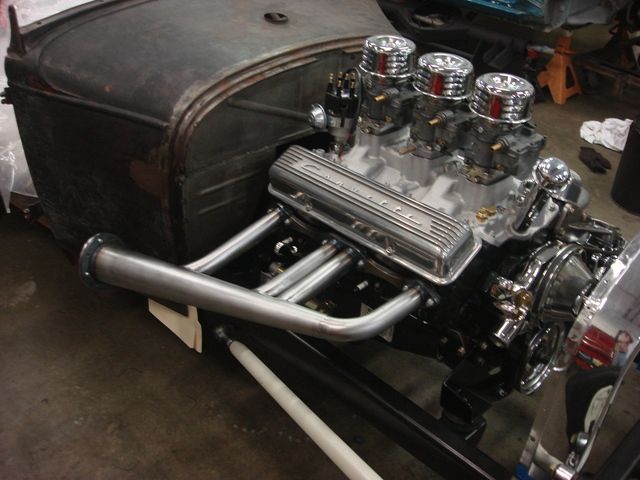
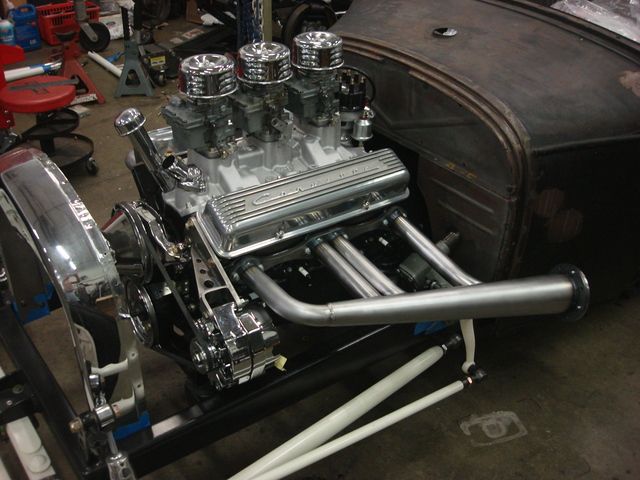
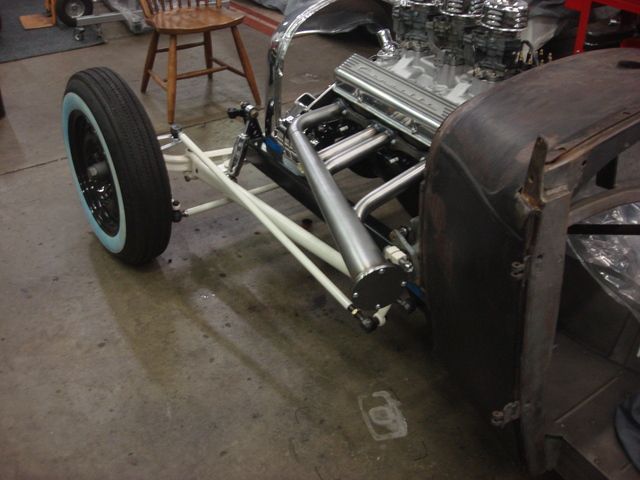
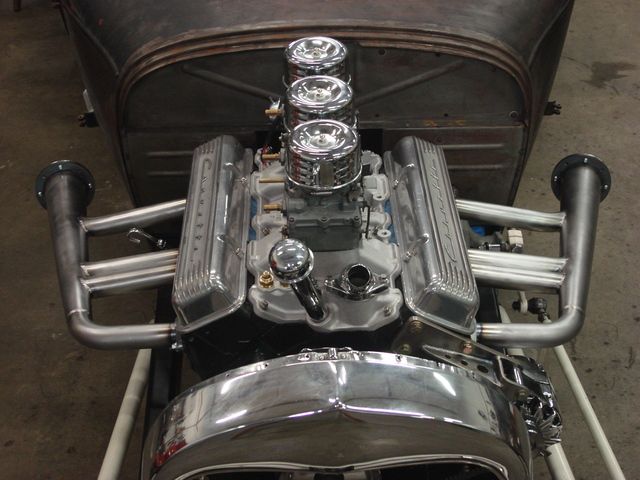
We got another full day in to work on the headers and got one side pretty well done and the other side started. We still have to weld on the ring at the end that holds the cap or, in my case, the baffles.

Here are some pictures from today and where we ended up.

Don


Here is the end ring just slipped on, not welded yet.

 
Thanks, guys. Dr C, the flanges are 3/8 and really nice quality. We had two sbc Speedway kits, one that Dan bought a few years ago because he needed the cones and some bent tubing to make the headers for his 455 Olds. The flanges on those were only 1/4 inch thick, so it looks like Speedway has improved them.

They also changed the holes from 1 &5/8 round holes to oval shaped holes, so you have to reshape the end of the tube slightly to go into the holes. That is also better as it gives more clearance for each of the header to head bolts. I could get a 3/8 wrench on each one easily. The thicker flanges also did not warp at all from the welding, which was good. When we bolted the one back on the flange laid right against the head.

Don
 
Done and done !!!!!! It's 2 am and Dan and I just got in from a 12 hour day of header building. But both sides are now completely done and I can take them to the ceramic coater next Friday. [cl

Dan really put in a lot of hard work and they turned out great. Now I can pull the body off and start body work.

Here is the side we wrapped up today:


And the side we did last weekend:


We welded on the flanges for the end caps and I am going to cut a hole in the middle of it and install a set of Car Chemistry baffles we have left over from Dan's rpu. Those should quiet it down pretty well.


Don
 
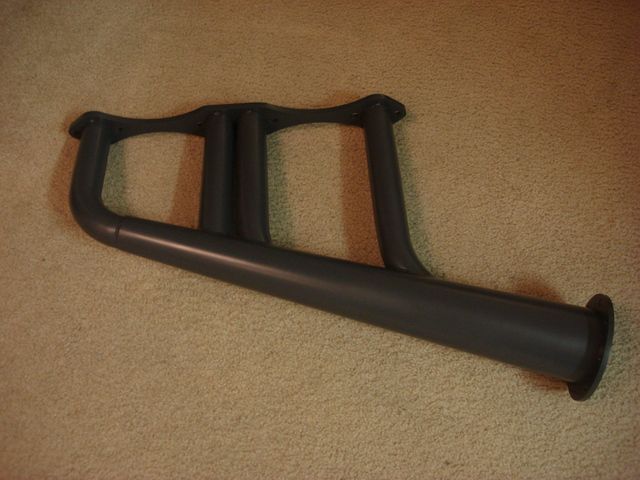
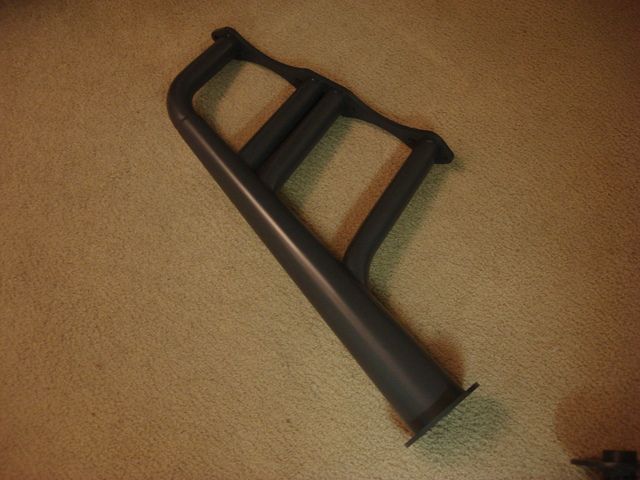
Today I drove up to Tampa and picked up my headers. I wanted a different look on this car, so I had them ceramic coated in a cast iron color but with a semigloss clear coat on top. I could not be happier with the results. I haven't been to the shop yet to put them on, but here is one of them:


They also coated the baffles we built:


The guys who did it are called Engine Armor, and they even coat things like blowers and pistons. They also did the headers on Dans car.


Don
 
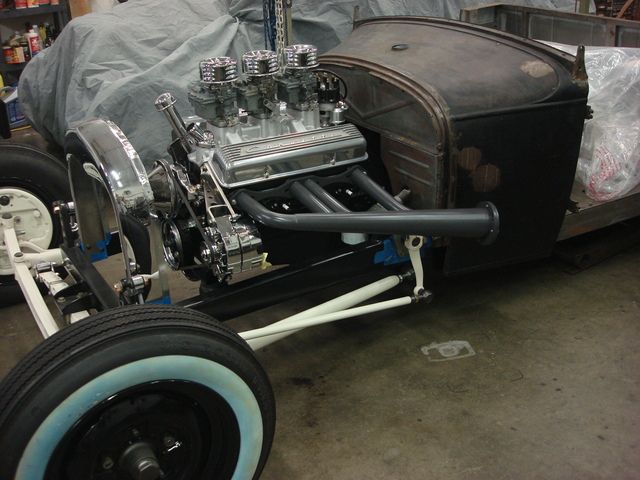
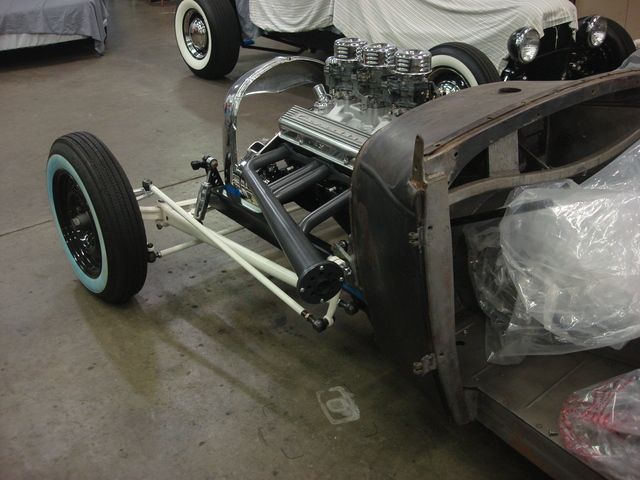
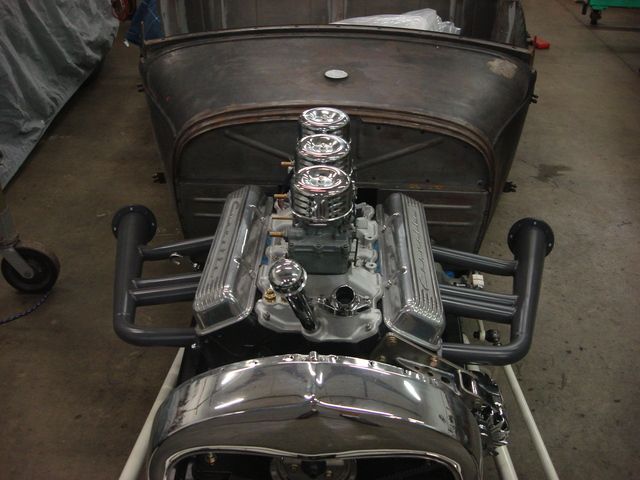
Thanks, Billy. :) Tonight I went over to the shop and had to try them on. They are maybe a tad darker and shinier than I thought, but I think the heat from the exhaust and time will patina them down a little. I know every time I fire up an engine for the first time the headers cook a little, so that should happen here, I think.

But overall, I like em.


Don
 
Thanks, guys. They are starting to grow on me a little more. When I first put them on they just kinda looked to "new" or something, but I really think the hot exhaust will age them and tone them down a bit.

Don
 
The whole car is darn near perfect in its design and construction..

Sorry to hear you're not doing well, ssimpala.
 

Latest posts

Back
Top