1927 Roadster

Rat Rods Rule

Help Support Rat Rods Rule:

This site may earn a commission from merchant affiliate links, including eBay, Amazon, and others.
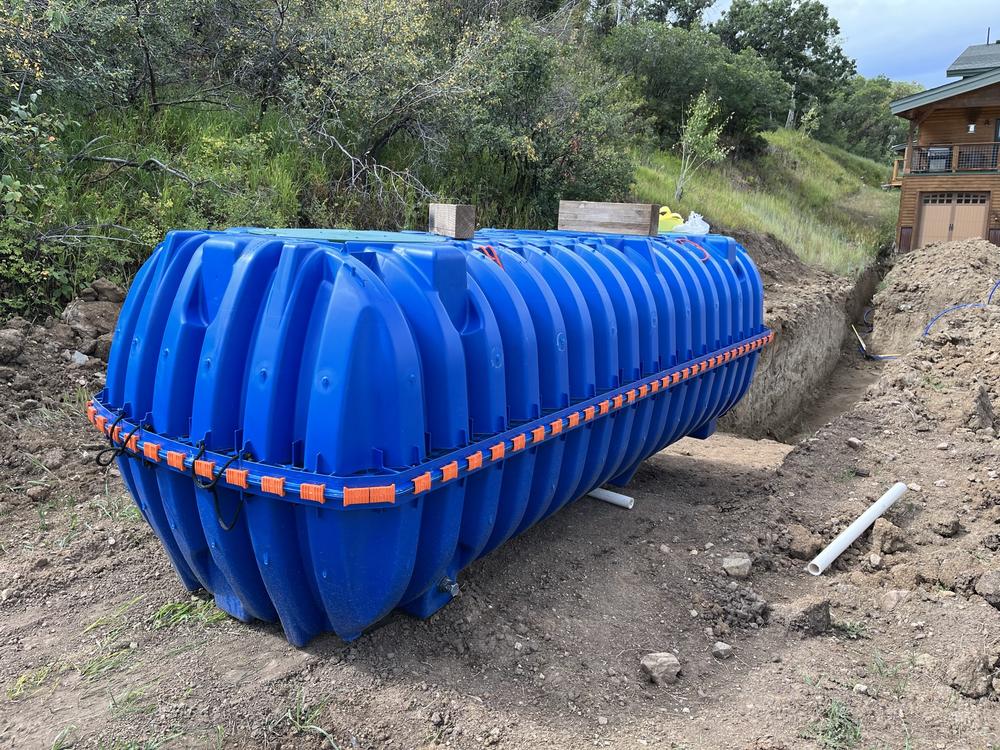
Yesterday I was pumped to move a couple water tanks into a massive hole I dug for another 3700 gallons of fresh water storage.

attachment.php


Then it started to rain :(. What a momentum killer that was. Not being very good a changing directions, I took a nap. Turns out, a nap was all I needed to find some momentum in a different direction. So I went down to the shop and built some mounting brackets to incorporate the Silver Cloud cross member/motor mount doo-hickey on to the 27 frame.

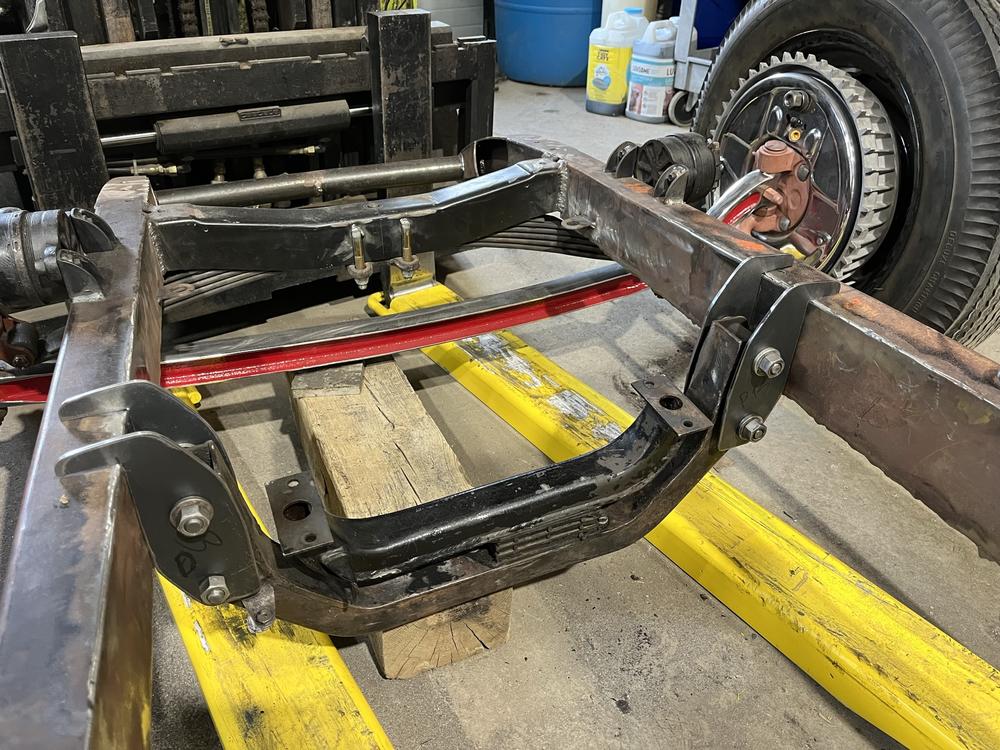
But first, the remaining part of the old motor mounts needed to be ground off.

attachment.php

attachment.php


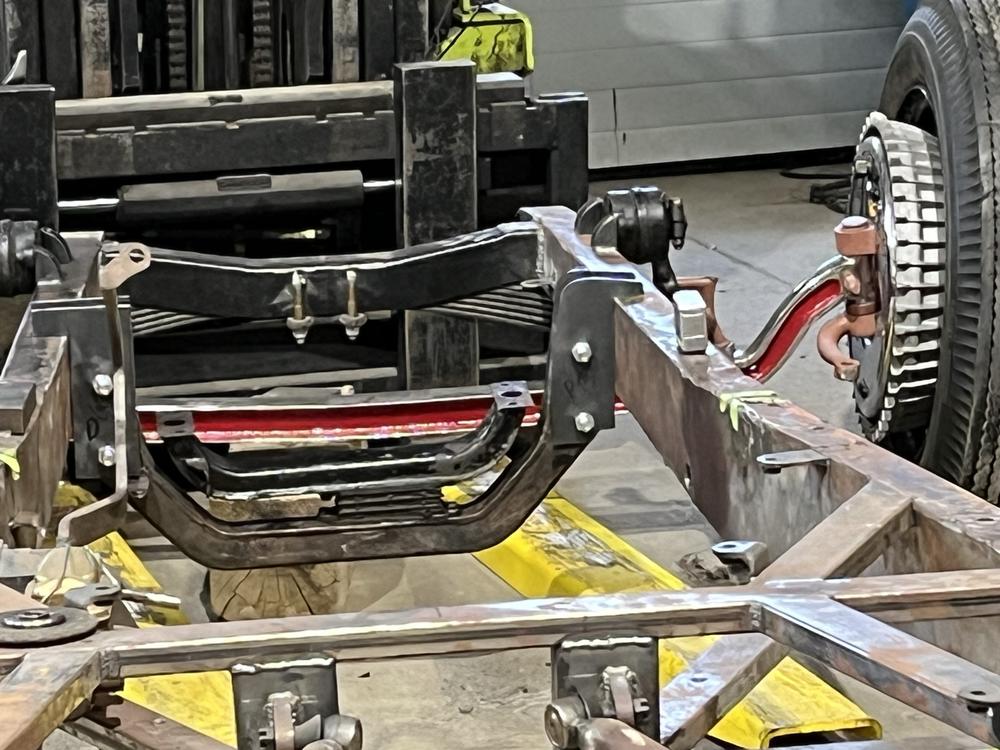
Here's the cross member/ motor mount thingamajig.

attachment.php


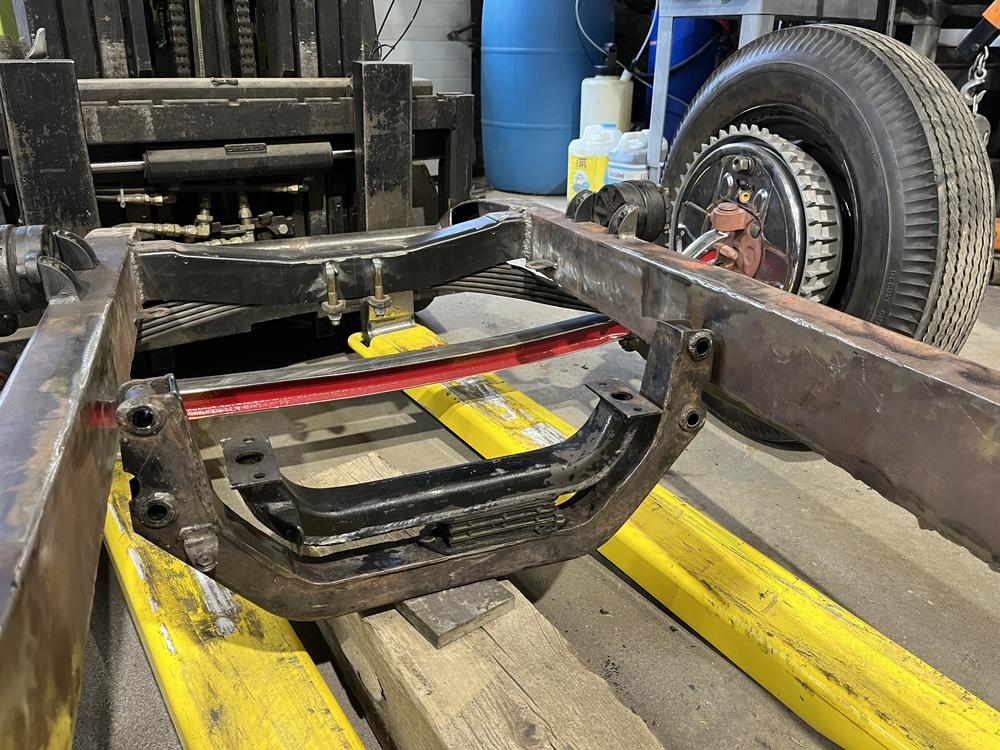
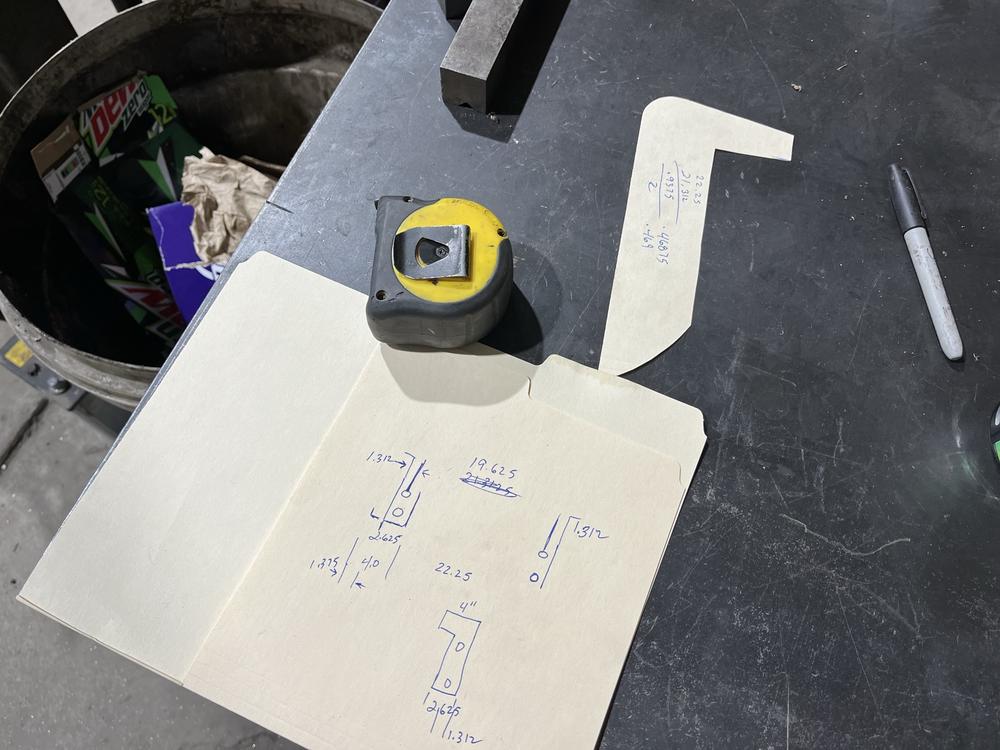
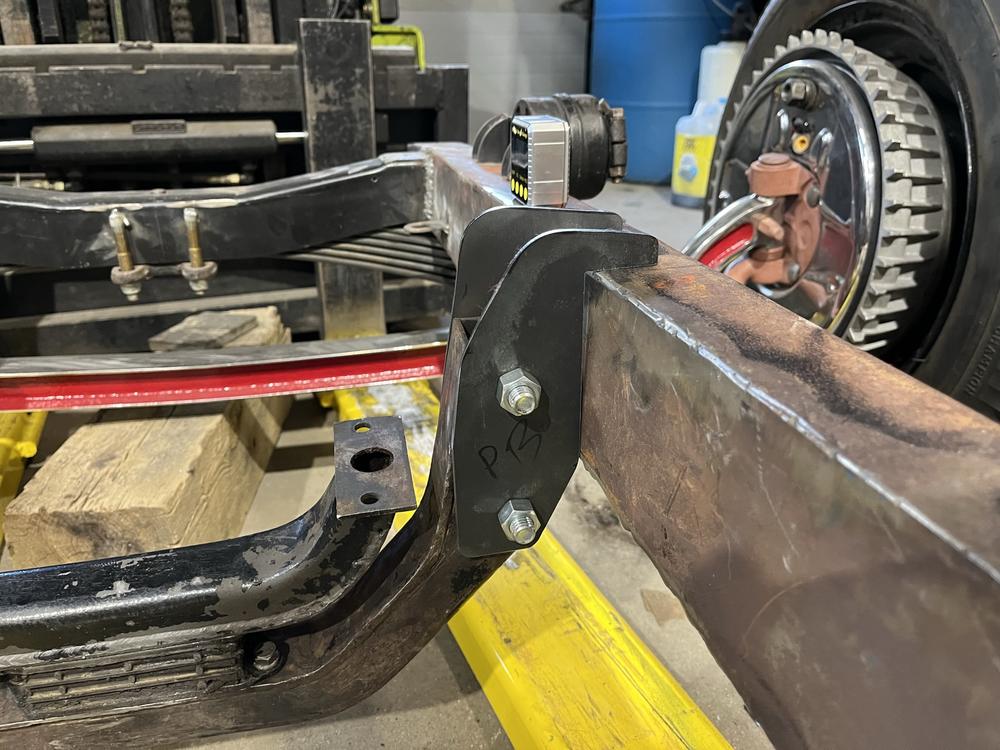
Figure out dimensions

attachment.php


Not pretty yet but dimensions worked out.

attachment.php


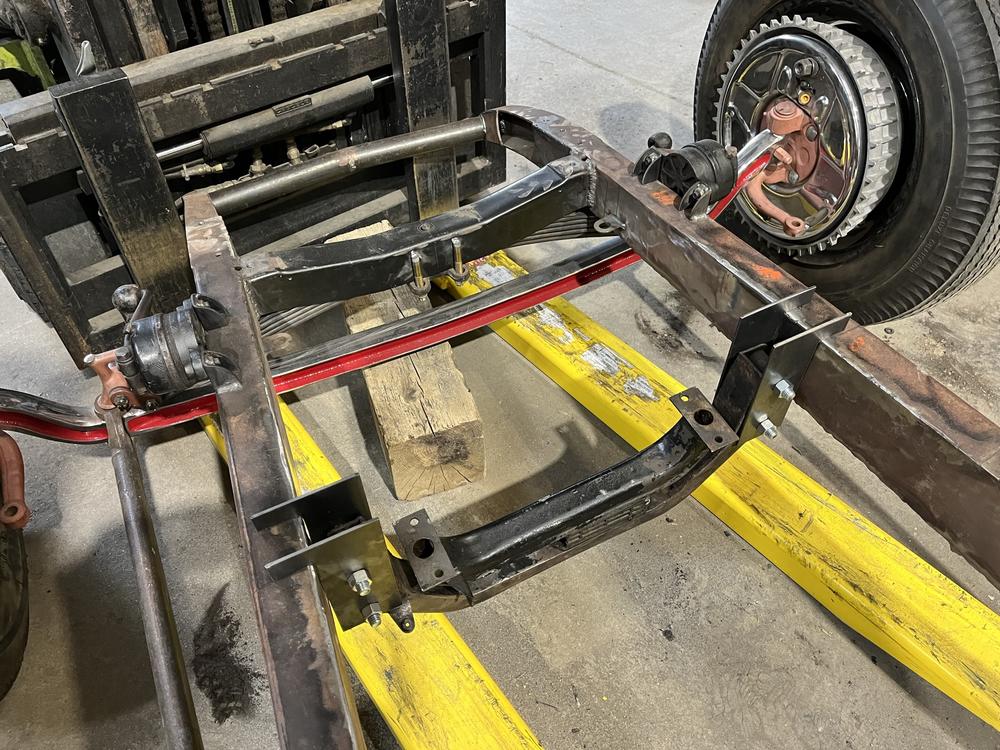
Starting to look better but too fat on top

attachment.php


I liked this so I went with it.

attachment.php


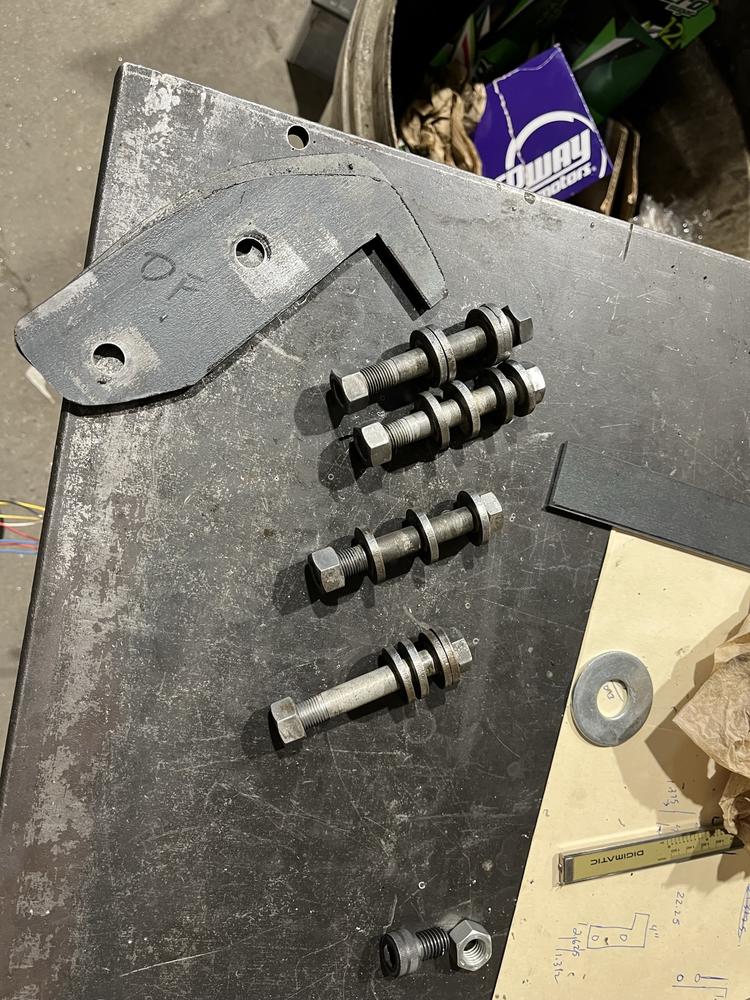
Here's all nuts bolts and washers that were used on the Rolls. Looks like I lost one of the 16 washers.

attachment.php


Finished.....I think.

attachment.php


attachment.php


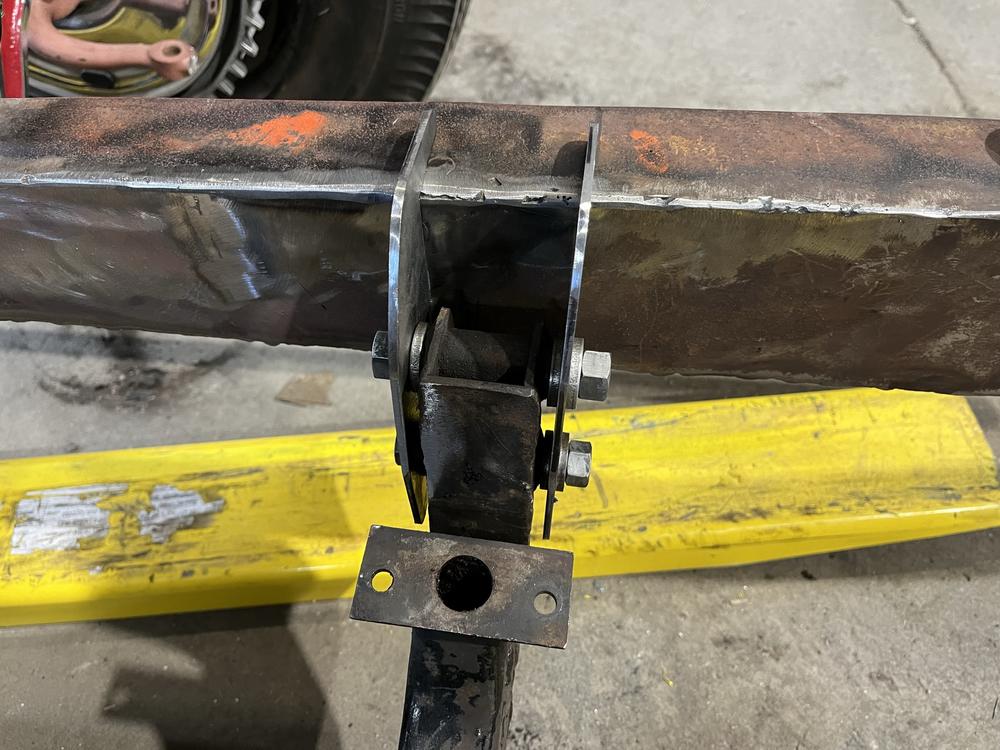
From here the engine can be dropped in and set in the correct position Then the brackets will be tack welded to frame, engine lifted back out, and brackets finish welded.
 

Attachments

  • IMG_9207.jpg
    IMG_9207.jpg
    218.4 KB · Views: 73
  • IMG_9210.jpg
    IMG_9210.jpg
    159.8 KB · Views: 71
  • IMG_9212.jpg
    IMG_9212.jpg
    88 KB · Views: 68
  • IMG_9214.jpg
    IMG_9214.jpg
    171.7 KB · Views: 67
  • IMG_9216.jpg
    IMG_9216.jpg
    117.1 KB · Views: 68
  • IMG_9217.jpg
    IMG_9217.jpg
    145.2 KB · Views: 8
  • IMG_9218.jpg
    IMG_9218.jpg
    158.7 KB · Views: 67
  • IMG_9219.jpg
    IMG_9219.jpg
    111.6 KB · Views: 68
  • IMG_9220.jpg
    IMG_9220.jpg
    160.7 KB · Views: 69
  • IMG_9215.jpg
    IMG_9215.jpg
    130.8 KB · Views: 67
Quick Question

I need to install 3.5" drop steering arms on the spindles so the center drag link will go below the wishbone radius arms.
In order to install them, I'll need to cut the stock steering arms off the forged stock spindles.

My question is, are these stock Ford spindle of any value or rare, as in OMG don't cut and grind on those?

attachment.php


Spindles without the steering arm are readily available in the aftermarket but, they cost money, I already own these.
 

Attachments

  • IMG_9257.jpg
    IMG_9257.jpg
    42.3 KB · Views: 38
I see the problem having two solutions. The guys that tell you 'OMG, you can't cut them up', should have to buy them from you, OR --- you could cut the arms off of them and bolt on your new arms and get going. You're building a hotrod; go for it.
 
What's this

Haven't had any time to tackle anything big on the roadster:( So I'm just doing small stuff and thought it might be fun to play a game of what's this. See if you can figure it out before the 3rd picture.

I took it apart so I could clean and polish the other side.

attachment.php


After cleaning and polishing, it was put back together. Note the small copper safety wire on the #4 castle nut.

attachment.php


It's the oil filler cap. Ha!

attachment.php
 

Attachments

  • IMG_9340.jpg
    IMG_9340.jpg
    217.4 KB · Views: 34
  • IMG_9341.jpg
    IMG_9341.jpg
    210.8 KB · Views: 33
  • IMG_9342.jpg
    IMG_9342.jpg
    167.7 KB · Views: 34
In addition to the tarnished oil filler cap, it's been discovered that the fabrication and welding of the frame had not been completed. After removing both the front and rear axles, we flipped the frame over for inspection. It's good and flat and square as heck but, it turns out most of the rectangular tubing used to join the 32 frame rails together and then to the rear axle support assembly had only been welded on 3 sides. Also, the points where the frame rails are joined to the rear axle support assembly are in need of some additional support and finally, the frame box-in plates were installed very poorly.This is concerning because all of the rectangular tube inner frame structure is welded to the box-in plates.
Although the situation is less than desirable, it's not as bad as it could have been and going over everything will still be simpler than starting from scratch. Here's some before and after pictures as the work has started.

attachment.php

attachment.php

attachment.php

attachment.php

attachment.php

attachment.php

attachment.php
 

Attachments

  • IMG_9276.jpg
    IMG_9276.jpg
    80.9 KB · Views: 52
  • IMG_9409.jpg
    IMG_9409.jpg
    109.2 KB · Views: 52
  • IMG_9408.jpg
    IMG_9408.jpg
    62.4 KB · Views: 51
  • IMG_9404.jpg
    IMG_9404.jpg
    93.6 KB · Views: 52
  • IMG_9426.jpg
    IMG_9426.jpg
    82.8 KB · Views: 51
  • IMG_9282.jpg
    IMG_9282.jpg
    89.2 KB · Views: 51
  • IMG_9425.jpg
    IMG_9425.jpg
    92.3 KB · Views: 9
  • IMG_9403.jpg
    IMG_9403.jpg
    141.5 KB · Views: 53
So, the dilemma with using the RR rear axle has been that it's 5 on 5.5 and the wheels that came with the car are a dual pattern, 5 on 4.5 and 5 on 4.75. The simple solution would be to buy a couple of 5 on 5.5 wheels and move the trim rings and hub caps over to them but, man these things are pricey. What's worse is if I went that route, I'd be out 550.00 and have 2 extra wheels laying around. So, since I have more time than money, I decided to drill the wheel mounting flanges and brake drums to 5 on 4.75 and use the wheels I already own. For this I had to enlist the help of Dale, the resident machinist, he's got the book and the knowledge to use it.
attachment.php


attachment.php


Finding center on the brake drum

attachment.php


After the drums were done we move on to mounting the first axle to an angle plate.

attachment.php


The worst part of doing the axles is setting up the head on the mill as the axle is hanging off the back of the table.

attachment.php


Last, we used a boring tool to get to a .60" hole which is where we needed to be to use the wheels studs that are in the axles in the 8" Ford rear end that came with the car.

attachment.php


At this point I'll need to make some shims to back up the brake drum when the wheel is attached with the lug nuts.
 

Attachments

  • IMG_9518.jpg
    IMG_9518.jpg
    140.5 KB · Views: 33
  • IMG_9546.jpg
    IMG_9546.jpg
    121.1 KB · Views: 33
  • IMG_9531.jpg
    IMG_9531.jpg
    136.8 KB · Views: 33
  • IMG_9542.jpg
    IMG_9542.jpg
    140.1 KB · Views: 32
  • IMG_9545.jpg
    IMG_9545.jpg
    136.1 KB · Views: 32
  • IMG_9548.jpg
    IMG_9548.jpg
    126.7 KB · Views: 32
They are an absolute Must Have.... I have one too. A friend with a book who knows how to use it. They are few and far between these days. :)
 
Very cool!!! Helps to have a good machinest around!! What the can do is amazing!!
 

Latest posts

Back
Top