1929 International Truck

Rat Rods Rule

Help Support Rat Rods Rule:

This site may earn a commission from merchant affiliate links, including eBay, Amazon, and others.
Updates for today, I managed to get the other header tacked together, they look pretty symmetrical. I'll get a pic once it's all welded up and put back on.

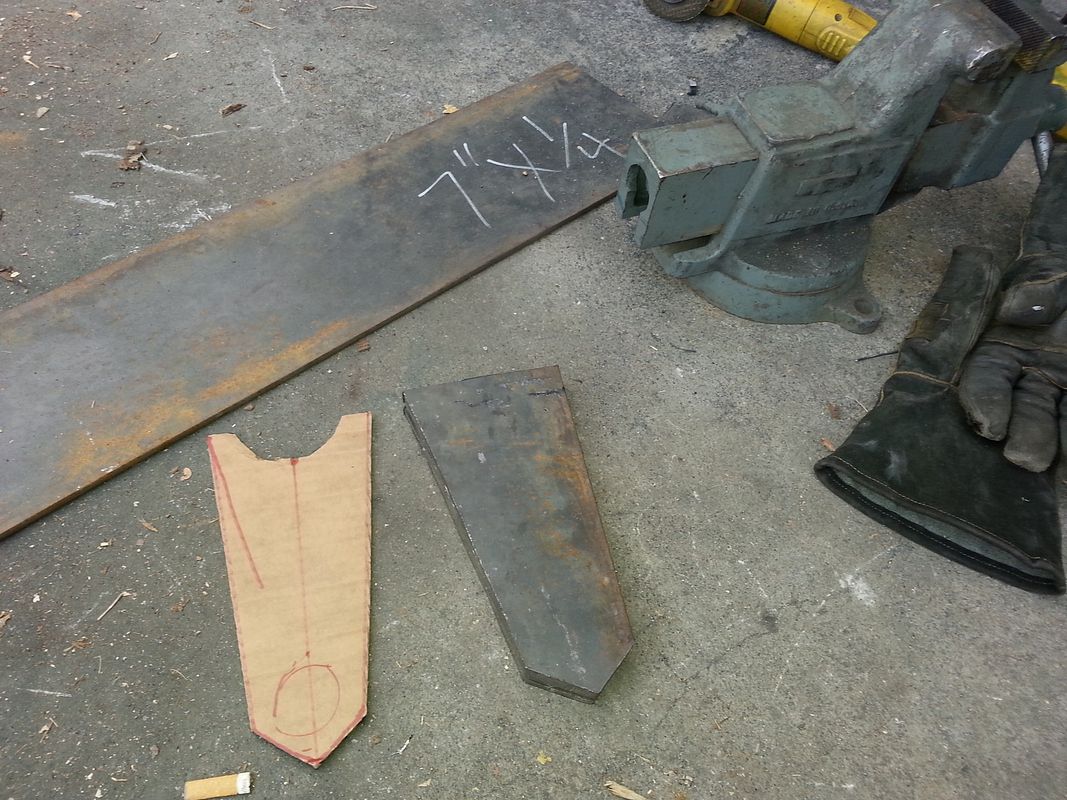
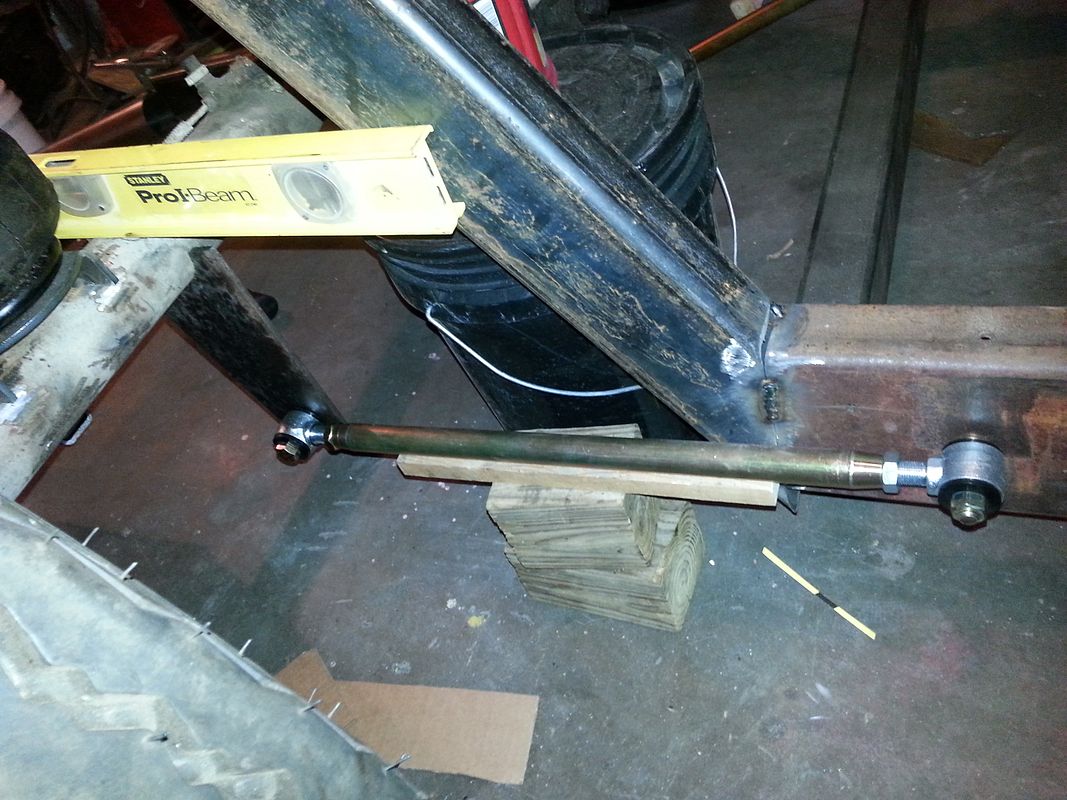
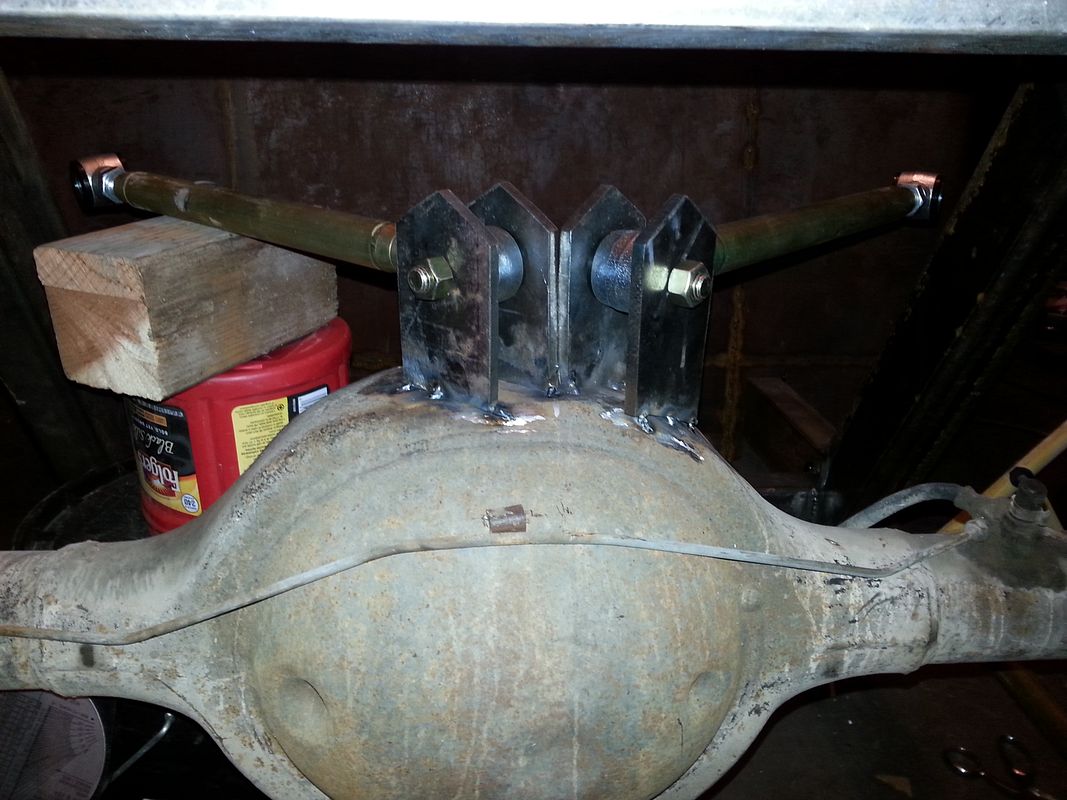
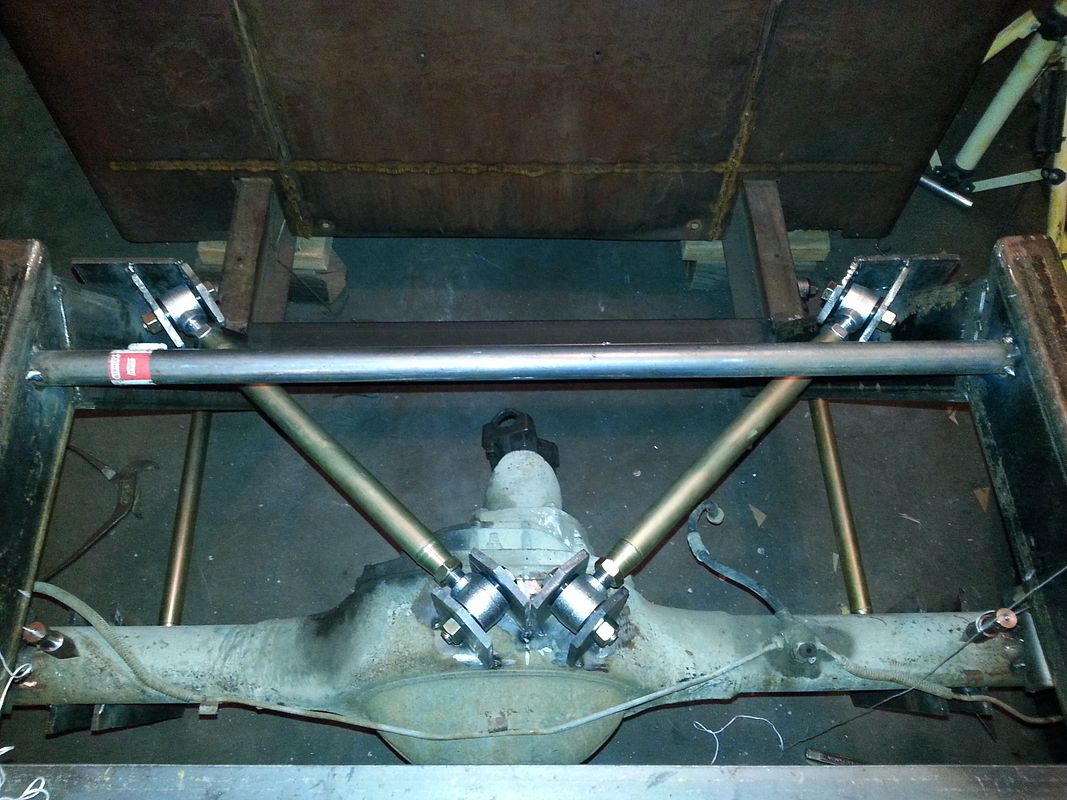
I got all the rear suspension stuff in, so first order was to get the bottom links in. Here was the process of building the brackets.

Cardboard template and basic cut out-


I clamped them all together and hit them with the grinder so the all ended up the same. Then it was time to mock it into place and tack.


That was about it really. Measured a bunch of things, leveled and such, and it all ended up alright!


I'll work on the upper links and upper bag mounts in the next few days.
 
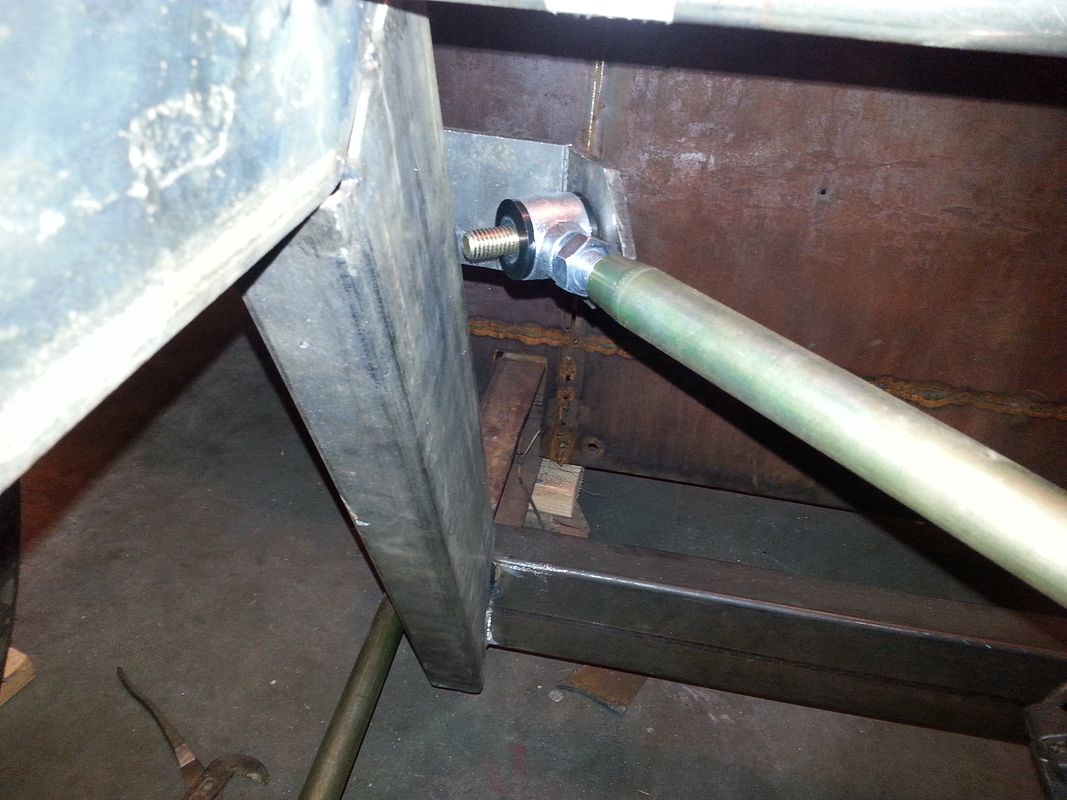
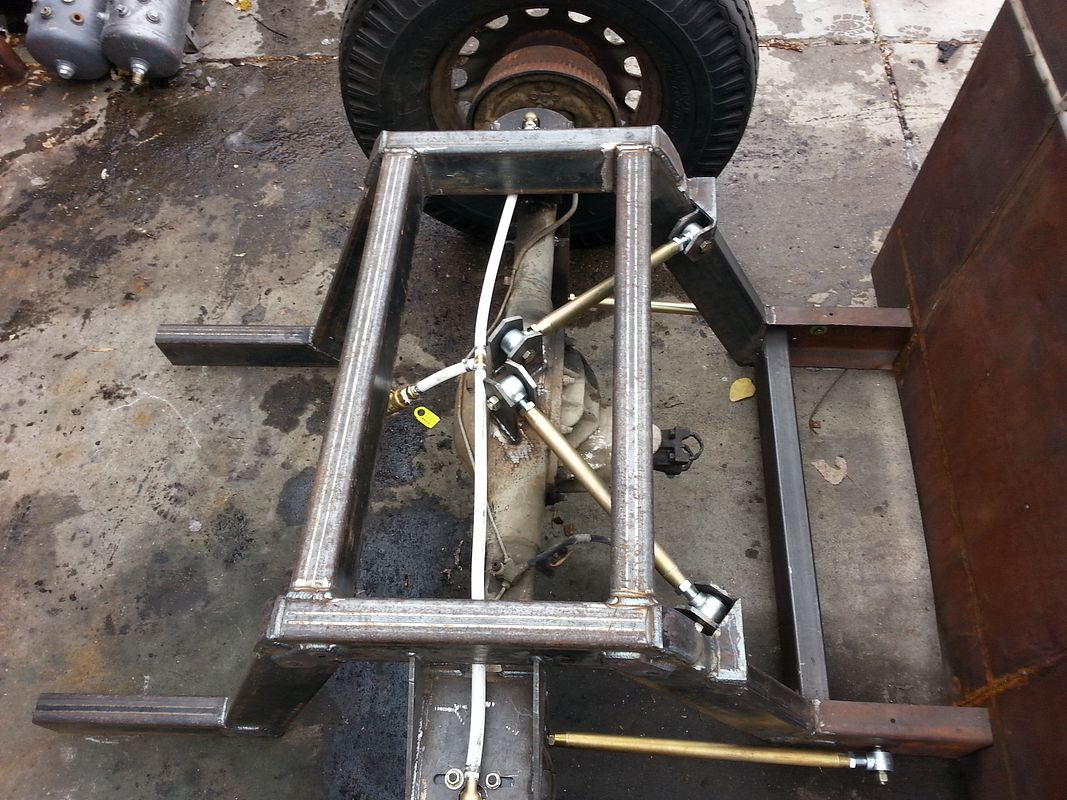
Alrighty, so LOTS of progress this weekend! We'll start with the upper links. Here's how they came along-


Getting the frame sides done-


And all tacked in-


I then got the upper bag mounts done, nothing real special there and didn't take pics of that. After that was done, I aired up the bags and ran the suspension through it's travel and everything worked great. No binding or anything out of the ordinary.
 
So then it was time to take it all apart and weld it in for good. Lots of welding and grinding, lots of fish plates, boxing plates and such. I took out the temporary braces and put in permanent cross members, and this afternoon I had it all pretty much finished up. So I got a chance to roll it out and see how she looks, and I'm pretty happy overall :D


Profile shot, aired up bags-


Laid out-


I ordered the valves and stuff for the bags, so I'll work on mounting the tank and plumbing in the next few days I reckon. Probably start thinking about brakes soon as well.
 
Well it's been a few weeks, but I've been getting some work done on the truck. I got all the air bag valves and such in and plumbed. Used some old dual tanks off of an air compressor, and 1/2" SMC valves and lines. We did them all in copper since we're plumbers :D Everything holds pretty well, takes a few days for any noticeable leakdown. I'll end up putting an electric compressor on top of the tanks at some point, but I've also got an old York A/C compressor to use.


The other thing I got done was I tracked down a radiator. I got it out of a '54 Plymouth fury. After I sectioned the grill shell so it was even with the cab, the radiator fit perfectly within the shell. I had it boiled out and repaired some holes, and had the filler neck moved to the middle and extended up. I love the way it looks, super happy with the outcome.


I got the brake pedal in as well, don't have any pics of that at the moment but that's the current project. Going to work on plumbing the brakes and start doing some body work, getting a floor planned out for it, etc. Should keep me busy through the rest of the holiday.
 
You didn't say, but I'd guess this isn't your first time out of the hall. LOL. Like the copper work, I'm a retired plumber myself. Used to love copper work. Plastic now turns me off big time. UGH Great job on the truck. Like the History too. Perley
 
Well, sorry I took 6 months off, but I only took time off from posting here, not from working. So let's get right to the updates, of which there are many!

So when I left off around Christmas, I was working on the brakes and floor. We'll start with the brakes. I got some old school 4 piston Wilwood calipers off of ebay. I called the seller and had him give me some measurements, and they ended up being perfect for the rotors I'm running. Unfortunately, they're shiny, but I don't mind it much, knowing that they're damn good brakes. So I then had to make some mounts. I used the existing holes in the axle where the original backing plate for the manual brakes were. Pretty simple bracket, and they work great


Here they are after being fully plumbed and in the daylight


And here are the best pics I could get of the Willwood dual reverse master cylinder setup. I bolted it to the big crossmember (an old piece of the frame) that I had welded across the body. It's a pain to fill, I have to use a funnel and go through one of the gauge holes. But other than that, it's great.


Next up was the floor. I used the old running boards that were on the truck. Here's how the running boards looked just as I had pulled them off


I flattened it out and started chopping them up and welding them


Here you can see a few things. The center tunnel is done, flat metal frame work is in, and the bellhousing area is covered. I also had to address the tranny cooler at this time, I pulled one out of a 90s Chevy truck in the junk yard. Made some brackets for it and bolted it to the frame rail and cross member. Hopefully it'll be enough to keep her cool.


Didn't take many picture of the floor process, as it was really just kind of a puzzle piece together type of thing. So here's a final shot. It's made of different removable pieces, and they're all zip screwed together for easy removal in case of repair and maintenance.


Now you'll notice there are quite a few other things done in those pictures. A shifter was given to me by a friend, no idea what it came out of but I made it work. You can see the linkage goes through the floor. The wiring is done in as well, and all tucked up on the body crossmember. The accelerator pedal is also mounted, it was sourced from the junkyard from a suburban if I remember right.
 
I like this![cl
 

Attachments

  • b.jpg
    b.jpg
    102 KB · Views: 20
Also, in the previous posts pictures, you can see that some seats are set in there. They came from a 90s Ford Ranger, the little rear fold down ones.

Let's see, about the last thing needed to get it running was wiring and a driveshaft. Wiring was pretty simple, I put the ignition module and starter solenoid on the body crossmember under the dash. Bought a couple of universal fuse blocks from autozone and soon It could actually be started! I took the driveshaft to my local shop and had them shorten it. I then make a couple of driveshaft loops, which with the amount of travel the bags have, ended up looking pretty silly, but if the U-joints ever go I'm sure I'll be glad they're there!


I know there are lots of little things I'm forgetting that it took to get it truly ready for its maiden voyage. Had to make a battery mount, ended up putting it behind the passengers side of the cab. Mounted the gas tank on top of the rear frame, used the original tank, straps, and pick up tube. Made some radiator hoses, bought a new alternator and got it wired up. Plugged the speedo hole in the tranny, got the accelerator pedal set and used some bailing wire for temporary throttle cable. Anyway, it was eventually ready for her first trip around the block! My brother and I-


It was a successful test drive! Went around the block 4 times. Only malfunction was I forgot to put a retaining cotter pin in one of the brake calipers, so a brake pad fell out. Which sounds dangerous and scary, but I honestly didn't notice, save for the terrible screeching noise of pistons on rotors. Being that we were just barely puttering around at 15mph or less probably had something to do with the lack of scariness as well though. Anyway, everything worked fine, so it was back in the garage for more work.
 
So the net project was chopping the top. Obviously this wasn't a very complicated one, as it's all pretty square. I braced the **** out of everything and took out 5.5 inches in front and 5 in back. I could have taken a bit more, but my dad is 6'3" and barely fits in the thing to begin with, so I didn't want to make it impossible for him.


Also in those pics you can see I have installed the tunnel ram intake that I mentioned I had bought back on page 4 of this thread. The carbs that came with it were rattle canned red and silver (BLEH) so I was in the process of rebuilding and stripping them.

In the meantime, I found a bed for it as well. It's from a 30's International, and I think between it and the chop, the truck really came together! I don't have any pics of chopping up the bed, but I basically cut the whole bottom out of it, then cut it in half and took about a foot and half out. I think it looks proportionate in length for the truck.


Set the headlights on just to get a feel for what they would look like

 
Last edited:
So I got the carbs all rebuilt and as I've mention in the beginning of this thread, my brother and I run our own plumbing business. So here was the finished product of the engine, with lots and lots of copper. Also, the "fuel block" is a backflow prevention device, which is mostly what my brother and I do in our business. Also of note are the custom breathers, made from copper adapters and a cast iron cap


My brother tinkering with something. Also note we put the stock visor on it, and bent it down a bit.


Tuning the carbs has been an ongoing project of course. I got the adjustable jets from vintage speed just recently and it has been A LOT better running since then. I'm still tinkering with it though.
 
Now, if you'll remember earlier in the thread, I took a hiatus from this project to get involved in politics, and am now running for a county office. Interestingly enough, me running for office is what motivated me to finish this project. I decided to use it as my campaign mobile, so I was getting it ready for some local festivals. I had my girlfriend make a cool stencil and I used some 1shot, reduced it a lot, and rubbed some dirt in it and here's what we ended up with-


Here she is after her longest drive down to the festival. At this point I still didn't have plates for it, so we had only gone around the block and neighborhood a bit. She made it down there alright, couple of stalls and backfires (this was before the adjustable jets), a few loose compression fittings, but she still got there.


It was a hit at the festival. People stop to talk about it, and before you know it they want to vote for me just because I have a cool car and unique campaign strategy.


People were taking pictures with it, sharing them on Facebook, etc. It was awesome.


The last thing to do was get plates so I could start cruising this thing around. And thankfully, everything went well! Got a regular title, with the original VIN number and now I'm all legal!


You'll notice it's got 2 matching taillights, the one on the left is the original that was still intact and just fine. The matching one I found on ebay, and am ashamed to say that I paid $70 for it :/
 
Couple of other things that have been done. I used the original headlight buckets and managed to retrofit a standard 8" sealed beam bulb in them. I found some fender signal lights (The ones that would face the driver) on a 70s Plymouth Horizon, and attached them to the top of the headlight for my front signals. Used a universal signal switch to wire it all in, including the brake lights.


I used the original ignition switch housing, and retrofitted a universal switch into it. Found an old International temp gauge from a tractor or something on ebay, and it works great. Also got a dual needle air gauge for the air bags. The original speedo/odometer is still there too, just for looks of course, non working.


I broke down and bought a new Viair compressor, it keeps up pretty well for the bags, but on the list to do is get the engine driven compressor going soon. Other than that, there's not a whole heck of a lot left to do. Small details sure, these things are never really done of course. But it feels good to have a running driving vehicle.

If anyone wants pictures of specific things, feel free to ask. I'll continue to update things as time allows, and hopefully I'll see some fellow Coloradoans at some car shows this season!
 
Congrats... Turned out great the chop and the bed really made it come together
 

Latest posts

Back
Top