Hey Mac, I was wondering if you could post a pic of how the pillar garnishes get installed. I have them and I was looking at them but I can't remember how they went on. With the chop, of coarse they don't fit any more so it makes it harder to figure out so that I can modify them. I think I know but I'm not 100% sure.

You are using an out of date browser. It may not display this or other websites correctly.
You should upgrade or use an alternative browser.
You should upgrade or use an alternative browser.
36 Ford Bobber Build
- Thread starter willyD
- Start date
Help Support Rat Rods Rule:
This site may earn a commission from merchant affiliate
links, including eBay, Amazon, and others.
DozerII
Well-known member
Very nice [cl
MercuryMac
Builder Junky!
There are two screws in each one. There should be two holes in the A pillar or two tabs with holes in them. I think the low one will be alright but the top one may have been right at the chop level. Hopefully it was a little higher. I might have an old extra cab with the A pillars bare if you need naked pictures.
Attachments


Thanks! On mine, there's a lip that looks like it should end up between the windshield frame and the a-pillar if that makes sense. So the lip would basically cover the terrible factory "joint" that I posted a pic of and wrap around the inside of the pillar with the edge near the door opening. I think that how yours are but its hard to tell if that lip really goes where I think it does. Am I right in thinking that?
On a side note, looks like your doors are maybe 35 doors...? They have the removable window garnishes which mine doesn't have but I think the 35 cab that I breifly had did have. I may be remembering wrong though. I am sure mine doesn't have the removable garnishes though. I'm sort of amazed at how many changes they made for each year of these cabs even though that are close to the same. All of those changes would require significant tooling changes so I'm surprised that they made them!
On a side note, looks like your doors are maybe 35 doors...? They have the removable window garnishes which mine doesn't have but I think the 35 cab that I breifly had did have. I may be remembering wrong though. I am sure mine doesn't have the removable garnishes though. I'm sort of amazed at how many changes they made for each year of these cabs even though that are close to the same. All of those changes would require significant tooling changes so I'm surprised that they made them!
MercuryMac
Builder Junky!
Sharp eye Willy, those are indeed '35 doors on a '36 cab. I got a little better deal on the cab because it had no drivers door, and I was arrogant enough to think I could just rustle up a door with one eye closed. Wrong mistake. The pair of doors that I finally found were '35's and really wrecked, so I fixed them.
MercuryMac
Builder Junky!
Willy, I took some more pics of what I think is a partial '36 upper cab, and from the front this time. I thought when reading your question that the lip you were talking about was on the A pillar, but now I think you meant it was on the pillar garnish. So, anyway I took the garnishes off of this wrecked cab and took two pictures from the front. I put the upper screws back in to tell you where the holes were.
Attachments


Thanks! I do still have the screw holes in my pillars so that's good. Can you take a pic in that exact same direction but with the garnishes either on or just held in place so that I can see how that flange on the garnish sits in the opening? Having these pics really helps me sort out how those garishness go on. I really appreciate you taking the time to help out on this.
Note to self: take pics of everything as you take it apart the first time no matter how simple. You never know how things change once you cut stuff up!!!
Note to self: take pics of everything as you take it apart the first time no matter how simple. You never know how things change once you cut stuff up!!!
MercuryMac
Builder Junky!
I never thought of it 'til I was posting those last pictures that I should have taken a pic of the garnish before I took it off. More pictures to come, stay tuned.
soltz
The Rat Captain
Note to self: take pics of everything as you take it apart the first time no matter how simple. You never know how things change once you cut stuff up!!!
How well I know

Looking nice [cl
MercuryMac
Builder Junky!


Mac, thanks!!!! That's what I was looking for. I thought that was how they go on but that confirms it. There is a notch on the garnish on one end and a flare on the other. Looks like the notch goes up with the flare on the bottom.
Man it's great that you have the same truck but all put together! Sure helps me out on these questions.
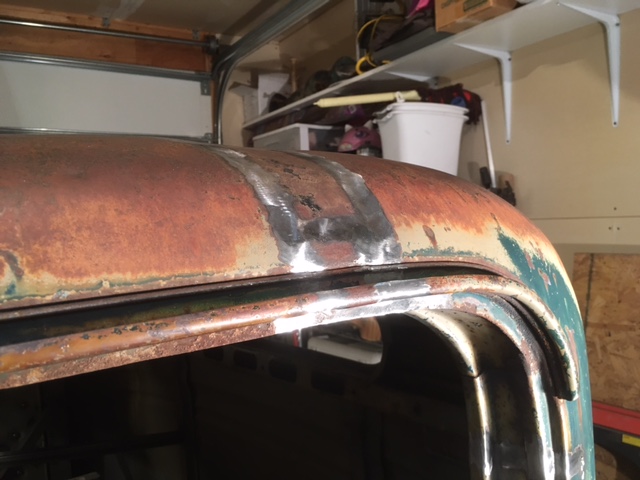
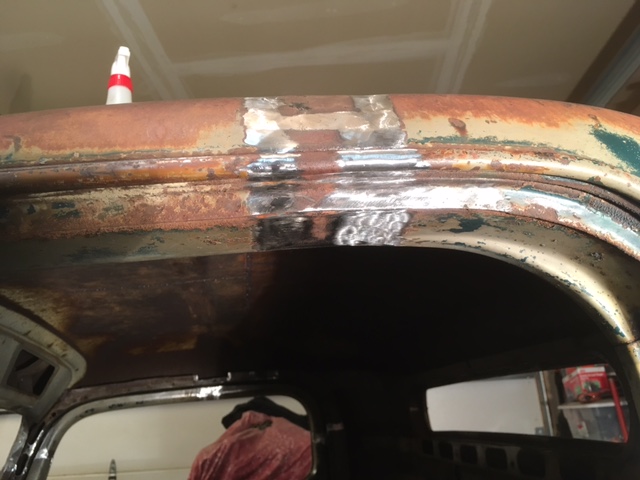
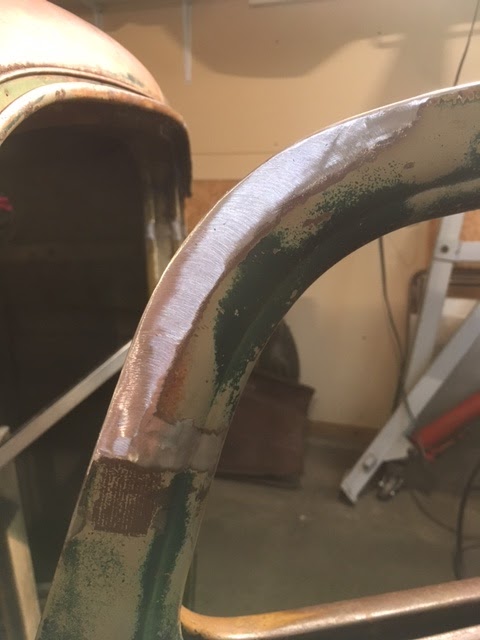
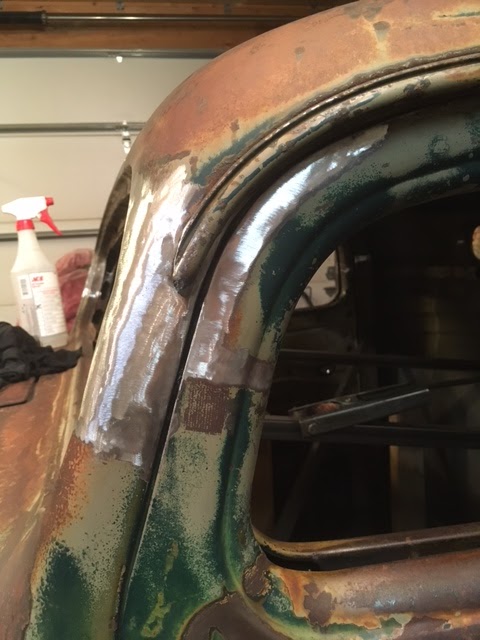
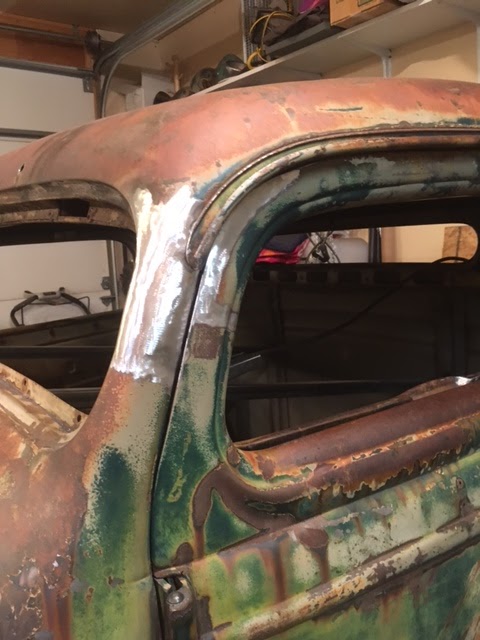
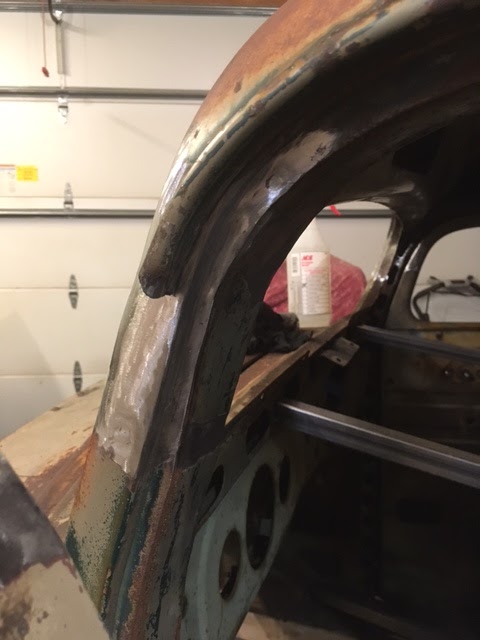
It was another night of grinding. Not much worth posting pics of but progress none-the-less.
Man it's great that you have the same truck but all put together! Sure helps me out on these questions.
It was another night of grinding. Not much worth posting pics of but progress none-the-less.

Torchie
Well-known member
Watching. Watching. Watching..........
I remember those days well.
Looking good.
Torchie
I remember those days well.
Looking good.
Torchie
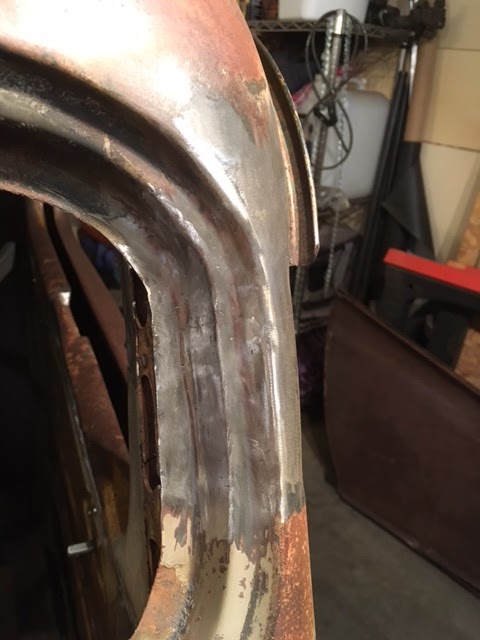
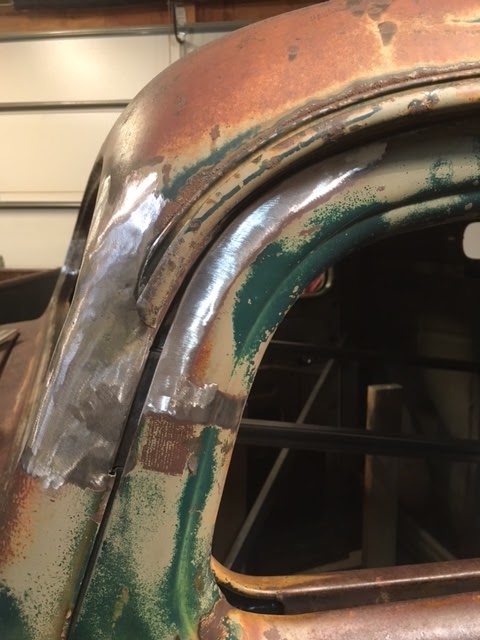
I finally got the drivers side windshield opening finished up. I also got a bunch more grinding done. I still have a ways to go but I can at least see the finish line on the chop now. Man, I'm ready to be done with this part and move on to frame and drivetrain stuff!
DozerII
Well-known member
Looking really good willy, you have way more patience than me. [P
Torchie
Well-known member
Looks great.[cl
Most people have no idea how much work goes into a chop.
That's why there are so many unfinished ones for sale.[ddd
Keep at it.
Torchie
Most people have no idea how much work goes into a chop.
That's why there are so many unfinished ones for sale.[ddd
Keep at it.
Torchie