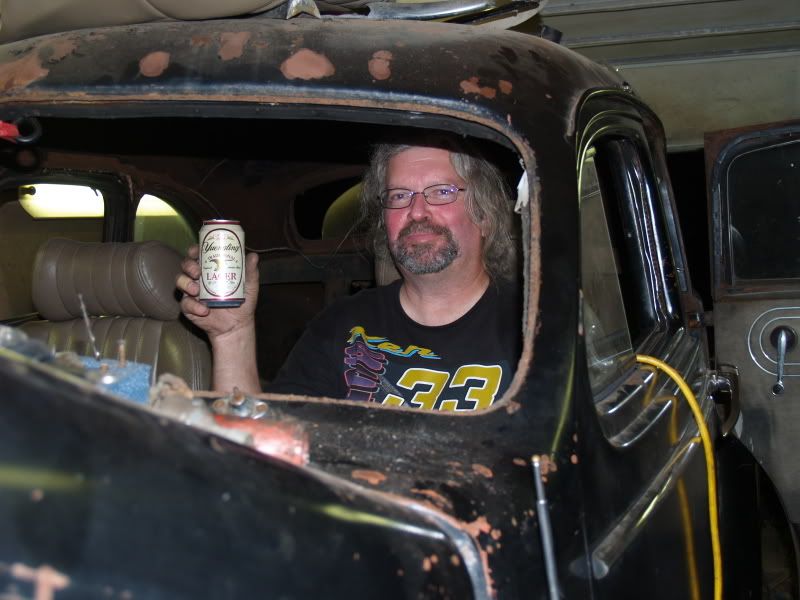
40 Studebaker build pics

Rat Rods Rule

Help Support Rat Rods Rule:

This site may earn a commission from merchant affiliate links, including eBay, Amazon, and others.
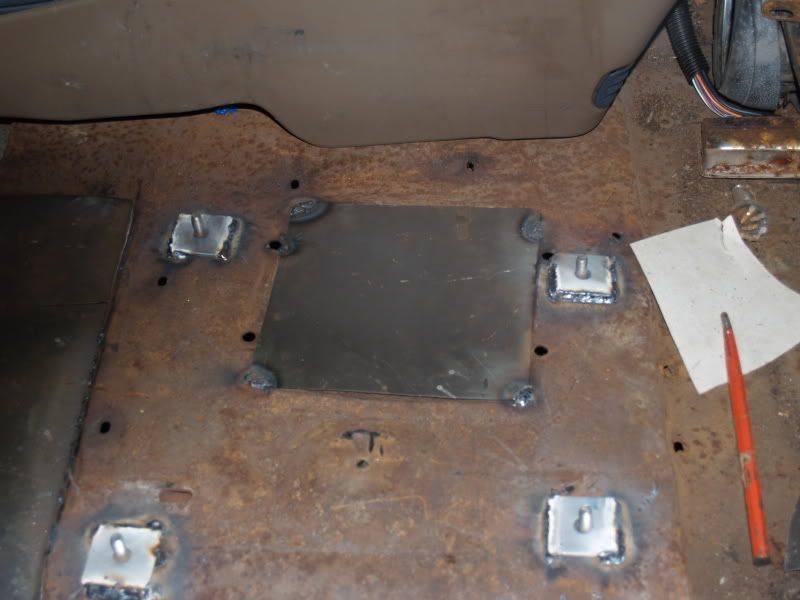
Here is a shot of the seat area. The Bonneville SSEi seats worked out darn near factory perfect. They sit on the rasied area of the original floor (one of the parts that was solid). You can see that we added bolts to the floor (welded into the floor) and then added the heavy plates around them and welded them up to give a good solid seat mount.

P8173047.jpg


P8173048.jpg


And here is yours truely holding down the newly mounted seat and enjoying his favorite adult beverage

P8173051.jpg


Well things are going back to normal.....I just got off the phone with work, and they need me to come in early today, so I will get more pics and more updates...hopefully in a few days. Our car club show is next weekend (see the shows area for details on the Wheels of Time), but I have Thursday off before the show and will be doing a couple hours work on the car, and maybe Donnie will get a chance to pick at a few things while I'm at work today through Wednesday.

More to come!
 
Lot's of good progress RoddingRon. Especially the floorboard and exhaust. Exhaust can be a pain and it's good to get that out of the way. Looks like the engine fits nicely.
 
I like your Stude and the work you are doing. Glad I'm not bothered by working for a living anymore. Say, is that yellow tube there so you don't have to get out of the Stude for relief after a few beers?
 
Seats are always good & that front windshield is *really* clean!!! :D
BoB


Yeah..the widshield is one of thse new ones that the bugs don't splatter against when your driving.....just don't yawn while your driving or you may get a free meal

I like your Stude and the work you are doing. Glad I'm not bothered by working for a living anymore. Say, is that yellow tube there so you don't have to get out of the Stude for relief after a few beers?

That is the drop light cord.....but now that you mention it....if I only would have left "one" of those holes in the floor I wouldn't have had to worry about recycling the beer.

Thanks guys for the support and the smiles. I'm stuck doing 12 plus hour days again so time for the Stude is gonna be limited for a little while and this weekend is the car club car show, so I'll be working there and not on the car. Problem is it's getting so close to moving under it's own power I can taste it, and that's the inspiration I need to keep hammering at it.

Oh well, it's 10:30 AM and I have to go get ready to leave for work:mad::D
 
MAN I LOVE THIS.... you dont know how much insperation this has given me! Maybe when we finish we can cruise together sometime!

Do you think the camaro front end will definatly work better? I think I am just going to take the flat head out and go with a small block
 
MAN I LOVE THIS.... you dont know how much insperation this has given me! Maybe when we finish we can cruise together sometime!

Do you think the camaro front end will definatly work better? I think I am just going to take the flat head out and go with a small block

First off....glad to inspire anyone that might be building a Studebaker. Yes the Camaro front clip (70 to 81 style) will work better then the S-10. The black 40 I posted in your "help me deside" thread was at our car show last year, and it had a Camaro clip on it. The width of the Camaro fit with the factory frame a lot better then the S-10.

Note that even with the Camaro clip you will have to relocate the motor towards the rear by a few inches from where it would originally mount in the Camaro frame. This isn't a big deal, but it's one of those things that you should plan for.

Because I'm doing a very similar car, I'll gladly help with any tips or tricks that I may have had to lean the hard way if it will help make your project go a little smoother....and yes you get yours done, I'm sure we can meet up somewhere and help spread the Studebaker word...Come h*ll or high water I'll be going to Charlotte in October with mine...can you get yours done by then?:D
 
hmmmm a challenge :D I will see what I can pull off HAHA what are the dates for the October show in Char.?
 
Charlotte is October 22 -24 (I think those are the dates...it's that weekend either way even if I missed by a day).

Knowing that I need to get some milage on the car before I drive it 600 plus miles one way, My brother in law and I worked on the car Labor Day Monday. I got the new brake calibers, pad and hoses on the frontend along with the new tires, and I got the steering column mounted and bolted into place. The 525 manual steering box works real nice and easy I'm happy to report.

P9015369.jpg


P9015370.jpg


P9015372.jpg


At the back of the car Donnie started bracing the rear cross member so that we can mount the shocks, and also so we'd have a place to mount the front of the gas tank. Once the reinforcing was welded into the cross member we decided that it would be more beneficial to flip the mount and re weld it in that way.....problem was before we could re weld it the welder ran out of gas, and I never got my spare tank refilled (Doh!). Anyway, here is a pic with the cross member flipped and (kind of) shoved back into place. Once it's trimmed a little better and re welded, we can throw in the gas tank and get the gas line run, and I can start fabbing the trunk floor (I mentioned before that Donnie has the welding certifications and he does all of the structural and otherwise important welding..I do the sheet metal fabrication and welding like the floors...I always kid that between to two of us we share a brain cell and can come up with some pretty good ideas on how to get things done). The channel laying on the rear springs is the front gas tank mount. Once the cross member is in place the channel gets mounted and then the gas tank.

P9015373.jpg


P9015378.jpg


The fuse block opening was cut into the firewall and the fuse block was mounted along with stringing the wires in the general direction where they have to go (using a wiring harness from a 1977 Chevy pick up, so everything is there as far as connectors, just gotta route and hook up things).

Still a ways to go, but if I can get at least one day a week to work on it like yesterday, it should be moving under it's own power very shortly then it needs to have some milage put on it to work out any bugs that may show up
 
any new news????

Not really any news, because of that work thing...still doing lots of hours 7 days a week.

I did get to play a little on Saturday for about 3 ot 4 hours. I started on the passengers side floor and found out that I need to build some new rockers real quick....the cowl and "B" pillar are only held together by the roof....not a thing on that side at the bottom. Nothing a little time and manipulating the molecular structure of some metal won't fix.

I am off this coming weekend, and plan on spending most of it in the garage and will have some (real) updates and photos next week
 
Man, it's been a long time

As much as I wanted to drive this to the Charlotte Good Guys show last October, it never happened. Because I didn't get the car on the road as wanted, I took a break from the car (actually work made me take a break...7 days a week and at least 4 of those days being 12 plus hours....I had no time to work on the car).

Anyway, with the nice weather starting to break, and work has backed down a little (only 6 days a week right now, and not long hours) I've been itching again to get the car on the road. I'm gonna ease back into this thread, and start with the one small project I did have a chance to do.


How do you take 70 year old glass tail lights (about 1-1/4" wide by 4" long inside) and make them 21st century safe?

P4186341.jpg


P4186342.jpg


First thing is to find tail light / brake light LED's that will maybe fit the old glass lens, I found these at Charlotte in October for $7 a piece. I figured for $7 each if it didn't work I didn't really lose that much.

P4186336.jpg


Next thing is to cut the things apart. I used a dremel tool to cut the lens off and then used a sanding barrel on the dremel to start shaping the usable part.

P4186338.jpg
 
To continue

Once the light circuit board was shaped and made to fit (some what) inside the glass.

P4186343.jpg


From there you use some clear silicone to hold it in place (you can see a small bead in the pic above. Next thing is what about all that open area that the light doesn't fill? I was looking for some plastic to fill the area with, when I stumbled across this stuff at the local Wally Mart....it's a plastic mirror that you can cut and replace your broken outside mirror on your car with. Now I know that LED's are very directional with the light they throw out, but the glas will still reflect some light back, so by putting the mirror behind everything it makes the whole light brighter.

P4186347.jpg


P4186349.jpg


Yes I had to scare everyone with the reflection of me taking the pic...but it shows how good this stuff reflects. Then you trace the out line of the lens and trim the mirror to fit.

P4186346.jpg


P4186345.jpg
 
and more....

Once everything was cut to fit and glued in with some silicone, I decided to fill the whole back of the lens with silicone. It'll make sure everything is water tight.

P4186351-1.jpg


I had to try it out by attaching the leads to a battery to see how bright the lights were. The pic with the brake light on was so bright my camera actually compensated and made the rest of the background darker. They should show up great when they finally get on the car......which by the way....I plan on going to work on tomorrow afternoon.

P4186353-1.jpg


P4186354-1.jpg
 

Latest posts

Back
Top