Roadster pickup from leftovers.

Rat Rods Rule

Help Support Rat Rods Rule:

This site may earn a commission from merchant affiliate links, including eBay, Amazon, and others.
Thank you, Paul. This step really puts me way ahead. Now I can start doing body work. I have to thank my Son Dan a lot for the help, he gave up his whole day yesterday to help me (more like I was helping him:eek:) when he could have been working on his Mustang.

Don
 
It's gonna be a shame to put anything over it.[dr You and some of the other guys are upping the build quality so much that I'm thinking of going pure Rat on the next project.[;)
 
Thanks, Bob. Funny you should mention that, Dan and I had a little "discussion" about that yesterday. He is pushing me to make this one nicer than I wanted it to be. I wanted it to be a little rough around the edges but Dan doesn't get that.

He spent hours grinding the subframe smooth and it will never be seen. When I told him I wasn't going to go through all of that he said "Fine, then I'll do it !" So I had a beer and let him knock himself out. :D

Now that a lot of the welding is done that I needed his help on I can go at my own pace and make the rest the way I want it. You should have seen his face when I told him I may paint it with a brush. :eek:

Don
 
There are drivers and there are showcars. Showcars are fantastic. The skill and talent needed to create them is amazing. The stress resulting from subjecting one to road conditions takes the fun out of driving it however. Don you might show this to your son by way of explaining that you just want some stress relief. :)

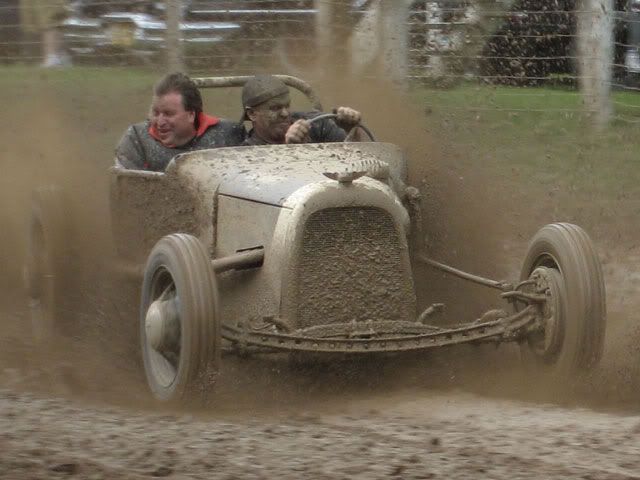
jalopy_showdown__2007_43.jpg
 
Haha, that is exactly what I am shooting for. :D I usually just use the airhose to blow the shop dust off of my 27 before going for a ride. I'm not exactly big on detailing.:eek:

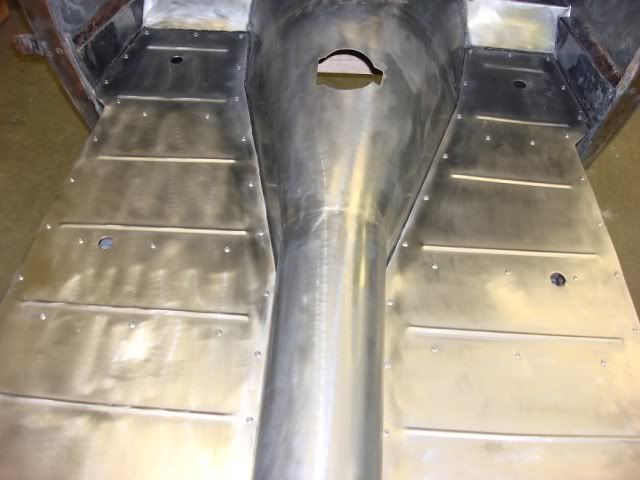
Tonight we went to the shop and got all the Clecos removed and then cleaned up all the holes with a 3/16 drill bit. After that we installed all 72 rivits so officially my floor is now done !!!!!![cl I forgot my camera, but will take some pictures tomorrow.

Next step is to clean up the rest of the metal in the interior and then I can shoot a couple of coats of epoxy primer on it all. Then I will flip it over and do the same to the underside.

Don
 
No more Clecos !!!!!!!!!! Last night we removed all of the Clecos and put rivits in their place. So for all practical purposes, my floor is officially done.

My next step is to clean up the rest of the metal inside the cockpit and then lay on a couple of coats of epoxy primer. Once that is done I will be able to flip the body over and prime the underside. Then bodywork can begin.

Here is how the floor looks now with all the rivits in place. Between the adhesive and the steel rivits, this floor ain't moving.

Don

myrpufloordone002.jpg
 
So for all practical purposes, my floor is officially done.

myrpufloordone002.jpg

So for all practical purposes, your floor is officially beautiful..

If my floor looked like that,I'd use the throw away paper floor mats like dealers use so I didn't mess it up.:D:D

Nice work!!
 
Thanks Tecster and Tim, much appreciated. I feel pretty good seeing the floor done. I was thinking I was going to have a Flintstone mobile for a while. :D

Next step is primer on the insides and undersides.

Don
 
Don this build is amazing.

A question on the frame. Is it the same width from front crossmember to rear crossmember? I am running a y block with a 36 cab. Enclosed driveline and a 36 top loader. I want my setup as tight and fit as possible.

Dennis
 
Dennis, no, the frame gets wider as it goes back. The front crossmember is 25 inches wide and the back one is 34 inches wide. It just looks a little sleeker when you do that and it gives a little more room around the transmission than if you just made it 24 or 25 all the way back.

I usually do the frame at 24 wide in front but I wanted to run the Model A grille shell and have it slip down inside the rails, so I needed that extra one inch. Hope that helps.

Sorry I didn't see your question until just now.

Don
 
Thanks guys. :) I really need to start working on my rpu again. For the past few weeks I have been sort of in one of those periods where you just don't feel like doing anything on it. To get myself reinterested I decided to do something fun on it instead of making the patch panels I should be doing. So I decided to remove the front axle and drill some lightening holes in it.

I decided to do 13 holes that are 1 inch in diameter. That spaced them 2 5/8 inches apart. I looked at the drilled axle in my 27 for inspiration and that is the spacing I used when I did it years ago. To get a scribed mark down the exact center of the axle I made a block out of 1/4 inch steel that was 1 1/8 wide x 2 inches long. In the exact center of it I drilled a hole so I could put a sharpie in there and when I ran it along the trough in the axle it made a perfect line right down the center.

Next I found the exact center of the axle and made a mark for the first hole, and then spaced the remaining holes out every 2 5/8 inches from each other. I drilled some 5/16 holes as pilot holes and then worked up to a 1/2 inch drill bit.

This is where I ran into a problem. I want to end up with 1 inch holes but first I decided to do them all at 7/8 and then finish up with the 1 inch bit. When I drilled the first two holes the 7/8 bit worked well, but on the 3rd hole it became dull and wouldn't cut. This axle is a forged original Ford and it is VERY tough steel. So I quit for the night and figured I would go buy a new drill bit the next day.

I have never had any luck sharpening drill bits and I have a Drill Doctor that works great, but it only goes up to 1/2 inch bits. A new 7/8 bit was going to cost me about $25, so I decided to go on line and learn how to sharpen drill bits the right way. There were a ton of instructional videos on YouTube and I watched about 4 of them last night and learned what I was doing wrong.

Tonight I went to the shop and tried sharpening the 7/8 bit the way they did them in the videos, and when I tried it the shavings started flying......I had actually sharpened the bit on our bench grinder ! [cl I was able to actually drill the remaining 10 holes with the newly sharpened drill bit, and saved myself about $ 25.00. :D

I finished up with the 1 inch drill bit (which I also sharpened) and then I lightly touched a 1 1/16 bit to each hole to take the sharp edge off. I got the axle reinstalled and I think it looks pretty good, and I learned how to sharpen drill bits in the process.

Don

my27drilledaxle015.jpg
 
Last edited:
David, I forgot how much work and time go into drilling one of these things. I had to set up the drill press 4 times for each of the 13 holes so I could keep drilling larger holes until I got to the 1 inch size. I have two nights in it, about 4 hours each night. I don't see me on Car Warriors any time soon at that pace ! :eek:

Don
 

Latest posts

Back
Top