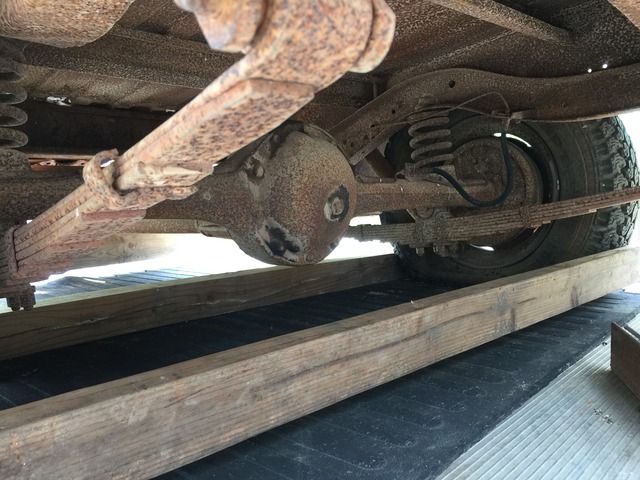
49 chevy truck booger

Rat Rods Rule

Help Support Rat Rods Rule:

This site may earn a commission from merchant affiliate links, including eBay, Amazon, and others.
it worked like a treat!:)

IMG_3050_zpshnb0jjrf.jpg


my neighbor is always down for anything and had a small tractor with an 1 7/8 ball. helluvaguy
Screen%20Shot%202016-05-14%20at%204.57.48%20PM_zpsfqy464se.png


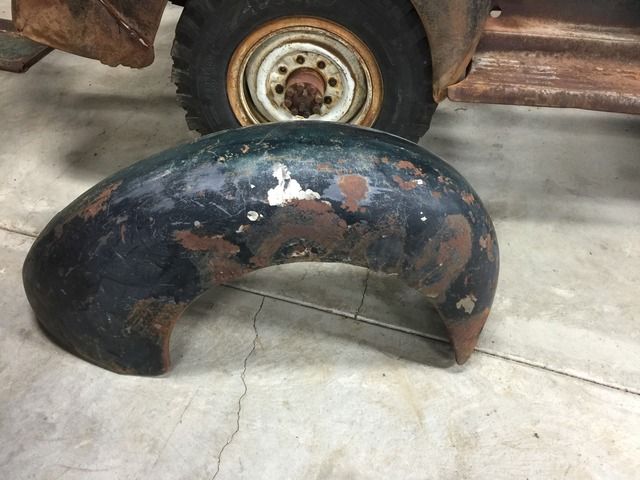
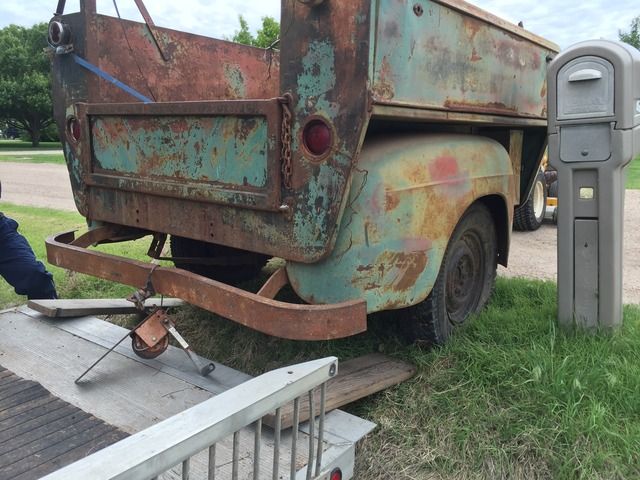
I looked inside the fenders and this is older than I thought. someone bolted the ford fenders on the bed at some point in history, it had swoopy fenders first. the frame is an early chevrolet or gmc, looks like a 38-46?
IMG_3030_zpsslf30d7h.jpg


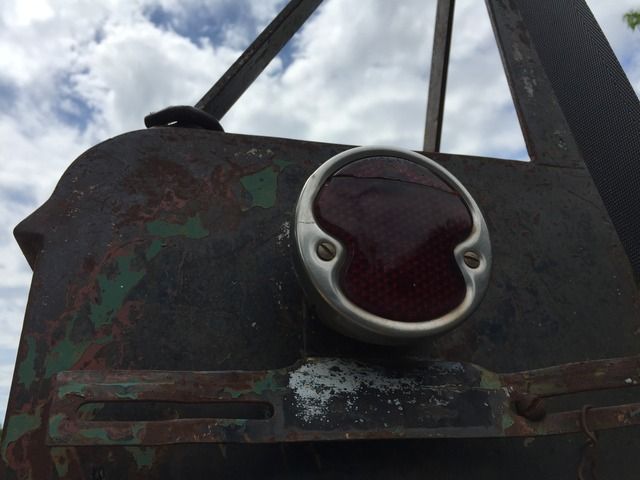
it had what looked to be a GMC taillight on one side but this little jewel was on the other side, looks like a 1932ish ford DUO LAMP with the license bracket. someone will probably want this!
IMG_3039_zpsqa5lmaeb.jpg
 
be forewarned, I am about to talk about wiring, which makes some faint like goats and others eyes roll back in their heads. but as a sparky tinkerer by birth and an electrical engineer by schooling I absolutely love this stuff. I will sprinkle in some mechanical stuff to keep people awake if they dont happen to share my particular bend.

most of the reason I love using the 98-03 s10 donor is because of the bussed electrical system that is very similar to what is still used, in fact the PCM is an 0411, similar to what all the LS swap guys will use. this makes it ideal, with the high pressure fuel system if you want to add an LQ/LM/LS motor its only a couple mounts and an interface harness between the motor and a tuned PCM, the gauges will all still work and everything will plug in. I dont have plans for a swap, but its nice that it can be done.

this is the mess that I will pare down for my simple truck, the engine harness is still on the engine, the rear harness is on the frame, so I need the body and dash harness today.

IMG_3057_zpslodsefce.jpg


after taking out what isnt needed, this is what I am left with, a pared down body harness and complete dash harness.

IMG_3065_zpsi7cxjsvb.jpg


I also dug out the correct column harness for my application, column shift automatic, key security.

IMG_3063_zpsjrhxqqaj.jpg


I rummaged around and found the firewall cutout

IMG_3066_zps4fcwfqsf.jpg


which I duplicated on the upper firewall. kylie put the 47 GMC cutout lower, under the pedal box, which caused a lot of problems with wire routing, my plan is to mount as much in the same area as stock.

IMG_3061_zpsoo3pegml.jpg


I had to plug up a hole, its dark under there so I forgot to touch up my overzealous cut but I will go back and fix it.

IMG_3067_zpspl8q6yqw.jpg


IMG_3068_zps95k3niwp.jpg


now just need to route the dash side, I may need to pull the pedal box to do it correctly, but I can already tell there will be almost nothing showing underneath, a big improvement. I am on the left side of the wiper arms too, so no interference problems.

IMG_3069_zpsgprui2ii.jpg

IMG_3070_zpsgtrplhyh.jpg


I am ashamed to say how long this took. the S10 tank uses an oring and lock ring, you have to push down the pump with one hand and operate the lock ring with the other, but the o-ring it just a bit bigger than it needs to be. lots of pushing, grunting, swearing, and holding my tongue right and

IMG_3056_zpsazey65dn.jpg
 
I need to mount up the radiator, from the GMC I know it will fit but still, trimming the inners was a trail and error operation. I will tin it back in, but I need to mount the AC condenser first.

IMG_3054_zpstvjholll.jpg

IMG_3055_zps6khrz895.jpg


hey look at that, the factory radiator hold down/fan shroud will fit with a little work.

IMG_3059_zpshnendudi.jpg


and the hood shuts like a dream

IMG_3060_zpstifykqx3.jpg


more to come! I could rush around and plug some things in and hear it run but I want to get the gas pedal and steering finished first.
 
still massaging the shoulder, seems to tighten up every couple days. started a big clubhouse swingset for the beeps, but they "forgot" all the high grade bolts in the kit so I only got about half way done, and its been raining walls of water since. the gutter guys phoned it in, I specified 6" K gutters with 3x4 downspouts (low slope roof with a lot of surface area) and they barely X cut for the downs, so every rain is a clog/overflow and the sump runs and runs. I fixed them with some nice downspout transistions, gotta do everything yourself now a days it seems.

I took out the pedal bracket and cut a wiring window in it and added a foot at the bottom for extra strength on the cantilever of the steering column torque
IMG_3088_zpsnfnlmvwi.jpg


finished cleaning up the wiring pass through
IMG_3090_zpssfcjhp64.jpg


painted everything silver so it would reflect light and let me see what was going on, reinstalled the pedal mount.
IMG_3095_zpspfdkzmmg.jpg

IMG_3096_zps03ohlsuf.jpg


wire window works
IMG_3097_zpsuni68yd5.jpg


I took out the ignition switch and routed wiring
IMG_3098_zpssmvr2qbx.jpg


from under the hood
IMG_3101_zpsjohjntt4.jpg


column and pedals reinstalled and everything routed and hooked up. I had to reverse the snap bracket for the relays but it worked out perfect. The remaining harness is for the column wiring. yes I lost the special brake clip haha, that makes about 10.
IMG_3102_zpszxvpgbwu.jpg


IMG_3103_zpsxh0jg9jc.jpg


so much cleaner than the 47 GMC was, I almost want to call Bubba and have him bring it back so I can redo it. oh you cant see it but I added the triangulating brace to the existing dash brace. the column only wiggles a tiny bit now, no worse than an s10.
 
I went and visited wayne a last time to pick up a few things, he finally wore me down and I picked up the 41-46 visor I had previously been passing on (split infinitive?). I am not a visor guy but its not about me, is it?

IMG_3135_zpsuzz7izgd.jpg


visited another guy two towns over, he had a 40 with a 46 front end and a good looking bed, I wanted the bed but he wouldnt separate.
IMG_3137_zpsmsgejqai.jpg

he said I could dig through his piles though, which were extensive. mostly 20s-30s stuff, almost bought this 36 chevy cab and grille
IMG_3149_zpsngymk4cy.jpg

IMG_3148_zpsogref0fv.jpg


he had other neat stuff
IMG_3138_zpsnrsr8aaz.jpg

IMG_3144_zpsud2sfnsg.jpg

IMG_3140_zpsgiri4g1c.jpg

IMG_3141_zpsusxuioys.jpg

IMG_3150_zpskvdrdzfd.jpg
 
tried to buy this for wall art but didnt have the strength of stack
IMG_3142_zpsseucrhk4.jpg


I did trip over a 46 passenger fender though, which I bought. maybe I will put the chevy fenders back on that utility bed...
IMG_3145_zpsk5kwpr7v.jpg


got a friend in the garage, he hides by the opening of the garage door and jumps out and scares (eats) all the bugs that wander in.
IMG_3111_zpseefa6wkh.jpg
 
spiderbro disappeared today I think my grinding scared him off.

tore the place apart for this.
IMG_3166_zpsqhxqet6g.jpg


patched the old steering column hole and reused the section of the s10 firewall to make the new one and mount the gas pedal
IMG_3167_zps8crqhorr.jpg

IMG_3168_zpse4dlrqsy.jpg

IMG_3171_zpsnulz6di2.jpg


chopped out a section of the old s10 tunnel for the small tunnel I needed
IMG_3169_zpsjxbywya3.jpg

IMG_3172_zpssjyt2pbx.jpg


baby went to sleep early, no more grinding tonight
 
I cant see throwing something away just to go buy it again!

finished the tunnel, seam sealed and painted. cleaned the garage, wiped out!
IMG_3176_zpsfjqxhkch.jpg
 
Man...you are not wasting any time...

Wish I had your stamina.. Nice work on the wiring and the whole darn set up...[cl
 
had to take a break for a couple weeks. family gatherings around graduations and other parties seem to happen. built a swingset for the beeps, had some torrential rains that played havoc with our gutters and foundation backfill. I also had to tear down the metal shed in the back yard, two storms had battered it and ripped the doors off. before I tore it down though the big wood shed needed a 6ft double door framed in place of the man door. then build some doors, then re-roof it, the same storms had torn the asphalt roll off. this time I went with 26" metal panels and screws with washers. now the mower is dry and I used the truck to pull down the metal one. it was lousy with brown recluse and black widows, I had one fall in a hole in my shirt and give me a bite but he was an adult and did not put any venom in the bite. two distinct fang marks though!

anyway cleaned out the garage of the shed and swingset stuff. wolf spiderbro is back and has a girlfriend, they are tag teaming bugs in the garage, which is nice. no picture, I wish I had a video though because when I picked up some ratchet straps she jumped down and did the funniest dance, letting me know she wasnt a pushover. I let her be though, no ill will to wolf spiders, they are the best kind to have.

tried out the bench, funny that rustoleum ivory is too yellow for the seat and krylon ivory is just right. guess which I had on hand? :rolleyes:
IMG_3203_zpsmispgfva.jpg

IMG_3204_zpscwcbbhwa.jpg


looks okay in the picture but is not. Also, the special lights I had squirreled away on the shelf, I was trial fitting them and she who shall not be named was putting something away.

IMG_1143_zpsvkni8avx.jpeg


sigh.

more parties and bbq this weekend, then I will be back at it. so close!
 
here is the test panel showing the color difference. the rustoleum is on the left, krylon on the right.
IMG_3233_zpsjclw2jd6.jpg


sanded off the rustoleum ivory and painted krylon ivory today. I worked at a business that sold steam mops and had an overstock of microfiber mop pads, I seriously have a couple HUNDRED of these around. they work nice as tack rags
IMG_3231_zps4zlcbpyg.jpg

IMG_3225%201_zpsrz641grc.jpg

IMG_3230_zps1t5scr76.jpg


I have a better glovebox door, ignore the overspray. it wouldnt come off, the screws are rusty and so is the hinge, so I worked around it. I plan to leave the speaker grille rusty because its a super slippery slope. right now its just a painted dash (need a wet sand, only "signed my name" once) but as soon as you start cleaning stuff up it can really start looking amateurish to paint silvers and redo the blacks... then the knobs look out of place. I am looking for cleaned up, not restored. the next guy can fix it.

in that vein I took apart the gauges. they were rusty, which is ok because I need to relabel them anyway, different min/max on a few and backwards operation on a few others. the 4 gauge label is ok, and I might even be able to just use a metallic sharpie to draw on the new values, but the chrome rings were just terrible. first picture is a reminder from earlier.
IMG_2641_zpsiym14wlm.jpg

IMG_3228_zps5kcfvvds.jpg

IMG_3229_zpsboe9obtn.jpg


I disassembled and sanded with 2000 grit and then steel wool. much better and fits the look I am after, will look great with the rusty speaker and dulled stainless.

IMG_3226_zps4suypyjl.jpg

IMG_3227_zps0y0vg5ti.jpg


I need to pick up the ribbon cables for the gauges, and I think I will put in molex plugs this time so disconnecting it isnt such a chore. I have to fix grandmas mower tomorrow but I am hard at it this week, glass install is next!
 
I tried a metallic silver on the speaker and ashtray, passable.
47964514-34de-43ab-bf13-0113d5fce9e5_zpsfz6gge4o.jpg


I tried offsetting the ac condenser to the passenger side but the pipe kept the hood from shutting
IMG_3259_zpsrwuuuwf1.jpg


so I trimmed the drivers side a little more and had great results
IMG_3261_zps6ej9fpwq.jpg


I need to whip up a mount, the condenser sandwiches (like original) ok but the plastic piece would look out of place.
IMG_3263_zpsmpvs0qit.jpg


and the reason I am slower than normal, my daughter graduated high school with honors, almost a full scholarship, works 30 hrs a week, and hits dingers on her softball team. mom and I talked it over and replaced her 15 year old 190k focus svt with a low mile mini cooper. 6spd of course, she is proud that she is one of only a few kids in her entire school that can drive a stick. here I am flushing the coolant and polishing the headlights and treating the leather with leatherique (amazing stuff)
IMG_3249_zpsa1tuf5wd.jpg


I did get the passenger door glass/seals in, well halfway. having trouble getting the glass to seat in the metal frame. replacing the rubber wiper in the door was fun on a bun too (it wasnt fun)
 
in order to have a hit list on the windshield, you need to have a windshield. If you havent done this, start by threading some 1/8 nylon paracord in the channel that will go to the pinch molding. then install the two glass halves to the gasket. it actually takes more grunting and sweating and swearing to get the rubber on the glass than it does to get the windshield seated. I used some silicone spray to lube the channel and thankfully didnt need to tape the gasket on, but some might. I had the common pinch in the passenger corner, which doesnt make a lot of sense but c'est la vie. Seriously took 30 minutes to get the cord and glass in the gasket and less than a minute to seat the windshield. start by shoving and pushing the gasket into the channel as close as you can get it to the pinch, then carefully, starting from the middle bottom, pull the paracord out so the gasket overlaps the pinch. every foot or so, give the windshield a smack from the outside where the gasket is already over the pinch to help seat the windshield. go all the way around to the top and redouble your smacking from the outside, you will see the whole thing physically move and seat as you go. repeat for the other half!

IMG_3316_zpsuctxq0we.jpg

IMG_3317_zpsh24fozr7.jpg

IMG_3319_zpspdticrqy.jpg

IMG_3318_zpsiwxns2wm.jpg


so now the truck has mostly new glass and I can put a worklist on the windshield now.

which brings me to my next question. I had originally thought to laminate the rear window with its bullet holes I plan to plug but not repair the bullet holes in the back of the cab, and it does add a bit of character, but maybe its kind of hokey. I do have new glass. the guy with the 47 loved the broken back window, and it didnt even have the 30/30 holes in it.

IMG_3320_zpsxpc8yprz.jpg

IMG_3321_zpsdydrvv3k.jpg
 

Latest posts

Back
Top