MAIDEN Build. 46' IH Rat Truck

Rat Rods Rule

Help Support Rat Rods Rule:

This site may earn a commission from merchant affiliate links, including eBay, Amazon, and others.
Ended up at Harbor Freight and got this setup. Then found the small little schrader valve at a local auto parts place. I need to drill the mounting holes in the bottom plates and weld on the mounting studs in the upper cups. Then I will be able to mount it all in and test the bags out ; )

IMG_20120709_182817.jpg
 
My progress is sure a little at a time! But it's still progress. Finished up the bags today. Real happy with how it turned out. Bags are straight up and down and lift straight up without any lean or tilting like it was before. It easily lifts the suspension to the bump stops. I may look at it some more and see if I can get away with shorter bump stops so it could lift a bit more. But it sure drops. I'm not sure if the suspension bottoms out or the internal bumpstops in the bags is what is keeping it from going lower. Either way, it's plenty low. It will drop even more when I put the Centerlines on. These Jag wheels are 16" with a 75 profile tire. I'll get 1.5" - 2" more with the 15" BFG's I'm gonna run. As it sits with the monster 16" Jag wheels and tires on, it measured up this way.
Center of the fenderwell Lifted - 29" Dumped - 23.25"
Jag crossmember (middle) Lifted - 9" Dumped - 2.75"
Bottom of my grille Lifted - 10.5" Dumped - 3.25"
Bottom of Frame at the grille Lifted - 13.5 Dumped - 7"

The bag air inlet actually lined up!!!
IMG_20120710_123209.jpg


IMG_20120710_123602.jpg
 
Last edited:
Got going on the horn last night for whatever reason??? Just felt like pimping something out. Took it all apart and cleaned it up. Stripped it down and brass'd the cone and repainted the body. Made a new gasket and put it back together. Looks fantastic. Like the hinges and door handles, I need to shoot some clear over it to protect the brass finish. I'm kinda likin' the brass brush trick. Takes a lot of work but it's worth it. Had to test her out as well ; )

Here she is the first time I saw her. Knew right then I had to keep it in the build.

64990df9.jpg


Breaking it down

IMG_20120711_220631.jpg


Then I took pics of it all stripped down, parts laid out all neat. Then when trying to upload the photos, ended up somehow deleting every photo on my phone:eek:

Oh well, here it is now.

http://s7.photobucket.com/albums/y274/saput/?action=view&current=VID_20120712_163838.mp4
 
Mysteriously, my pics are back on my phone? Hmmm. The paint I used is a matte clear. Turned out wonderfull.

IMG_20120712_130559.jpg


IMG_20120712_152401.jpg


IMG_20120714_163953.jpg


IMG_20120714_194548.jpg


IMG_20120714_194629.jpg


This last one shows an actual piece of solid brass to compare the finish to. In person it's almost dead on.

IMG_20120714_194704.jpg
 
So today I figured out the shock mounts. I still need to finish them but the overall design is done in terms of them working. The suspension cycles from bumpstop to bumpstop without the shocks bottoming out. There is an inch of shock left when the suspension is fully bottomed out and at full height(upper bumps) the shocks are about an 1/8" from being stretched all out.
I havn't decided how I'm going to finish these as far as looks go. But my big decision is to have them bolt on or welded to the frame..

IMG_20120714_195309.jpg


IMG_20120714_212829.jpg


IMG_20120714_214743.jpg


IMG_20120715_135551.jpg


IMG_20120715_135614.jpg


IMG_20120715_141431.jpg
 
Finally finished the shock towers. It's been 100+ and being bundled up to weld sucks but what's a little sweat when you make progress.
I'm gonna tack them on for now. I've been using .035 flux-core all this time and have been holding off finish welding anything on the frame as far as suspension and such goes until I get a gas setup for the mig. I'm moving to the rear now. Gotta get the leaf springs mounted up. I will fab up the front spring hangers but am now thinking about using leaf spring sliders rather than shackles. I really like the way they look and it will mount the rear spring eye higher than I could have with shackles. I'm not sure I will find any sliders that will work with my Explorer leaf springs though. Seems they are all made for chrysler springs. I'll keep searching or maybe use different springs. My Explorer leafs are 2.5" wide but the bushing sleeve is 3" wide. The bushing diameter is 1.75". The sliders I've found, Afco, Speedway, Summit... all have a 1" bushing for Chrysler spring eyes. If I can't find any, maybe I can have a couple reducer sleeves made up that are 1.75" OD/ 1" ID. press them into the spring eye and them the solid slider bushing into the sleeve. It's a thought.

IMG_20120721_104639.jpg


IMG_20120721_115055.jpg


IMG_20120721_115032.jpg


IMG_20120721_223523.jpg


IMG_20120721_223545.jpg
 
Started fooling with the rear suspension. I ordered the spring sliders pictured above. Wanted my basic parallel leaf setup to at least be different. So I started fabbing up the front spring hangers while I wait for UPS to bring me my sliders. I realized I'm out of any thick plate for making stuff. So, like I did with the back bumper that used to be on the truck, I had to recycle a part of the original truck back into the build. This time it's the bed side mounted spare tire holder. It's loaded with good OLD 5/16" steel. Giddy up!

IMG_20120729_170621.jpg


I used 3" pieces of 2"x2"x1/8" square tubing between 2 side plates of the 5/16". Then just boxed the backside. Very solid. Once again, I'm seeing how hard it is to make 2 identical parts. But then again, using primitive hand tools like I do, not sure it is really possible. They are good to go though and measure out the same. They will sit half on and half off the bottom of the frame rail. The off portion is inside the frame. I will box in the frame above the hangers and gusset the hangers to both sides of the frame and on the back side of the hanger on the frame rail. Hard to explain but you will see. I won't have the sliders until mid next week. Then next weekend I am going to see Iron Maiden in the bay area on Friday night and up here in Sacramento area Saturday night. So I won't get back on it for at least a week. Here's the start, I'll post pics as I progress. Don't judge until they are finished. Like the front shock towers, they don't look like much until they are finished.

IMG_20120729_125221.jpg


IMG_20120729_171627.jpg


IMG_20120729_170552.jpg
 
Well, got the sliders I ordered. Got home from work last night and the box was sitting in the back of my truck, right where one of them will be installed ; ) Then I opened the box!!!!!!!! The photos I posted showing the Liquid Iron sliders does not give a good representation of their size!!!!! These things are fricken huge! What was I thinking??? They are obviously for extreme offroad trucks that still use leafsprings. They are so overkill for my truck it's not even funny. But, they are here, paid for, and will still work I guess. Gonna look kinda goofy on my frame though!

IMG_20120802_103059.jpg
 
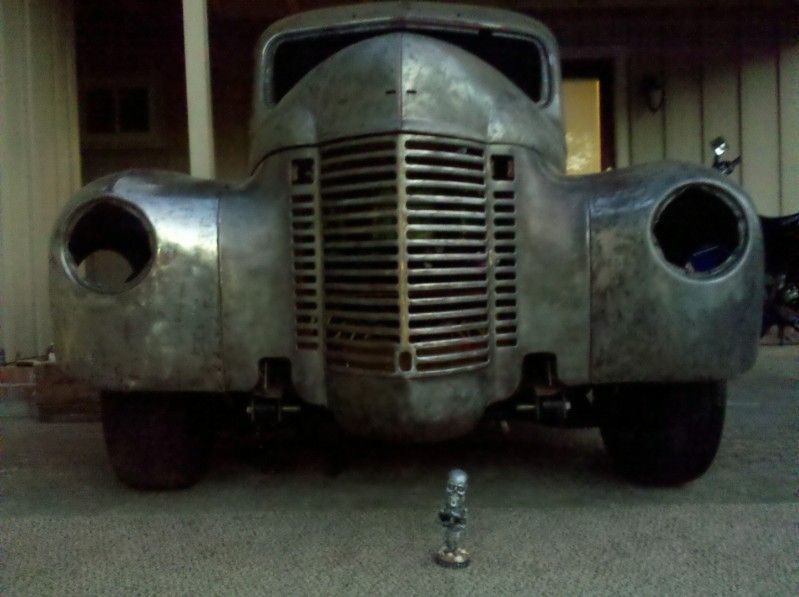
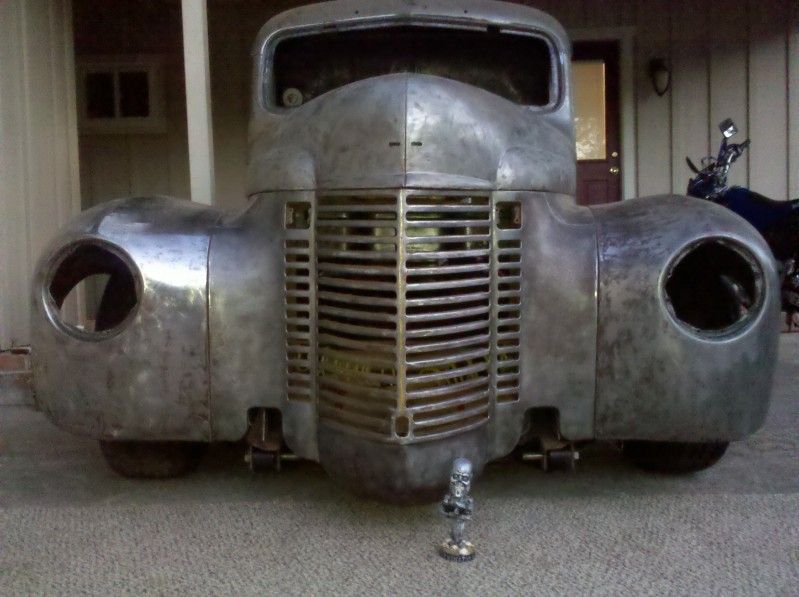
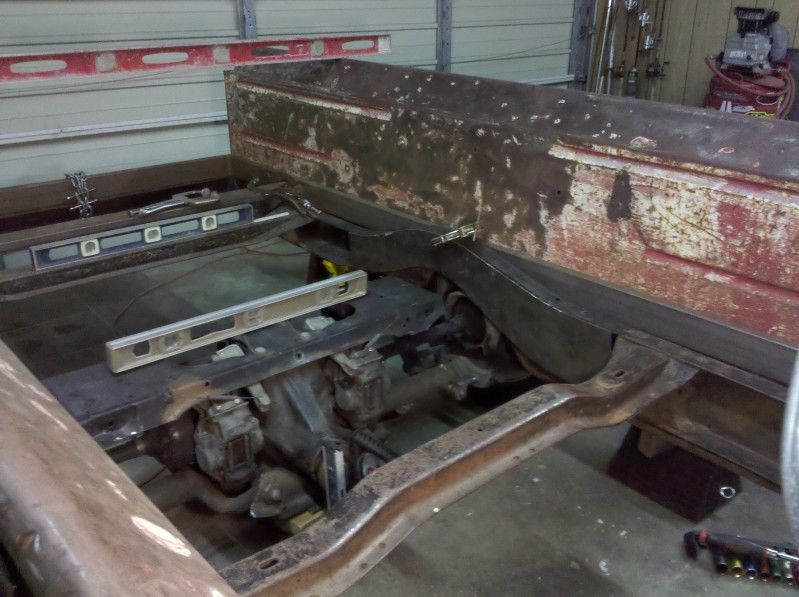
Been a while since I've updated. I've decided to go with the Jag rear and worry about changing the gear ratio later. So here is where I'm at.
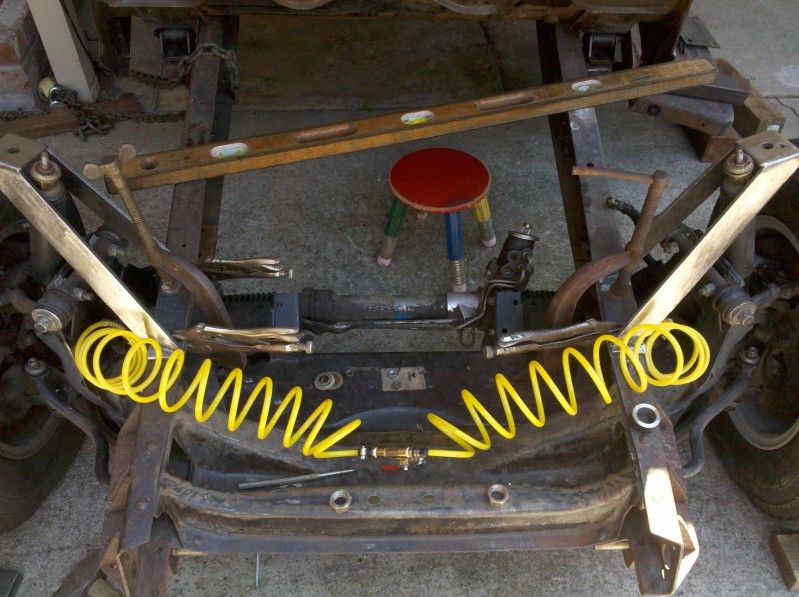
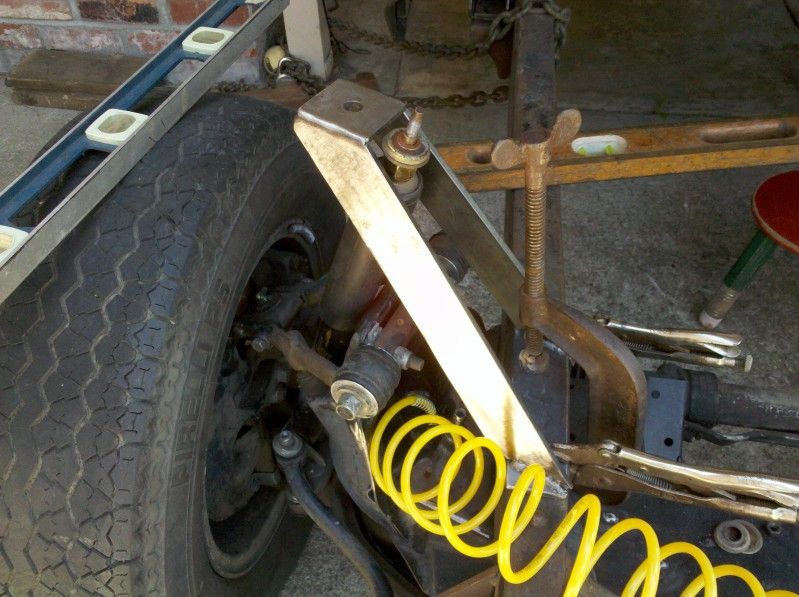
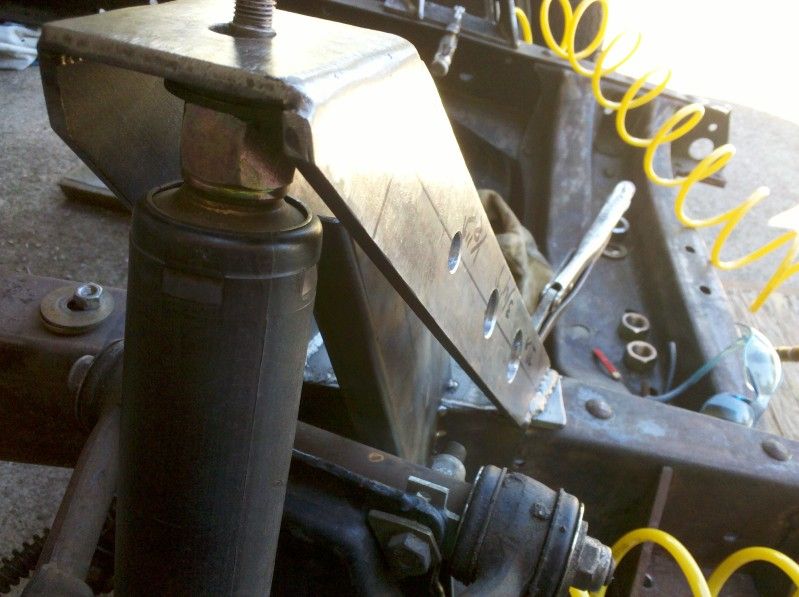
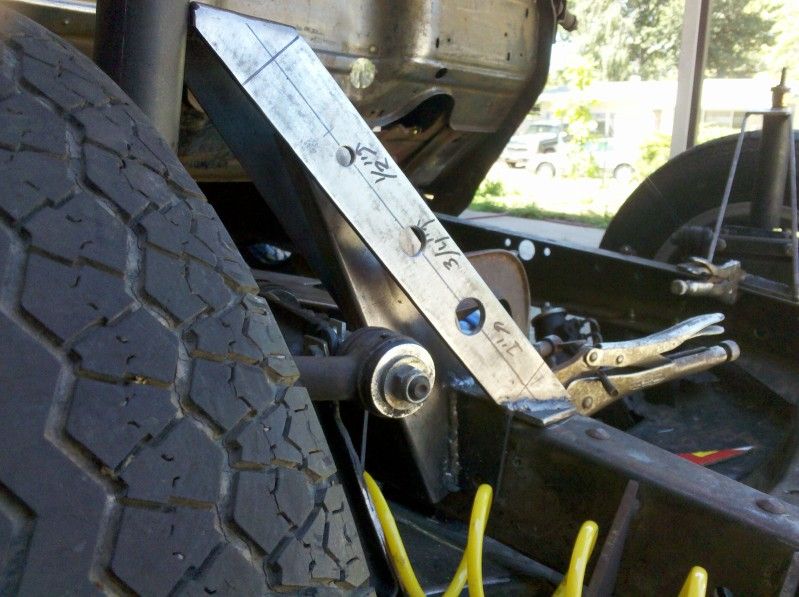
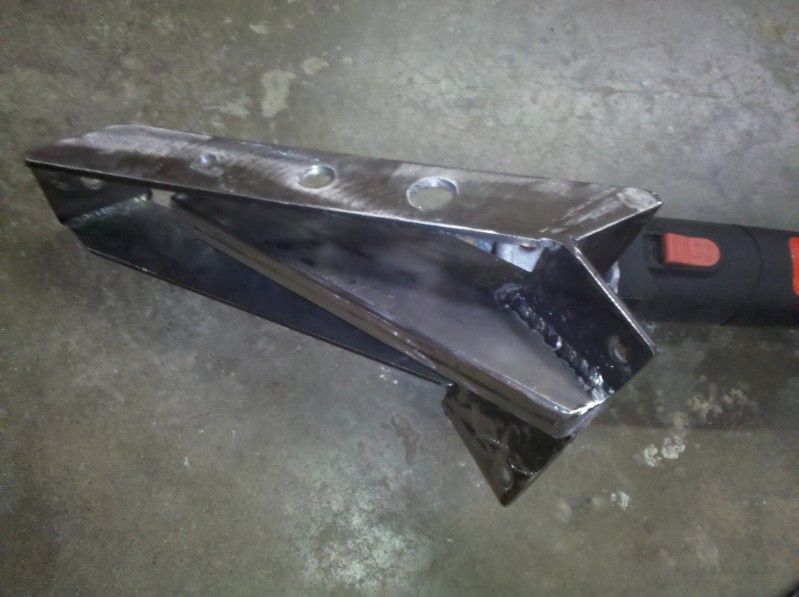
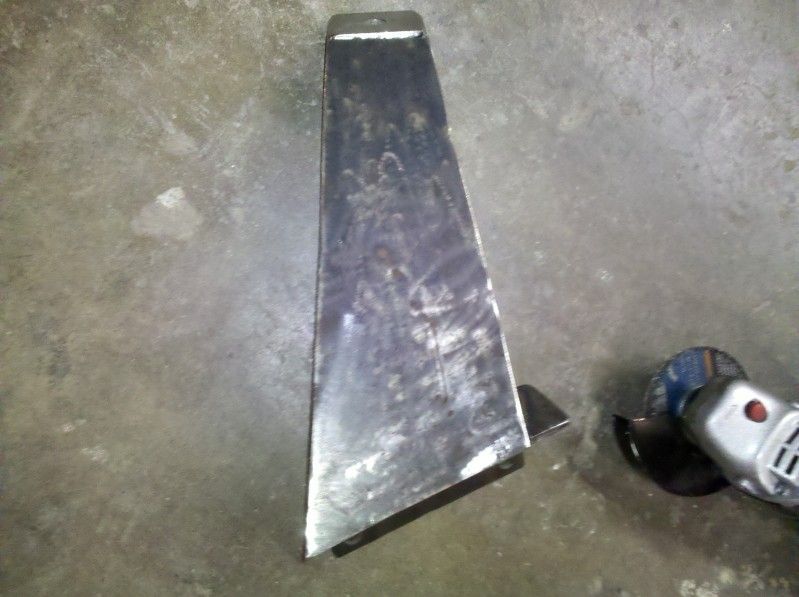
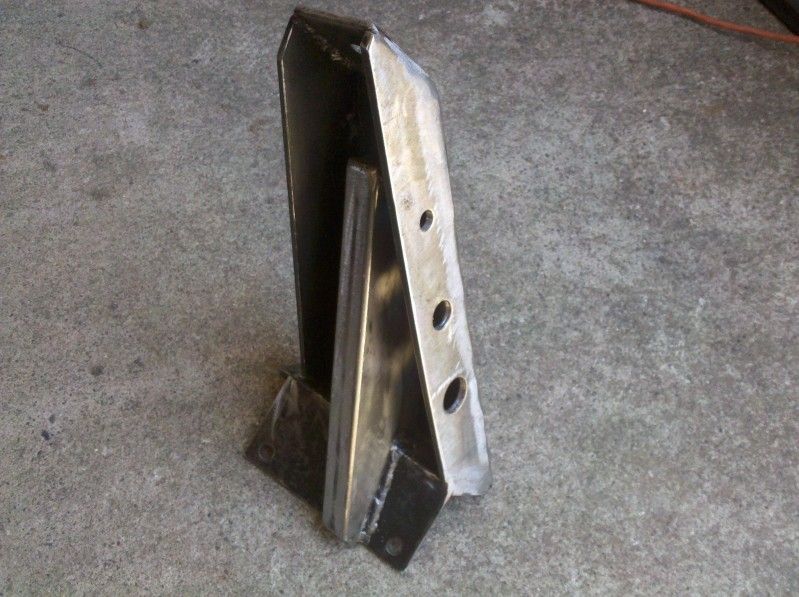
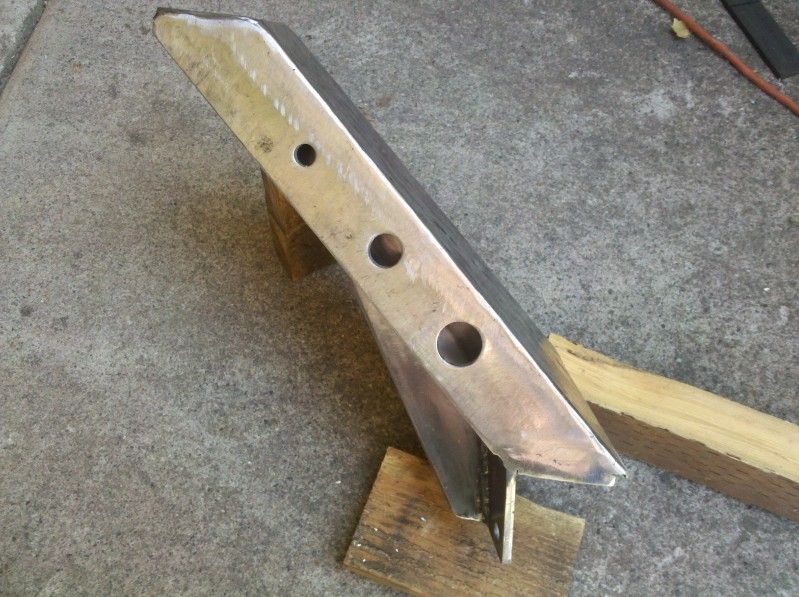
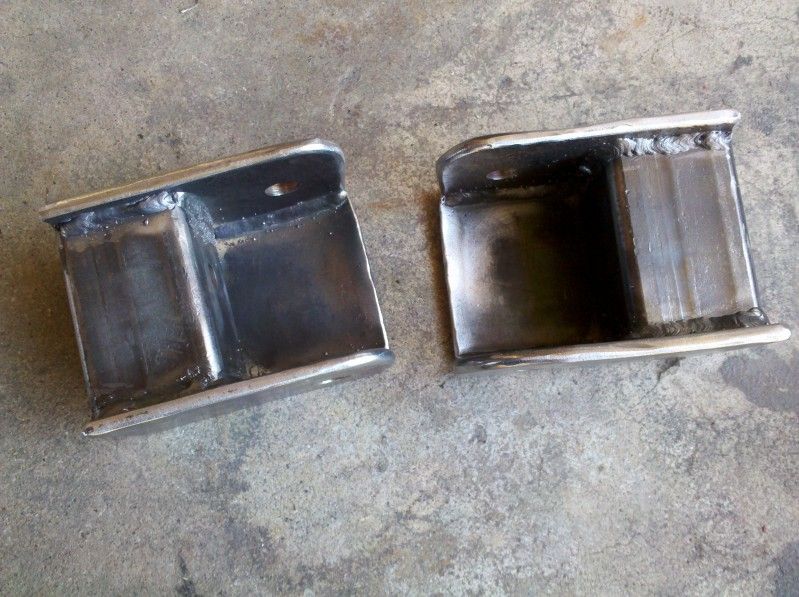
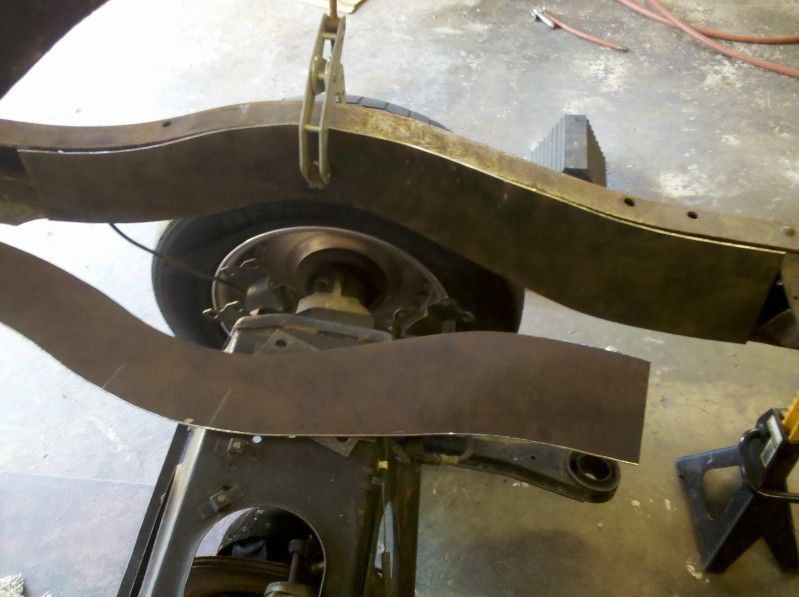
Started making boxing plates for the rear of the frame. love doing everything by hand!!! "Santa, can I please have a plasma cutter this Xmas"???

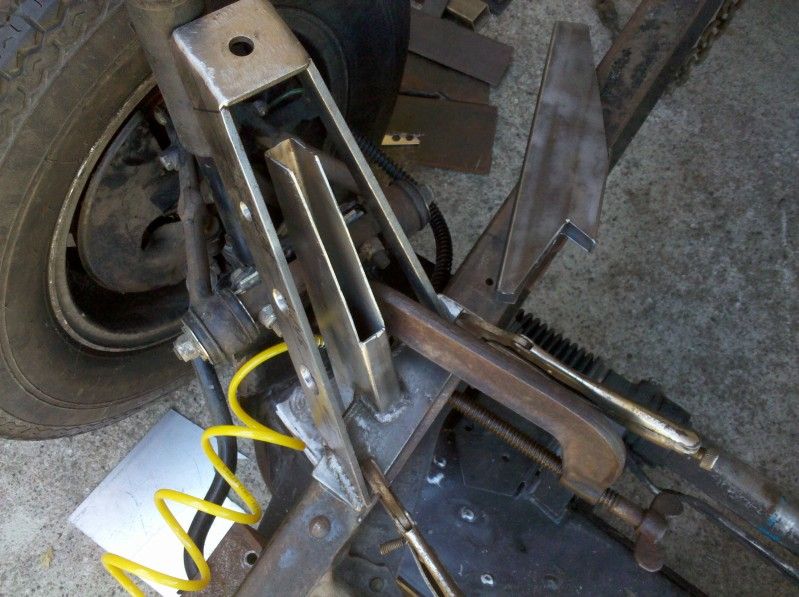
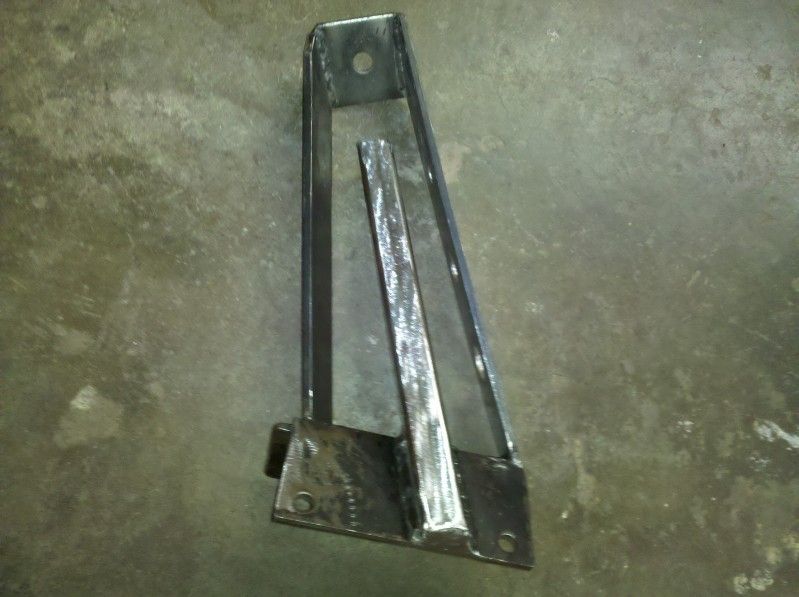
So I have the boxing plates finished and will get them welded up soon. My welder buddy is bringing a better welder over to do the job.

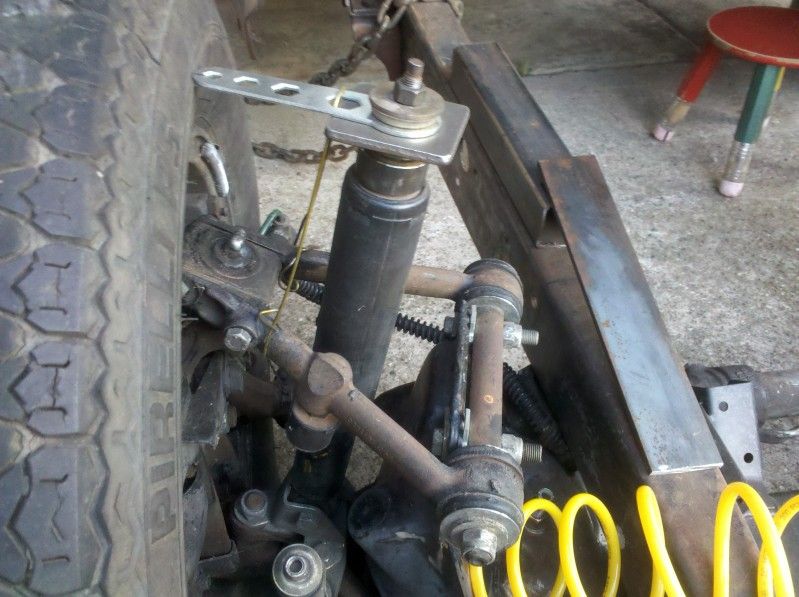
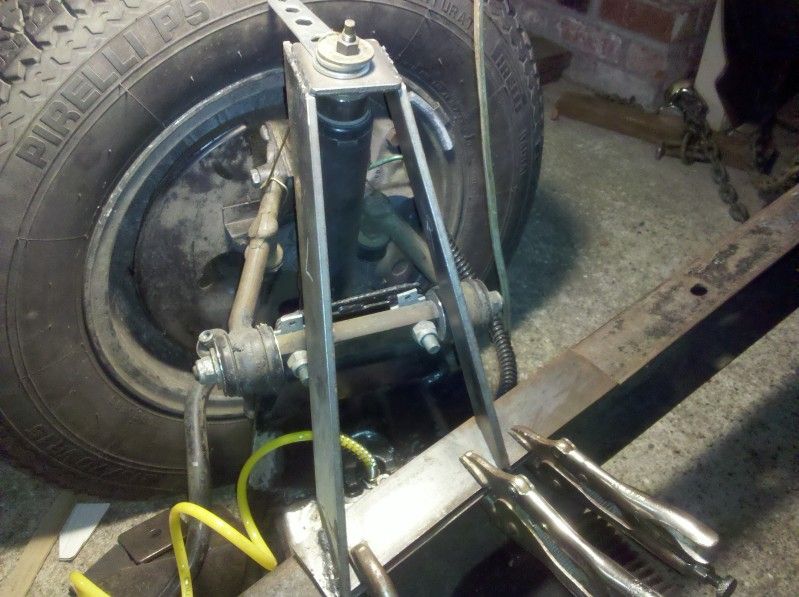
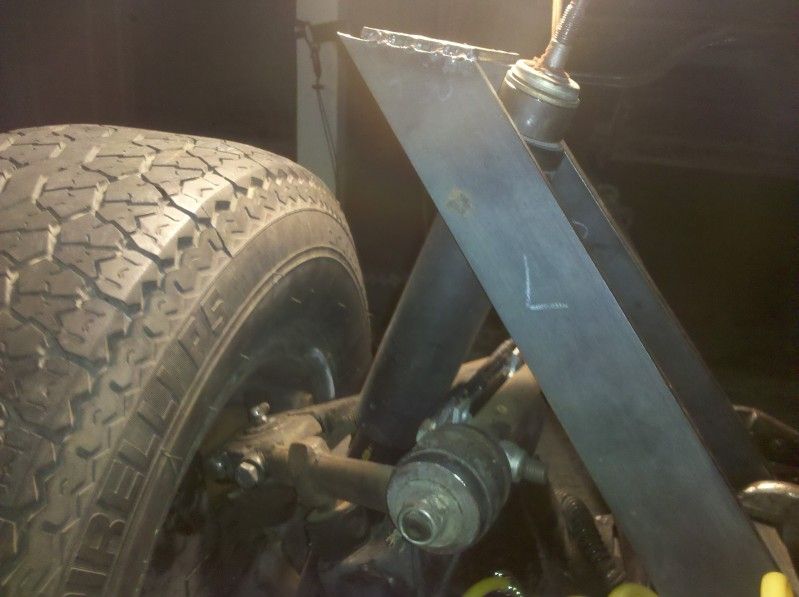
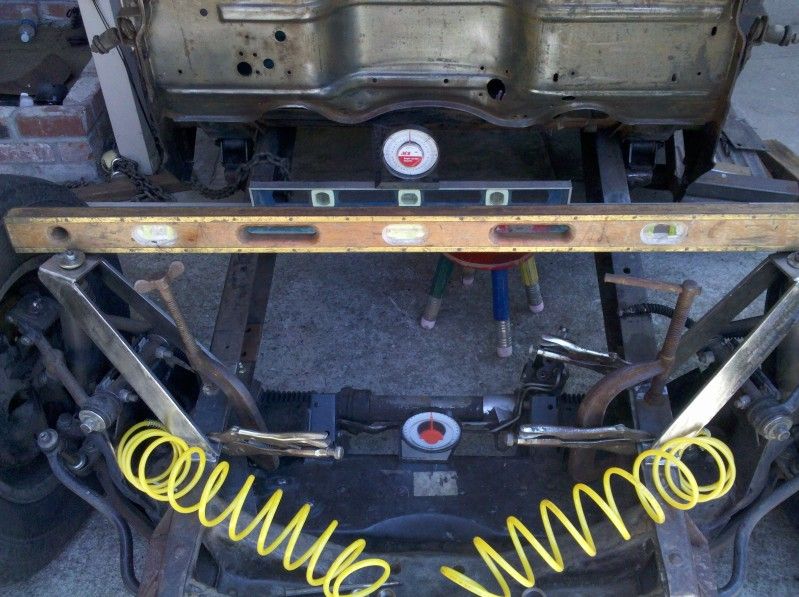
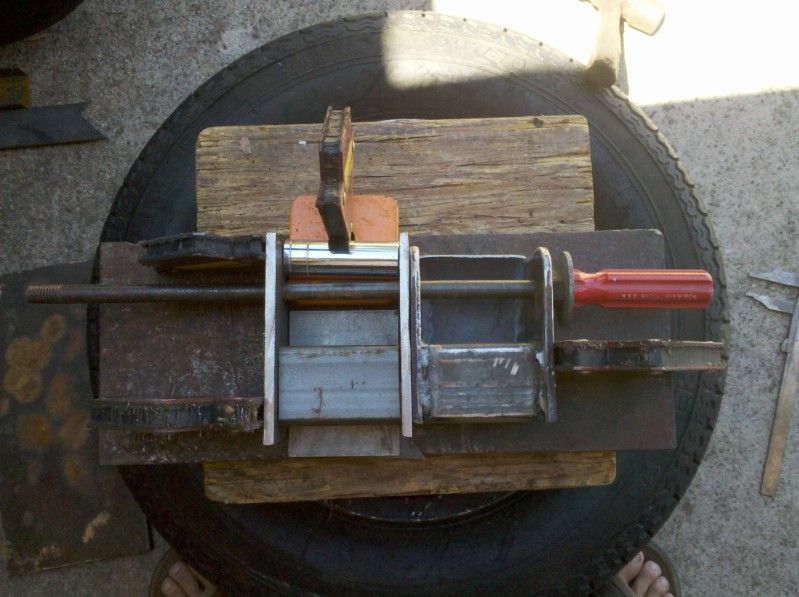
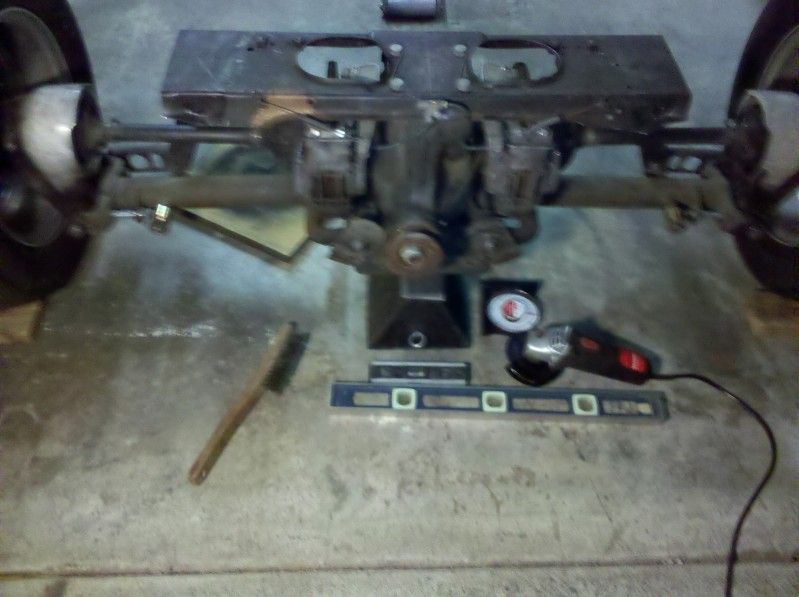
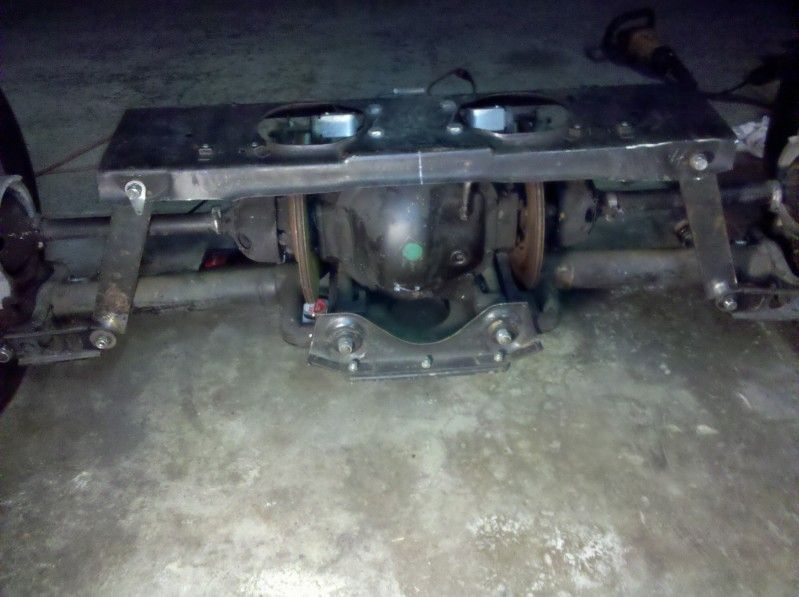
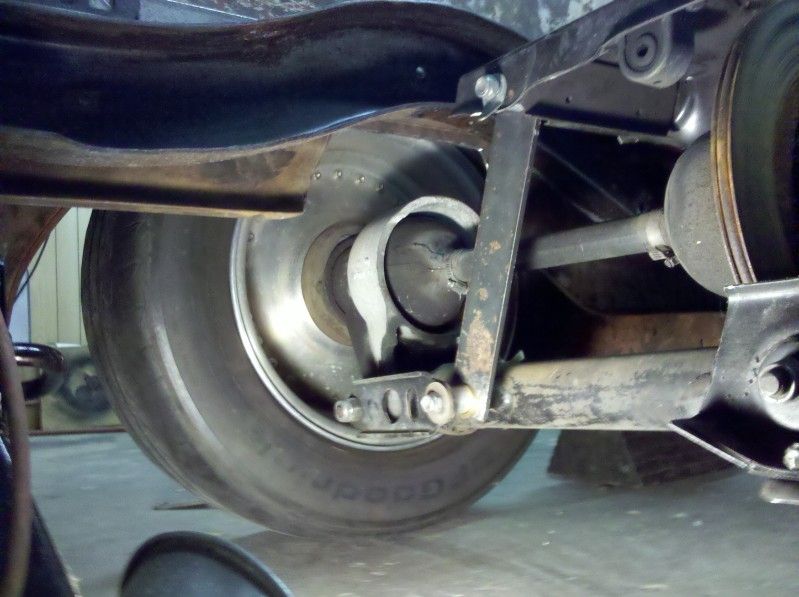
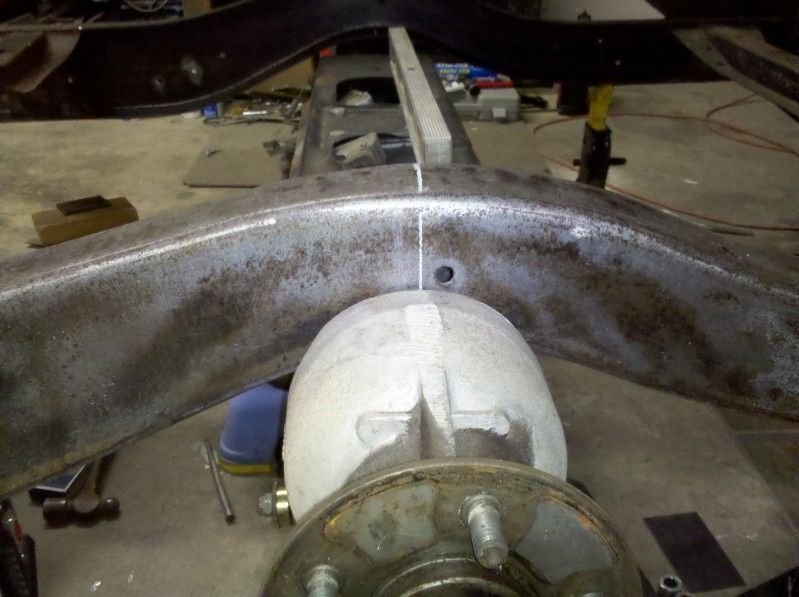
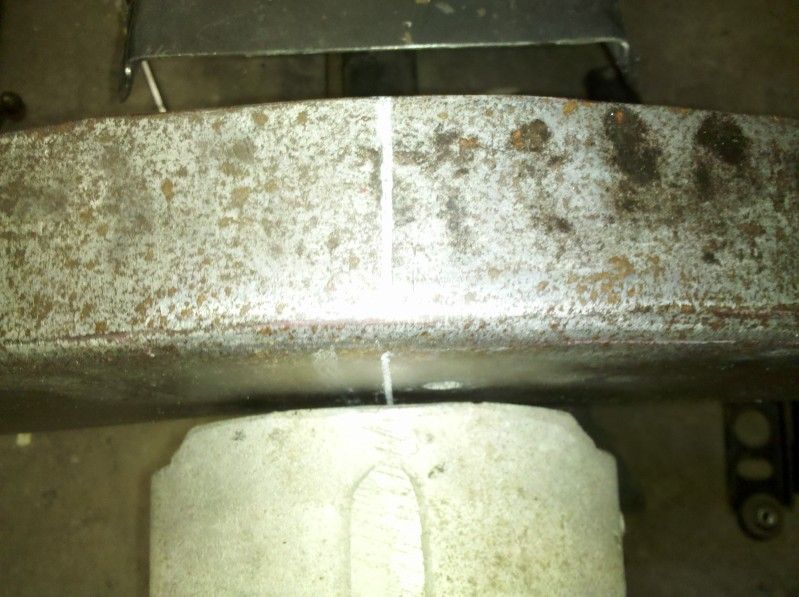
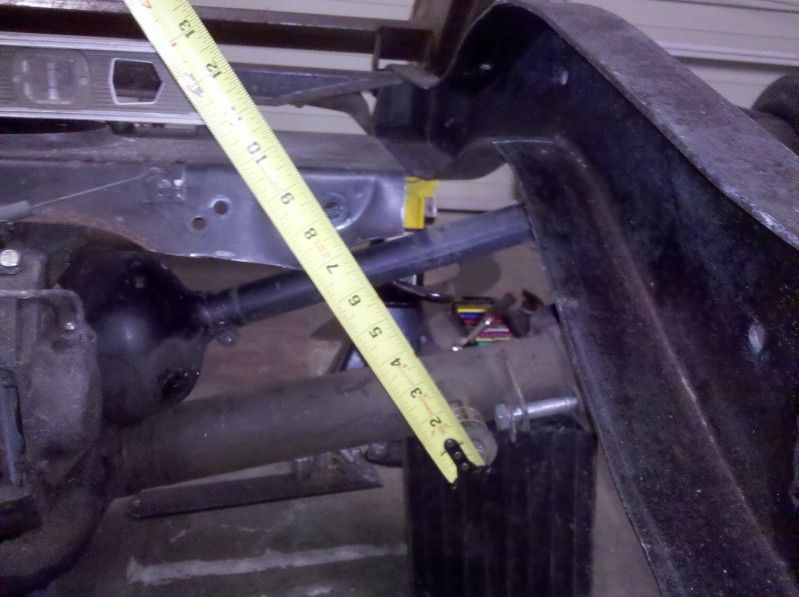
Next, I measured the crap out of the Jag cage. Think I have all the measurements I will need for the new Xmember. Then I swiss cheesed the cage to give me a better look at everything. Also made some spacers to toss in place of the coilovers to sit the rear with the half shafts lever. The spacers have the holes drilled 11" center to center. This pretty much leveled the halfshafts.

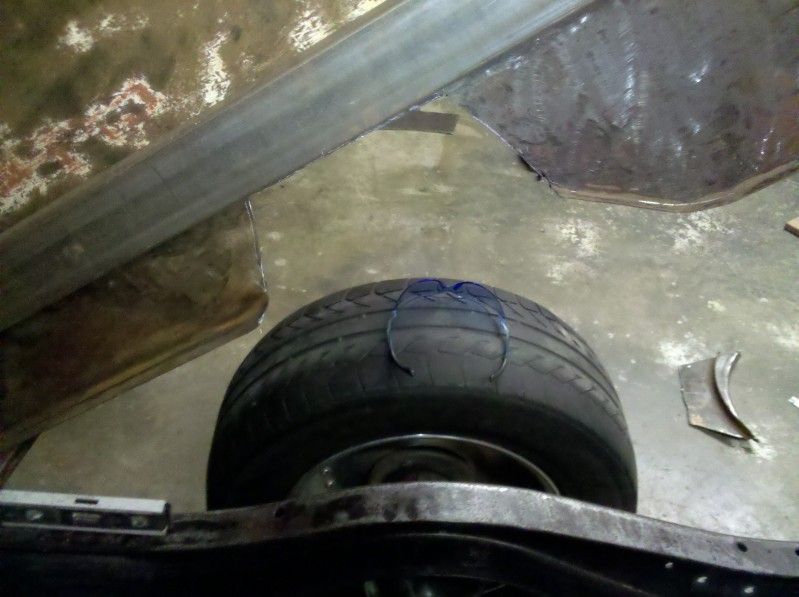
Then I rolled the rear back under the truck. I need to get the wheels centered in the fenders and make my centerline. But what I found is I do not like the way the rear fenders mount. The front side of the fender sits lower than the rear from the factory. Since I lowered the bed itself, now the front of the fenders sit lower than the running boards. So I will have to change them, rotate them back to raise the front and lower the rear. Something I've yet to see on another Harvester ; )

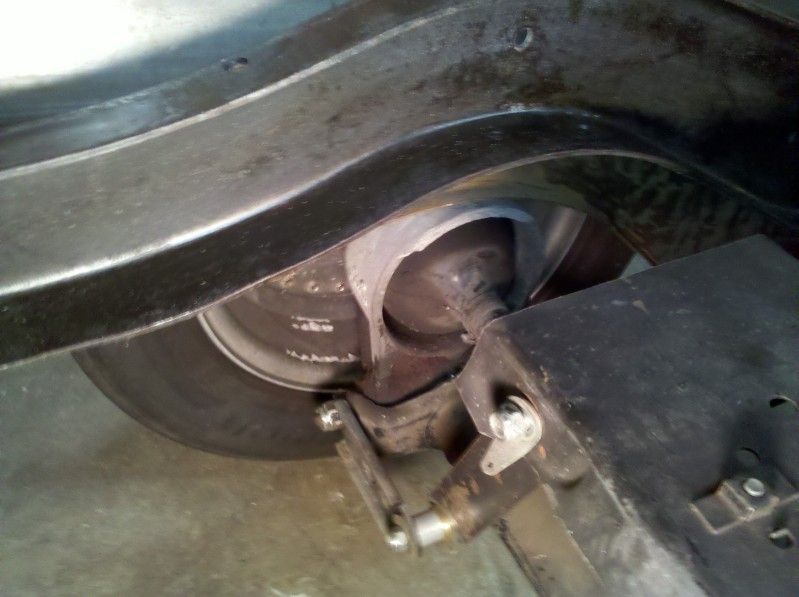
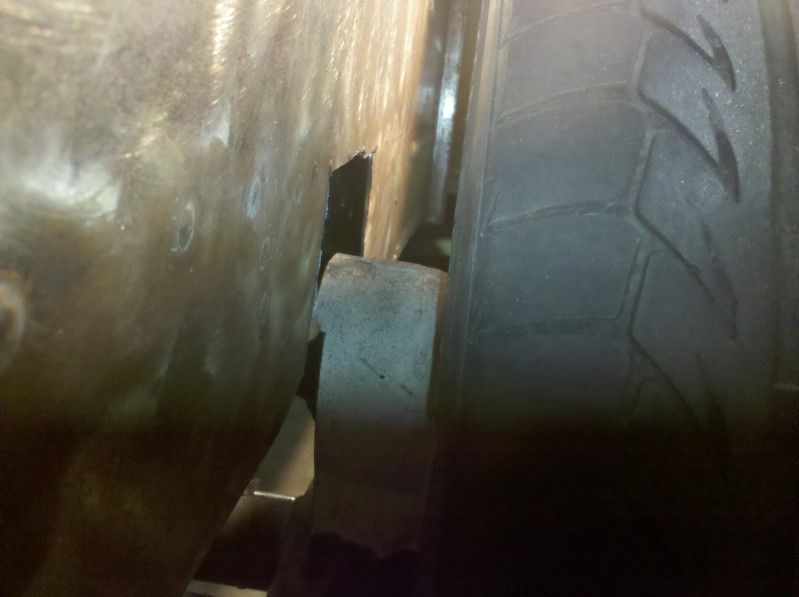
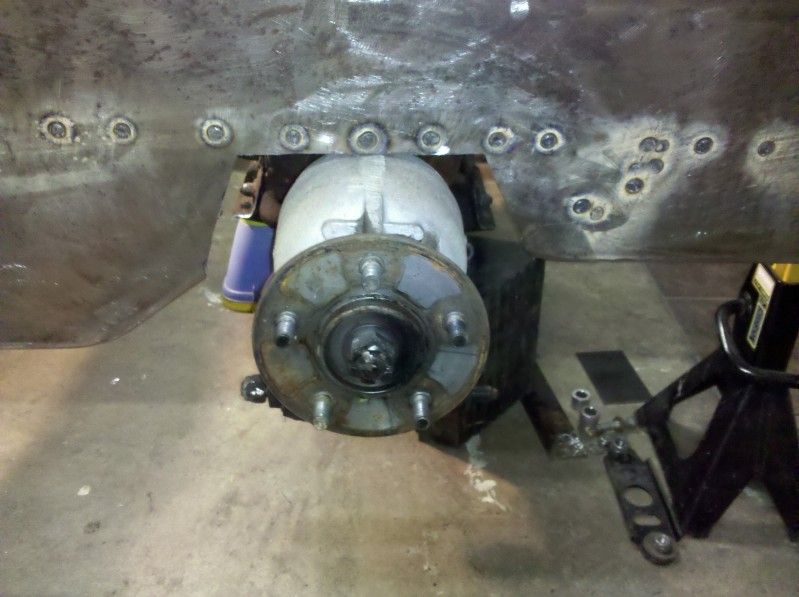
In lowering the truck over the rear, ran into my first issue. The hub carriers sit right under the bed sides! So I had to notch the bedsides real quick to give me some room. I notched them as far as I could. The frame I made for the tilt bed sits right there as well. So I notched the bed sides up to the tilt frame to see where I'm at.

As you can see, not a lot of room for travel. No clue how far up the hub carriers move, guess I will have to pull one of the spacers and see. I might have to c notch the bed frame. If that will even help! it also raises the question of how on earth I'm gonna do some bump stops. I assume they need to make contact with the top of the hub carrier???


IMG_20121004_120859.jpg


IMG_20121005_122301.jpg


IMG_20121006_193054.jpg


IMG_20121006_193123.jpg


IMG_20121006_203846.jpg
 
So where it sat, the hub carriers hit even though I notched the bedside. So it leaves me no choice but the have to c notch the bed frame I built and trim the bedside to match. I lifted the bed out of the way to see how much further the suspension traveled. My first positive ; ) The suspension stops and the hub carriers are just outside the frame rails. They clear! And it will help me align the suspension between the frame as it's maybe 1/4" gap on either side. Maybe some bump stops off the side of the frame. I'll leave the hubs up like this and trim the bed until they clear.

Assuming the coilovers bottom out before the suspension does? If so, what is that measurement? I was at 11" eye to eye on the coilover mounts. That has my halfshafts pretty much level. How much further will the coilovers allow? where I have mine right now, the arms all the way up.. the coilovers eye to eye is 8". If I knew when the coilovers bottom out, couldn't I put a bump stop above the hub carrier to stop it just before the coilover bottoms out? Am I thinking too much??? lol


More notching required!!!

IMG_20121007_222029.jpg


IMG_20121007_222154.jpg


Bed up and the arms all the way up until they bind.

IMG_20121007_225026.jpg


IMG_20121007_225017.jpg


All the way up, coilover mounts 8" apart.

IMG_20121007_225252.jpg
 

Latest posts

Back
Top