Roadster pickup from leftovers.

Rat Rods Rule

Help Support Rat Rods Rule:

This site may earn a commission from merchant affiliate links, including eBay, Amazon, and others.
Tonight Dan and I went to the shop and while he was working on his Mustang, stripping all the sound deadening out of it, I worked on my firewall and trans hump some more.

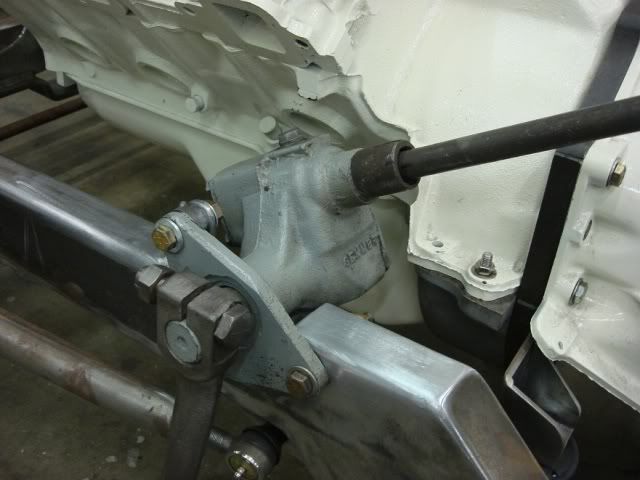
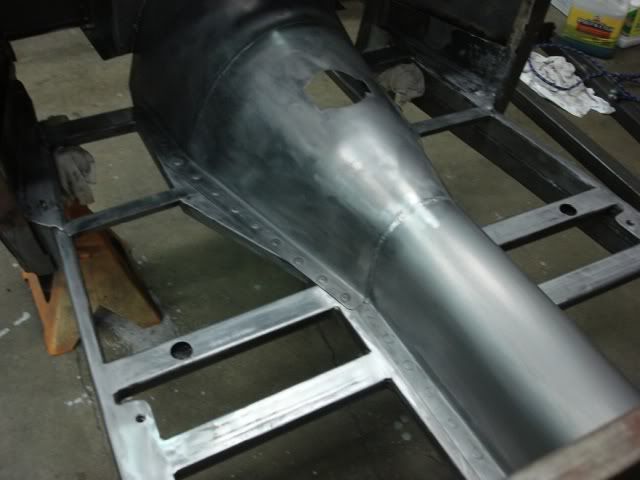
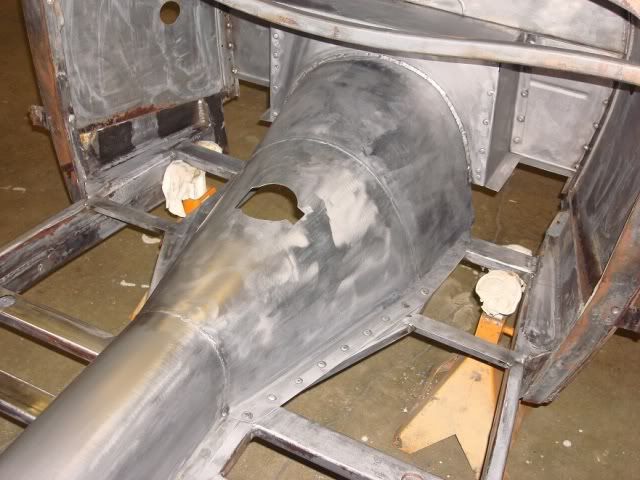
I had to cut a hole in the drivers side of the firewall for the steering column to go through, and I was semi dreading that job, because I NEVER hit the exact hole size I need on the first shot. No matter how I measure I have always been off a little, but tonght for some reason I hit it dead on the first try ! :eek::D Here is a picture of my column installed through the new hole.

myrpuholescutforshifter002.jpg


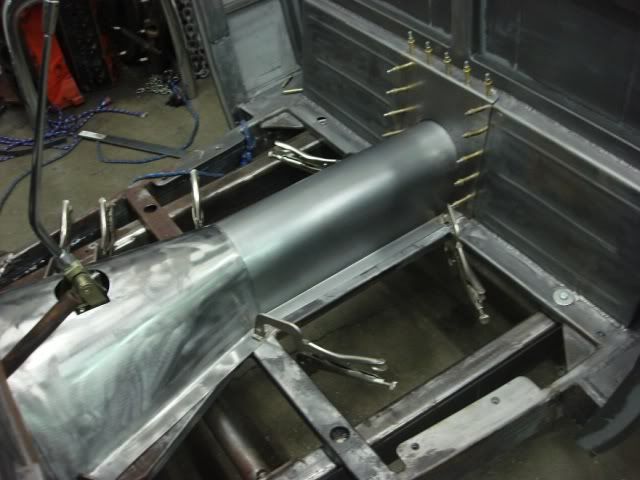
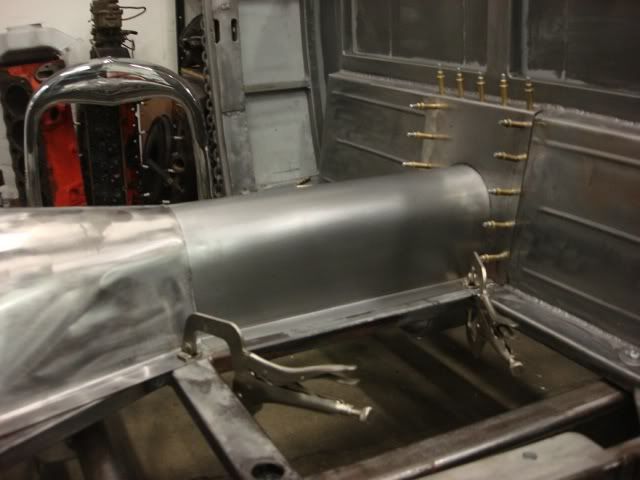
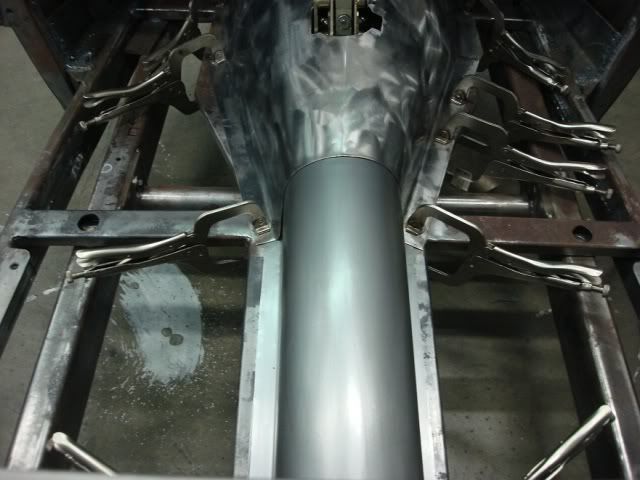
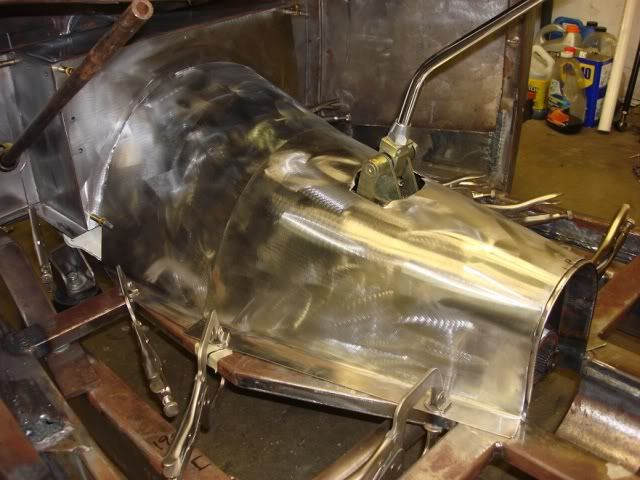
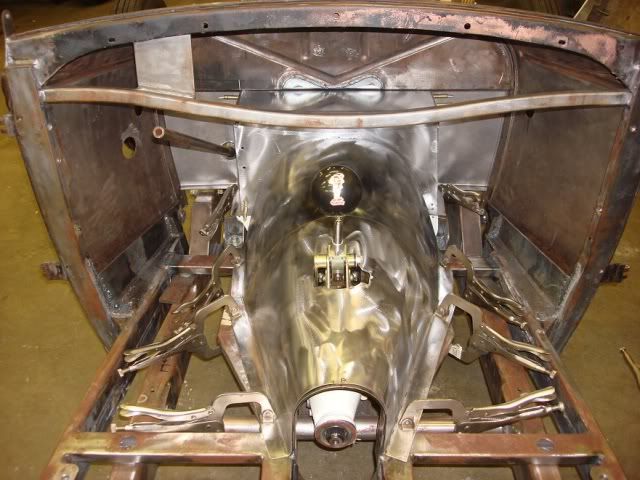
Then I had to cut another hole in the new trans hump for the American Shifter to come through. Either I am getting better at it or something, but I also hit this hole in the perfect spot the first time too. I had to grind a little more out of the hole for the shift arm to move back and forth and on the other side for the neutral safety switch clearance, but it actually came out pretty dead on.:D Here are some pictures of that hole and the shifter installed.

myrpuholescutforshifter004.jpg


myrpuholescutforshifter007.jpg


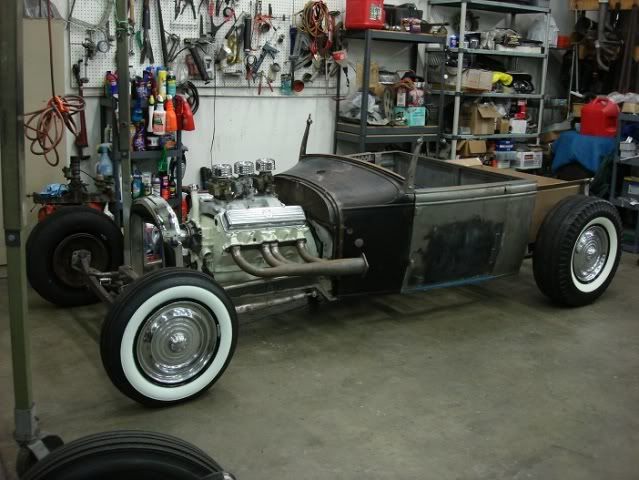
This week I am going to order a 4 x 10 foot sheet of 18 gauge sheet metal so I can finish up the floor and also start to bend up the bed. Next weekend I will get Dan to weld up all the tinwork so it is a permanent part of the subframe.

Don
 
Nice work! Don't you just love it when a plan comes together? I have always had trouble with the the hole in the firewall for the steering shaft.....don't know why but I always need to patch around it.
 
Thanks guys. That has always been a problem for me, trying to get that hole in the firewall in exactly the right place. No matter how I measured and used angle finders, I was always off a little and had to patch and recut. But this time I actually hit it right on the head and boy am I proud of myself today ! :D

Don
 
Looking good Don, still trying to wrap my head around how you are going to clear that steering box with a header pipe...

Also, is it super humid down there in your shop? High speed patina there =)
 
Way to go Don, now go buy a lottery ticket! Two holes in the right spot and they say good luck comes in threes.......

The truck is looking fantastic.
 
Yep, the header pipe sweeps upward as it exits the port and clears pretty well. I am running an old set of lakes headers that I found on Ebay years ago. They are homemade but whoever did them didn't do a bad job. He made them out of old Ford torque tubes and a flange kit (or so I think) and they are kind of funky and have lots of character. They came with machined block off plates but since I won't be running a full exhaust system I will just make some baffles to go inside them.

Dirtyrat, you are 100% right about the humidity down here. Between that and me sweating like mad working on the car I can clean it to bare metal and the next day it looks like it has been sitting in a swamp for a year.:( I go though a ton of those rice cake grinding discs keeping it as clean as I can.

Don

In this picture you can sort of see how the headers fit.

myrpumoreworkonbed004.jpg
 
Thanks, Falcon. :) Got some more work done on the driveshaft tunnel today. Dan bought me a 4 x 10 foot sheet of 18 gauge for Father's Day, which was very much appreciated. He didn't do a very good job of wrapping it, but it is the thought that counts.

The first thing I did was bend up a piece of 2 inch x 3/16 strap to make the rear hoop to shape the driveshaft tunnel, and we welded it in place. I made it the same exact shape as the front hoop, so the tunnel could end up just very simple and smooth.

Then I bent up a piece of the 18 gauge in the shape of the tunnel I wanted and clamped it down. Finally, I cut another piece of 18 gauge to make a cover for the hole in the back body panel that was left over from the previous tunnel, which was larger than this one. Clecos are holding it in place now but we are about ready to start welding all of the pieces together into one solid piece. The final thing to do will be to make up two floor pieces to go on the drivers side and passengers side.

Not major progress, but it is starting to shape up pretty well.

Don

myrpudriveshafttunneldone022.jpg


myrpudriveshafttunneldone021.jpg


myrpudriveshafttunneldone023.jpg
 
lookin good Don! Stay with it and you will get this rod building thing down...:D


side note: can you call my kids and let them know a sheet of 18ga is ok with me too? The wife is good. She got me a .38 last year for X-Mas!
 
That tunnel is way too smooth and nice! Heh... drop something on it or something to give it some character!

Seriously Don, looking really nice in there with the bead rolled rear section, and the tunnel.
I've been watching, because I will also soon be workign in a floor... if I ever find the time to get that driveline home and into the garage!
 
Thank you, but you guys are been way too kind. I just build functional stuff that works, and realize there are some guys out there who build cars that are simply unbelievable. Here is an interior I saved off of another forum. I have NO idea how the guy did all this fancy shaping and bead rolling on his interior, I had enough trouble just getting mine to fit. :eek:

Don

interior.jpg
 
Those waffle butt bomber seats might be a good idea in the hotter parts of the USA. Your floor is lookin' good too. You wouldn't want it TOO nice, then you'd be afraid to drive it. ;)
 
You've hit it on the head, Sam. I USE my cars and abuse them. I couldn't stand to have a car that was so nice you would worry about every little stone chip. I usually just dust my 27 off with some detailer and hit the road.

Don
 
Major progress alert ! Major progress alert ! :D:D On Friday and Saturday, while Dan was working on his car, I got all the pieces prepped and ready for Dan to weld them in for me, and last night we finished up at about 4 am. It is 2 pm and I just got my butt out of bed and am still feeling it. But this is major progress and I couldn't be happier. :D

What I had to do was grind all the subframe clean and then clean up all the sheet metal panels to remove the surface rust that was on them from touching them and our 100% humidity here in Florida. I used an acid based cleaner and a scotchbrite pad and got everything shiny again. Then I drilled holes every 2 inches in every panel so Dan could rosette weld the panels to the subframe, and to the firewall, and to each other. I must have drilled a hundred holes.

The first thing we did was weld in the firewall. It is 3 pieces but is now solidly welded to the cowl.

myrputunnelweldedin021.jpg


Then we continued inside the car and welded in the box over the bellhousing and then the trans hump and the driveshaft tunnel. We still need to grind and smooth all the welds, but getting this done is a major hurdle. The floors will be much easier because they are simply flat panels.

Here are a couple of pictures of the welded in trans hump and driveshaft tunnel.

myrputunnelweldedin033.jpg


myrputunnelweldedin022.jpg


myrputunnelweldedin028.jpg


Don
 
I dread opening this thread because it makes me realize I need to step up my own efforts. You and Dan do great looking work as usual.
 

Latest posts

Back
Top