
You are using an out of date browser. It may not display this or other websites correctly.
You should upgrade or use an alternative browser.
You should upgrade or use an alternative browser.
1936 chevy low cab build 1.5T
- Thread starter CORPO
- Start date
Help Support Rat Rods Rule:
This site may earn a commission from merchant affiliate
links, including eBay, Amazon, and others.
CORPO
Buildin' it his way, one piece at a time...
So I am making some progress on the brakes...
I took the residual valves and the proportioning valve out of the mix and made some lines to by pass them... I was successful in getting fluid to all 4 corners and although they still need more bleeding they were working...
So now the problem... Determining what was wrong in the system...
I need to determine if I need to put the residual valves back in... My theory is to check the brakes in a week or so and see if they are still functioning the same or if I have bleed back and air in the system ???
I'm thinking I need to make a bench rig with the proportioning valve to see if it is working correctly or not...
Not much but progress none the less...
deerchooper
Well-known member
- Joined
- Apr 3, 2010
- Messages
- 744
try bleeding the master cylinder again in the truck.

I-R-POPS
''Rusty Mopar Slacker''
Any progress is good progress.
I would think 1/4" would be plenty, looks like that's the size of that hose barb on your filter. Neat little filter.
I would think 1/4" would be plenty, looks like that's the size of that hose barb on your filter. Neat little filter.
Dirtyrat
Got Fins?
That is cool, reminds me of the tractor sediment bowls...
1952B3b23
Well-known member
Hey man, i just read through your whole thread and this build is kick ass great work!
-Chris
-Chris
CORPO
Buildin' it his way, one piece at a time...
thanks for the input guys, I think im in trouble (line size wise) and will have to do some more modifications..
The only way I think I will be able to make my gas tank work and now the old filter work will be with soft line.. the inverted female flare adapters that fit into the tank and the one on the line out of that filter are for 3/16 line.. which i was thinking wouldn't be enough.. hence the question.. you guys have all the answers...
Thanks RRR
maybe theres an adapter to step it up.. .....
Last edited:
Old Iron
Well-known member
Yep 2 barrels use 5/16 and 4 barrels use 3/8 in the old days
sgtpontiac
Older, Wiser and Still Buildin'
What Old Iron said.....
CORPO
Buildin' it his way, one piece at a time...
plugging away on wiring, and Its come down to mounting the battery and fabbing some brackets for it...
I have determined where it is going..now just to sort out the logistics of putting it where I want to... Best case senario is to mount the battery upside down (for ease of wiring.... which brings me to my next question.. I know (pretty sure) Optimas can be mounted in any orientation, but I was reading that once the company switched hands that people started to have issues with the batteries... Does anyone have any other recommendations for a battery I can mount upside down, or should I just go with the optima?
I have determined where it is going..now just to sort out the logistics of putting it where I want to... Best case senario is to mount the battery upside down (for ease of wiring.... which brings me to my next question.. I know (pretty sure) Optimas can be mounted in any orientation, but I was reading that once the company switched hands that people started to have issues with the batteries... Does anyone have any other recommendations for a battery I can mount upside down, or should I just go with the optima?
DJ3100
Well-known member
I think that Optima's problems are mostly over. I bought one about year ago from Amazon for $144. Have had no issues with it.
There are other brands of AGM batteries; they can be put in any position. The Deca brand I had in the F2stang lasted about 18 months. I have had much better luck with Optimas. The one in my 2000 Chevy lasted 5 years and was still going when I sold the truck.
There are other brands of AGM batteries; they can be put in any position. The Deca brand I had in the F2stang lasted about 18 months. I have had much better luck with Optimas. The one in my 2000 Chevy lasted 5 years and was still going when I sold the truck.
I've tried optimas in daily drivers 3 or 4 times and they all lasted about a year to 14 months. My experience is they are not worth the money but I've heard other people have had great luck with them. I just couldn't se forking out $175-$200 every year for a battery. [S
gold03
He lives in an "Altered State"!
Hey Corpo, I finally got around to looking at the header baffles. Thanks for the pictures and info. Cool idea. I have been looking at Harley mufflers and wondering if they would breath enough for my flat head. I think It would. It's more cubic inches, but it only fires one cylinder at a time. I could do baffles like your idea, or just run lakers with cut outs through HD mufflers. [S
The bike mufflers are everywhere on line right now. Everyone here changes out to aftermarket.
The bike mufflers are everywhere on line right now. Everyone here changes out to aftermarket.
RickyBobby
Well-known member
Oddessy batteries are by far the best I have ever used. Last forever, I've cranked them for minutes on end in the offroad racing stuff I've done. Used them to move a car off the track with the starter and the battery.
DJ3100
Well-known member
I've tried optimas in daily drivers 3 or 4 times and they all lasted about a year to 14 months. My experience is they are not worth the money but I've heard other people have had great luck with them. I just couldn't se forking out $175-$200 every year for a battery. [S
Optimas have a 36 month free replacement warranty. https://www.optimabatteries.com/en-us/support/warranties/on-or-after-2-1-2009/
I have heard great things about Odessey but haven't had one.
CORPO
Buildin' it his way, one piece at a time...
Thanks for all the input on the batteries guys... not 100% sure what I am going to do yet...
I use to work at an OEM manufacturer to Harley.. I talked to one of the engineers who worked in the exhaust department.. he was complaining about how they spend years developing and tuning the exhaust on the new bikes and half of the bikes get new exhaust before they leave the dealerships .. Haha
Plugging away on the battery box, making it more complicated than I should..
I bought this box.. probably 3 years ago at a swap meet for 1 buck with the plans of using it as a battery box with a little room for a tool kit.. well that didnt work out.. its just too big to fit it where it needs to go

I actually ended up cutting it again and removing another 1.5" from the box...
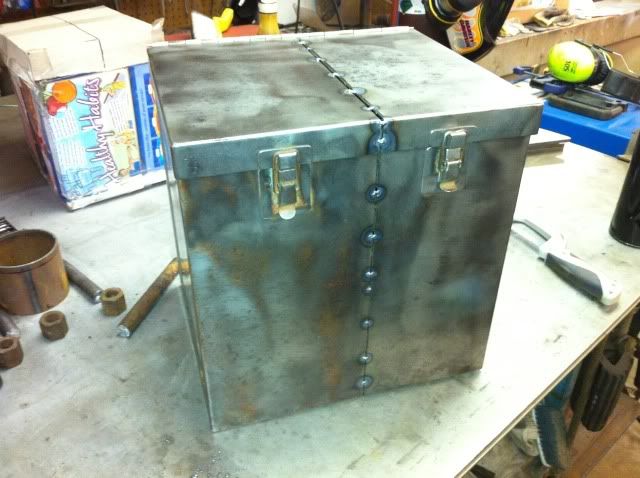
Its a nice heavy gauge box, with a continuous piano hinge.. well it was continuous.. now its two pieces.. lol
So the plan is to hang it upside down... I am a big fan of re-purpose parts from the original truck as im sure you guys have noticed.. So my dad and I were rummaging through the pile of miscellaneous parts... and I still had two of the massive u bolts that held the rear axle on... of course they are like 2.75 ID and I need them to be 3" ID.. so I am going to have to cut them and stretch them a bit, but they were over a foot long so I have plenty of material to add back in... What I am going to do is drill and tap the ends so that I can bolt into them with some 3/8" bolts that will go into the box.. For fun I am going to drill out the threads of the original nuts and slip them over the ubolt to add to the original u bolt look..
there also will be an internal structure to hold the battery up, i am not relying on the latches to hold the battery..
Hey Corpo, I finally got around to looking at the header baffles. Thanks for the pictures and info. Cool idea. I have been looking at Harley mufflers and wondering if they would breath enough for my flat head. I think It would. It's more cubic inches, but it only fires one cylinder at a time. I could do baffles like your idea, or just run lakers with cut outs through HD mufflers. [S
The bike mufflers are everywhere on line right now. Everyone here changes out to aftermarket.
I use to work at an OEM manufacturer to Harley.. I talked to one of the engineers who worked in the exhaust department.. he was complaining about how they spend years developing and tuning the exhaust on the new bikes and half of the bikes get new exhaust before they leave the dealerships .. Haha
Plugging away on the battery box, making it more complicated than I should..
I bought this box.. probably 3 years ago at a swap meet for 1 buck with the plans of using it as a battery box with a little room for a tool kit.. well that didnt work out.. its just too big to fit it where it needs to go

I actually ended up cutting it again and removing another 1.5" from the box...

Its a nice heavy gauge box, with a continuous piano hinge.. well it was continuous.. now its two pieces.. lol
So the plan is to hang it upside down... I am a big fan of re-purpose parts from the original truck as im sure you guys have noticed.. So my dad and I were rummaging through the pile of miscellaneous parts... and I still had two of the massive u bolts that held the rear axle on... of course they are like 2.75 ID and I need them to be 3" ID.. so I am going to have to cut them and stretch them a bit, but they were over a foot long so I have plenty of material to add back in... What I am going to do is drill and tap the ends so that I can bolt into them with some 3/8" bolts that will go into the box.. For fun I am going to drill out the threads of the original nuts and slip them over the ubolt to add to the original u bolt look..


there also will be an internal structure to hold the battery up, i am not relying on the latches to hold the battery..
earthman
Fascinated by rolling objects!
More interesting fab work to look at.
CORPO
Buildin' it his way, one piece at a time...
thanks eman.. heres the rest of the battery box fab.. still need to drill and tap through the U bolts to attach it to the tube.. but other than that its done..
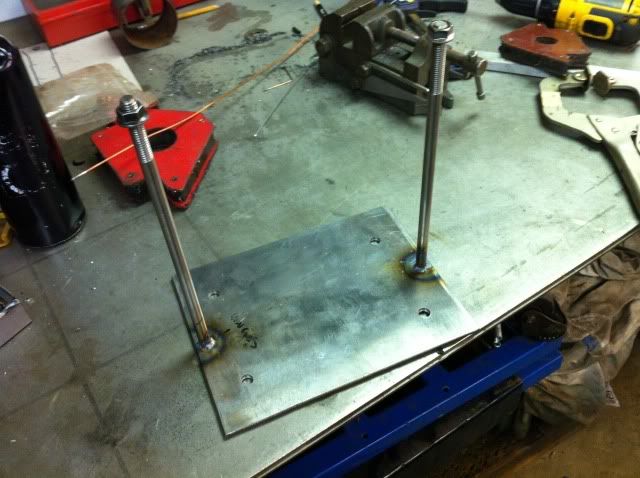
Here is how I modified the u bolts... added a little section at the top.. you can kinda see the flat head bolts that I drilled and tapped into the bottom
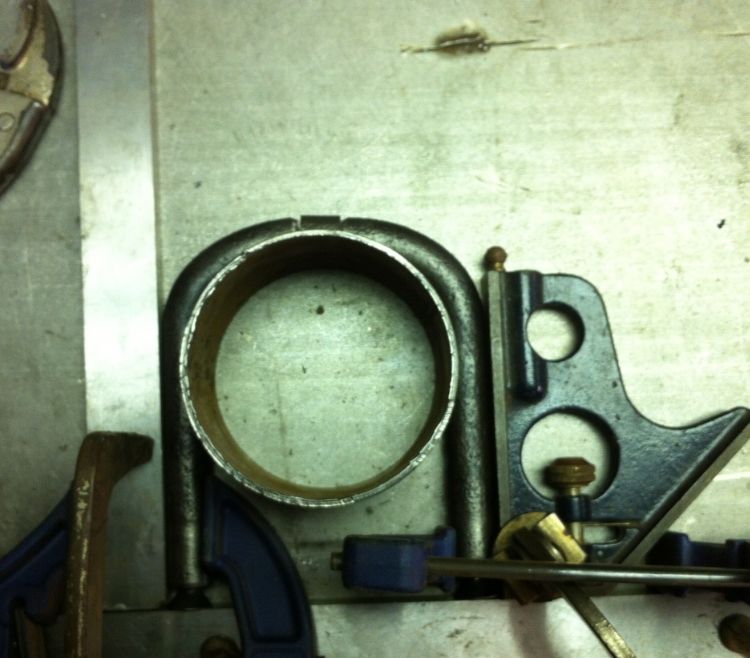
This plate goes into the box and the u bolts... bolt through the plate and box to suspend the battery from the rod (still need to make a plate to capture the battery...
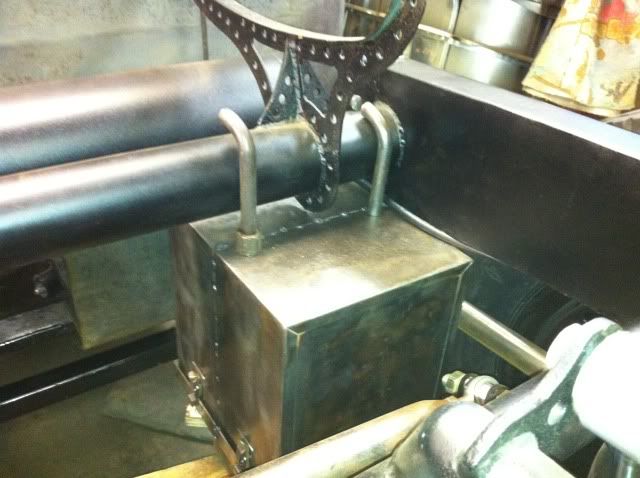
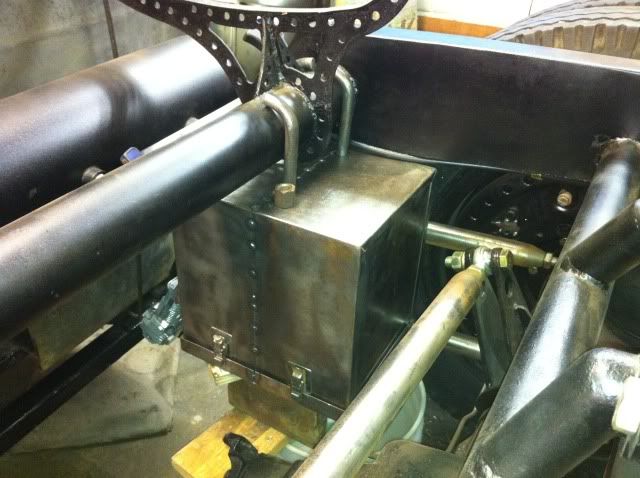
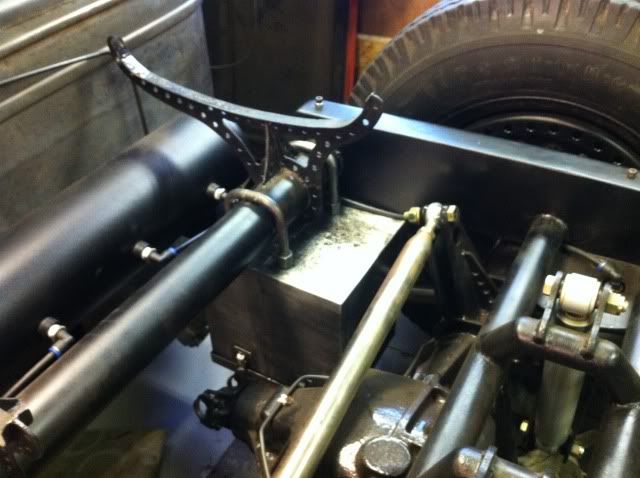
and here it is hung in place, My dad ground out the threads so that we could slip them over the ubolts.. just for the look.. Not going to lie this was a pain to install... (who designed this...???.. haha)
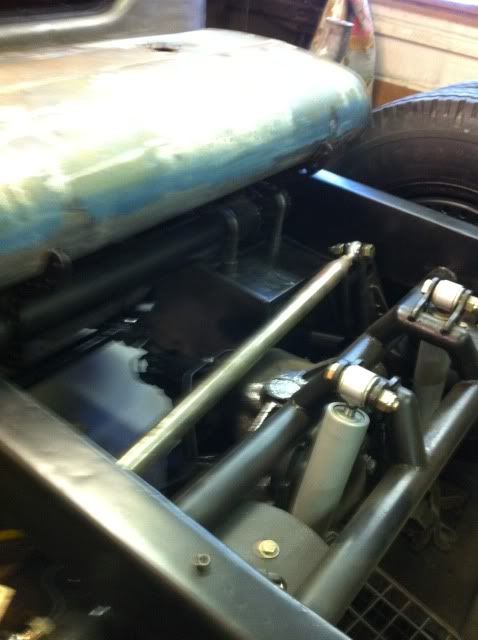
with the tank in place.. no one will ever even see it.. (sorry for the blury pic)
Here is how I modified the u bolts... added a little section at the top.. you can kinda see the flat head bolts that I drilled and tapped into the bottom

This plate goes into the box and the u bolts... bolt through the plate and box to suspend the battery from the rod (still need to make a plate to capture the battery...

and here it is hung in place, My dad ground out the threads so that we could slip them over the ubolts.. just for the look.. Not going to lie this was a pain to install... (who designed this...???.. haha)

with the tank in place.. no one will ever even see it.. (sorry for the blury pic)

Similar threads
- Replies
- 16
- Views
- 1K