
You are using an out of date browser. It may not display this or other websites correctly.
You should upgrade or use an alternative browser.
You should upgrade or use an alternative browser.
MAIDEN Build. 46' IH Rat Truck
- Thread starter IRON MAIDEN
- Start date
Help Support Rat Rods Rule:
This site may earn a commission from merchant affiliate
links, including eBay, Amazon, and others.
IRON MAIDEN
Well-known member
I'm not gonna lie...after a long weekend of being on call, that step by step of precise metal fitting, welding and finishing made my morning.
-Chaz
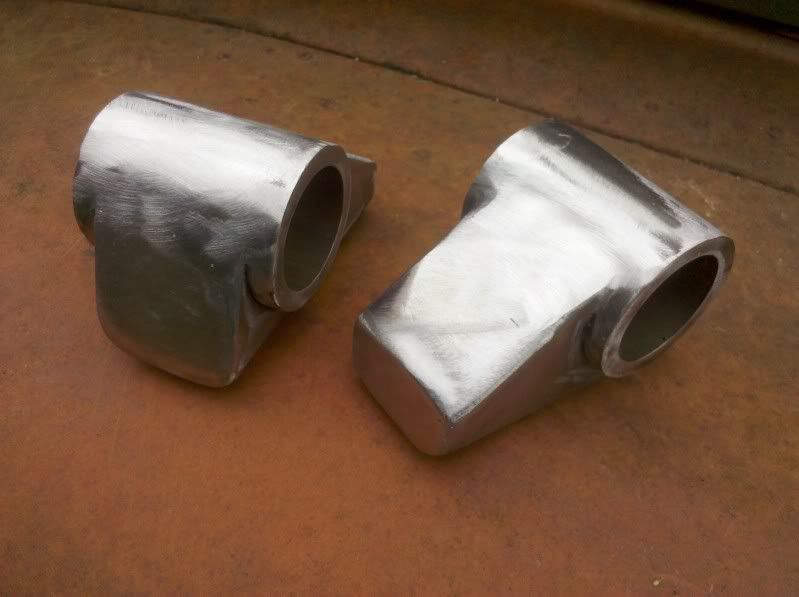
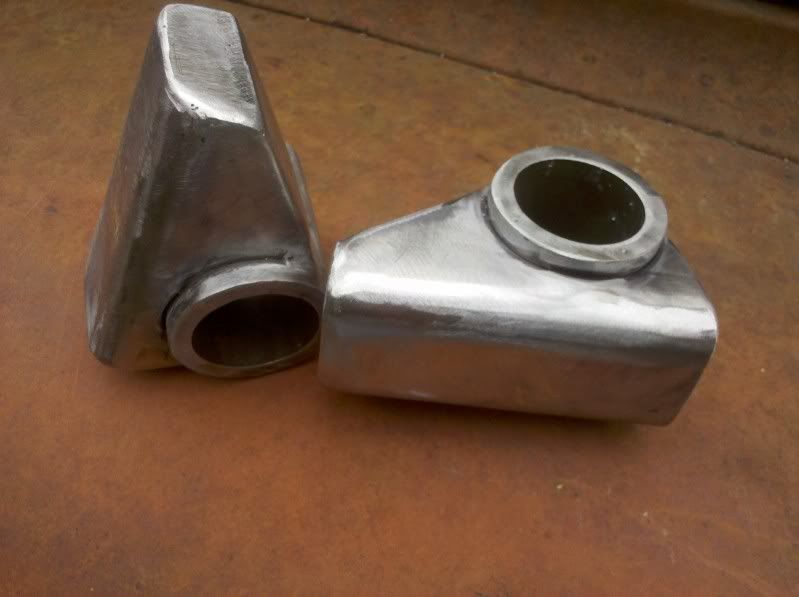
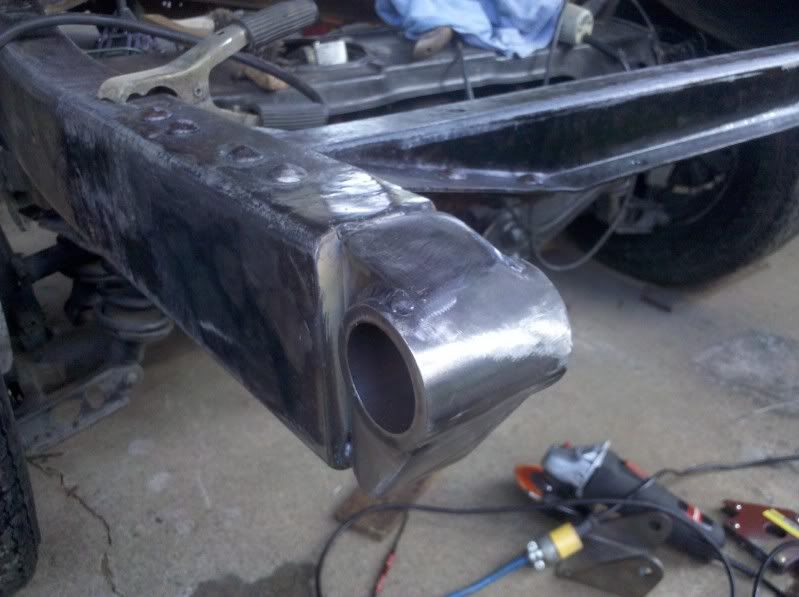
Haha. It's fun and time consuming for sure. I think they will look pretty nice when I grind em' all smooth. I never planned on going into this much work on these mounts, but when I smoothed out the back of the frame and held up the mounts...... it just didn't look right all opened up the way they were. So I went nuts with the cutting disc and welder. Now soon the grinding disc and flap disc. I woke up this morning to rain and had to scramble to clean up out there. I had left tools and other junk scattered all over from my weekend of work so I just spent my morning trying to get cleaned up. I'll try to get them cleaned up and post some pics asap. Thanks though. I feel like I'm doing ok for an amateur.
SugarRay8
Well-known member
You’re doing great, nothing amateur about it, well maybe leaving the tools outside. 
IRON MAIDEN
Well-known member
It was more of a bonehead move than anything. Got caught up in this spring like weather we have been enjoying and didn't bother looking at the weather report. Anyway, was able to get them cleaned up and ready for the final welds. I don't plan on grinding the last welds down so I'm gonna let my buddy have at em' so they look good. I'm still too inconsistant and will screw them up. ; )
bob w
Still crazy after all these years!
Just weld the darn things. Your welding and all your other work looks excellent.
SugarRay8
Well-known member
Just weld the darn things. Your welding and all your other work looks excellent.
^^^What he said^^^
earthman
Fascinated by rolling objects!
X3 [cl
Jimmy Wallbanger
Well-known member
I was gonna ask if your buddy the pro welder was doing those beads cause they look great
IRON MAIDEN
Well-known member
He did some and I did some. I'm sure you can tell whos is whos ; )
I'm a great tack welder ; )
I'm a great tack welder ; )
IRON MAIDEN
Well-known member
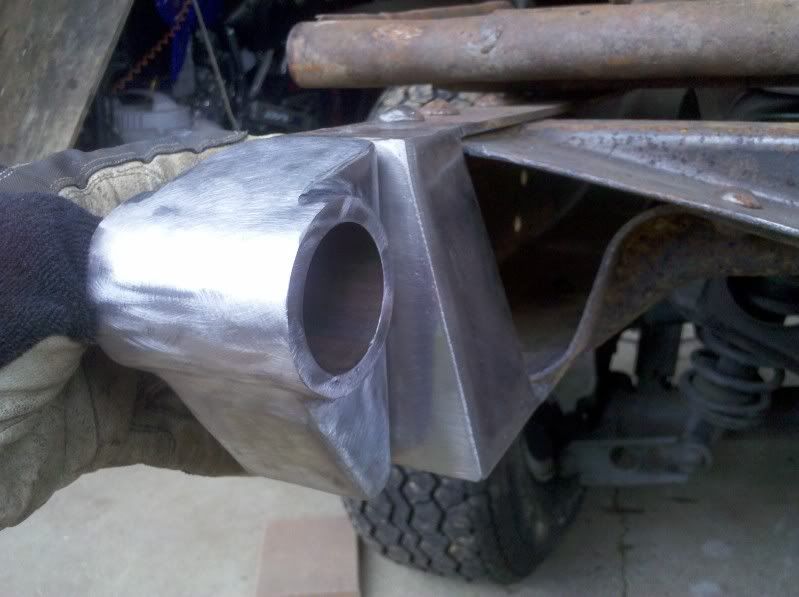
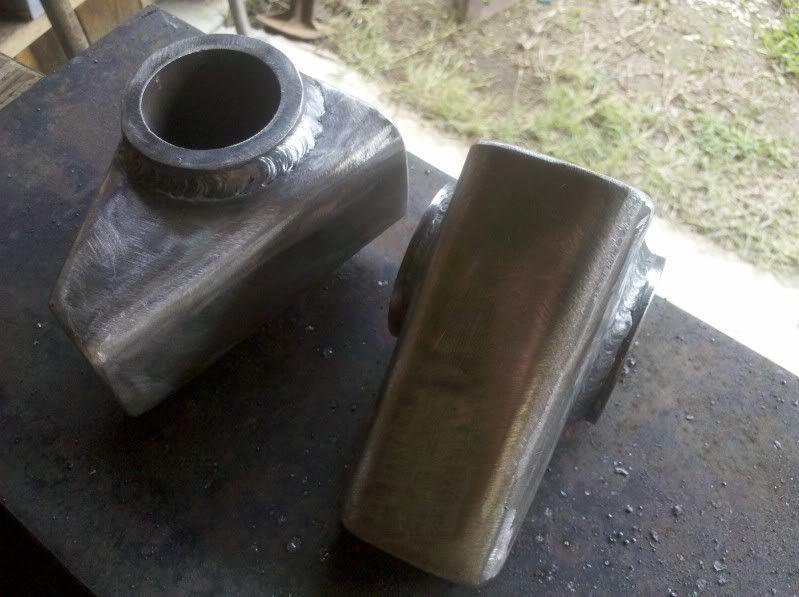
Got the mounts finished off today. Also filled in all the holes on the back of the frame from the aftermarket bumper that was on the truck. I'm stoked on how they came out. Now I need to get the bed back on and get the thing tilting ; )

IRON MAIDEN
Well-known member

IRON MAIDEN
Well-known member
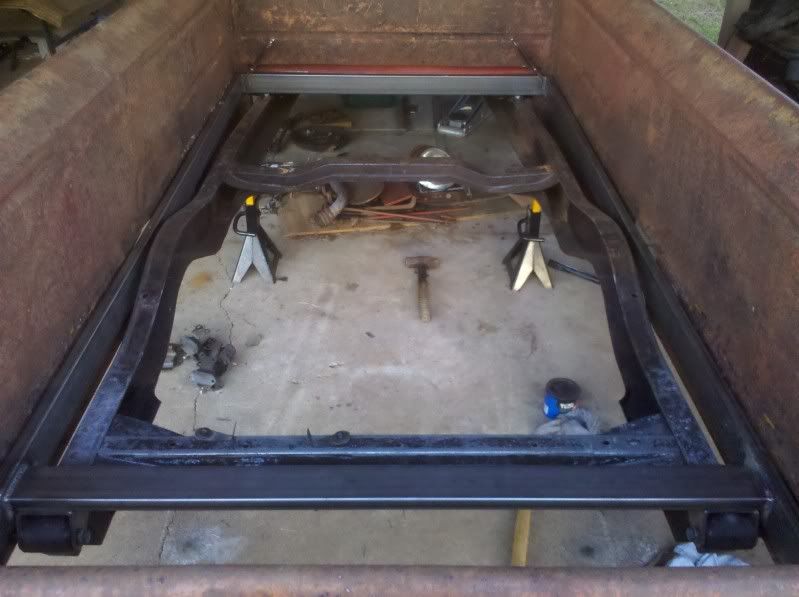
Good day today. Made some good progress. The bed frame is finish welded and fits great. We had to make a couple adjustments along the way but it ended up exactly as I hoped. Everything is square and level. Not sure how that happened!!! We have the bed clamped to the frame right now just so we can position the rear back in the truck but it seems to be right where it needs to be welded or bolted in place. I have some channel I bought to use as the crossmembers for the wood planks. As it sits, they will allow the wood to just clear the humps in the truck frame and be level in the the bed sides. Again, not sure how that happened ; ) Believe me, i was scratching my head all day as we were doing this and it ened up dead on. I need to find some bolt on rubber pads for the front of the bed frame to rest on. I spaced it off the frame 1/2" so I hope i can find some this size. We scrambled to get it back on the truck after we pulled it all off to finish weld it. Gotta tell you, my buddy and I were grinning ear to ear when we tilted it up the first time. You have to love when a plan comes together like you invisioned it in your head. Kids were less impressed by our mini achievement. They said cool and ran back off to play???? Oh well, I bet they brag about what I created to their friends at some point in their life ; )
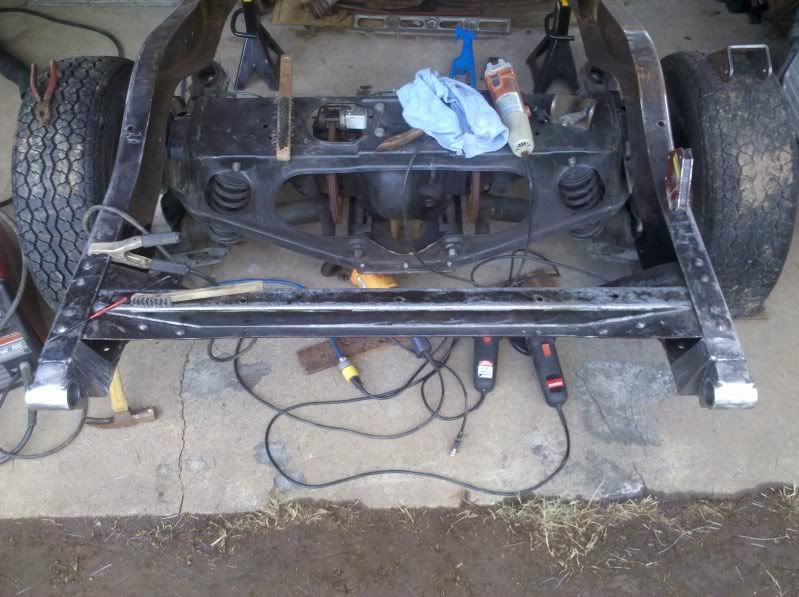
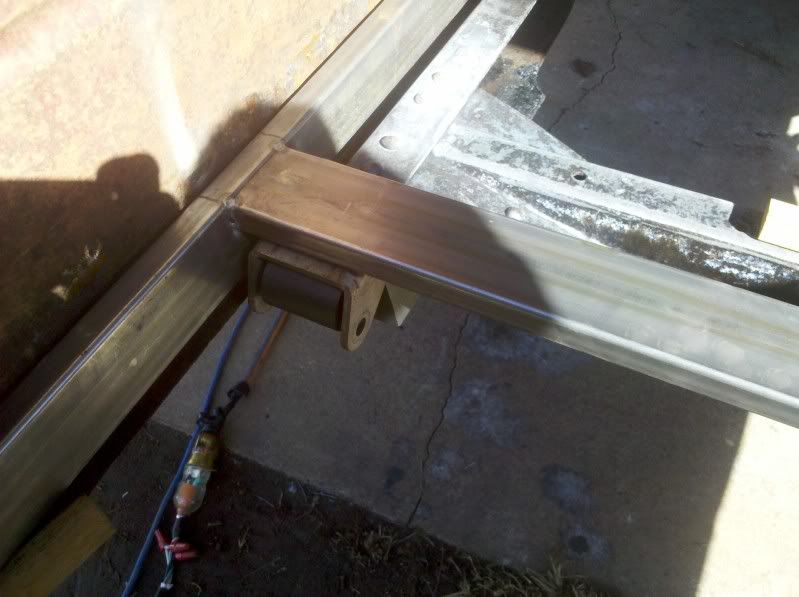
Lining up the frame for the crossmember that will support the rear mounts.
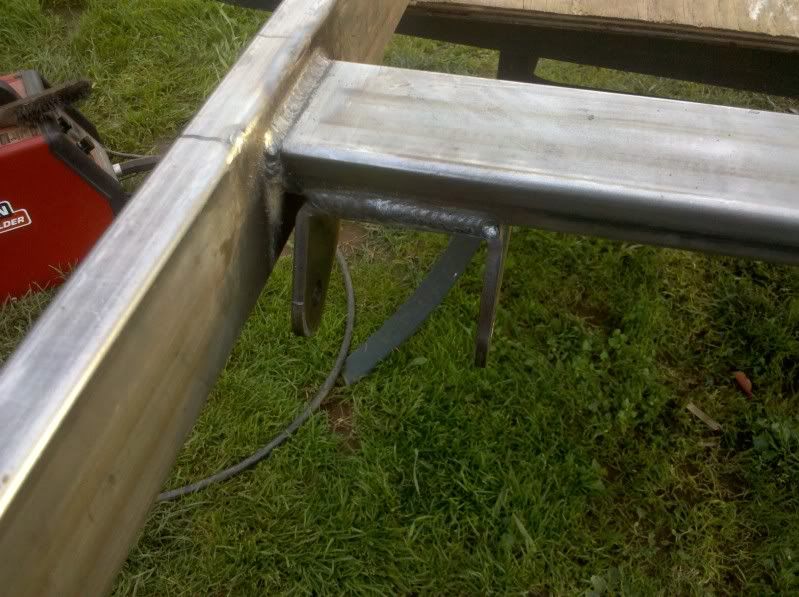
Tacked in but I didn't like how it sat. Plus there was little room for the fastener under the frame. So we ended up cutting it back out and moving it.
Relocated crossmember and welds finished off.
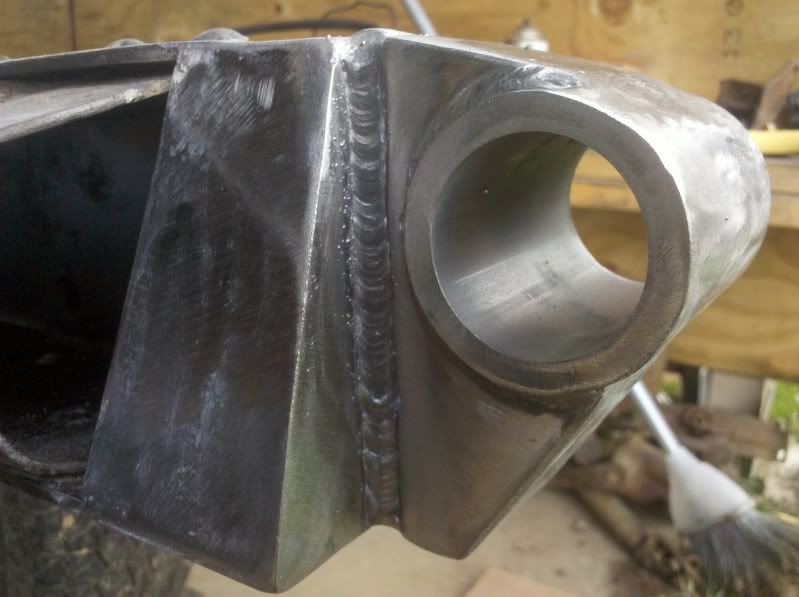
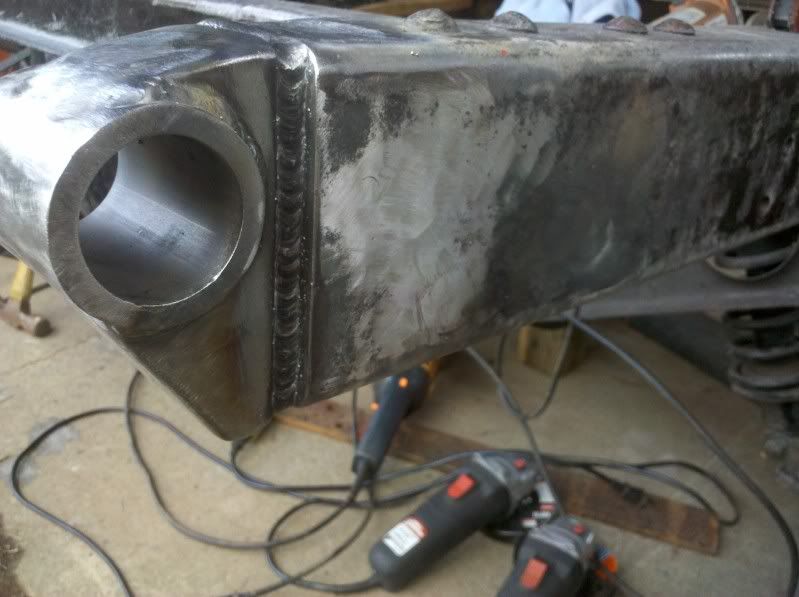
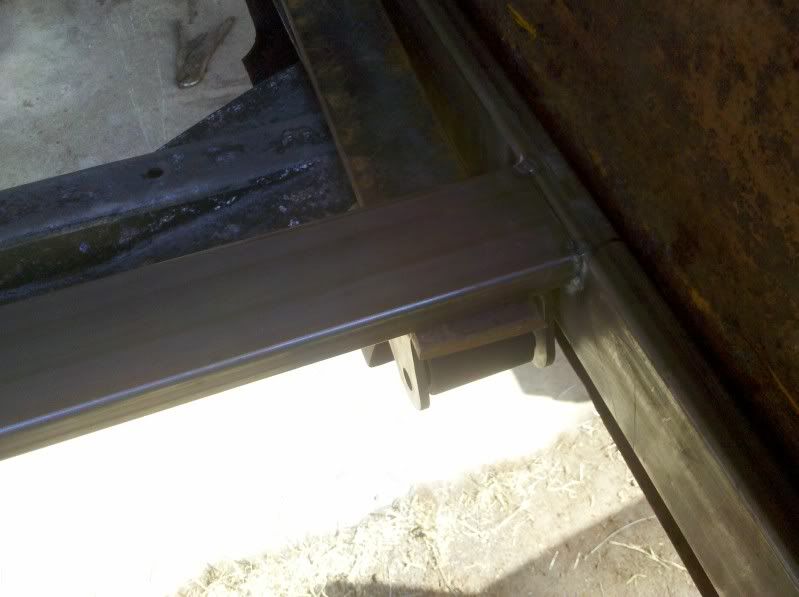
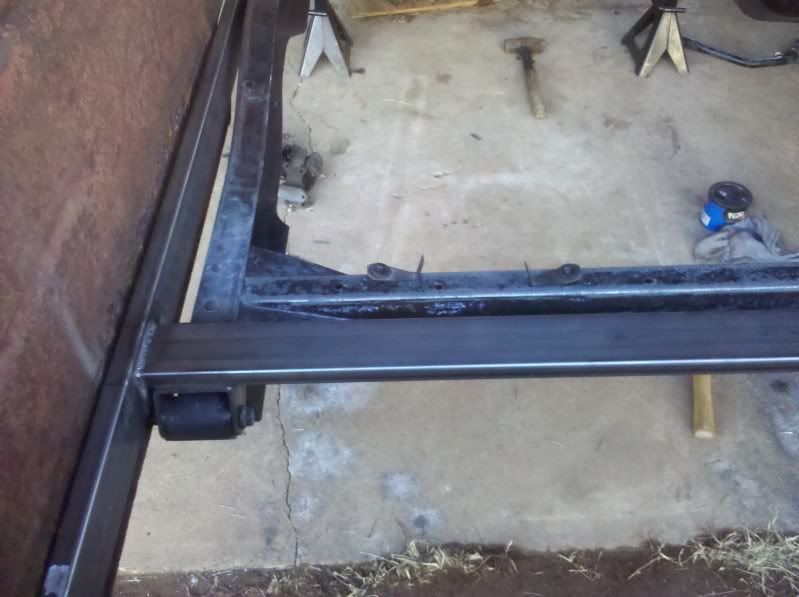
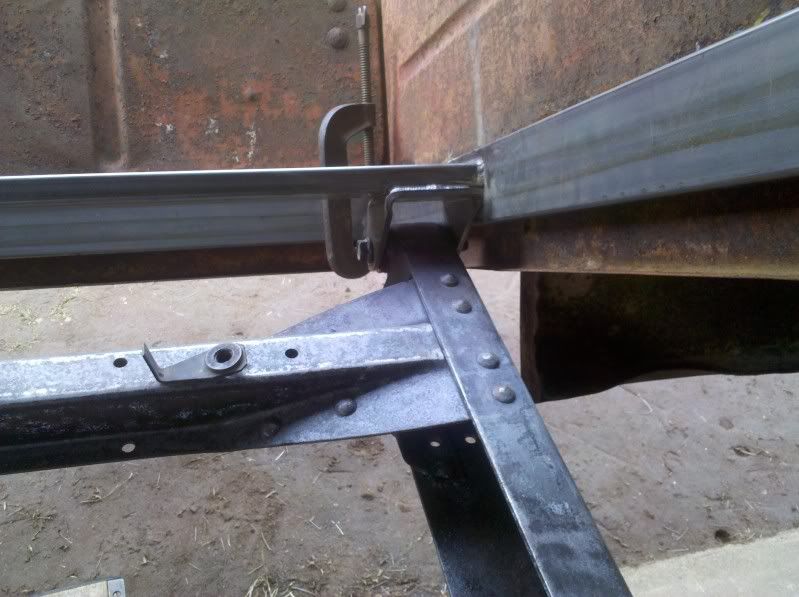
A look at my converted HD shackle hangers/spring hangers. Now bed mounts/pivots.
Lining up the frame for the crossmember that will support the rear mounts.
Tacked in but I didn't like how it sat. Plus there was little room for the fastener under the frame. So we ended up cutting it back out and moving it.
Relocated crossmember and welds finished off.
A look at my converted HD shackle hangers/spring hangers. Now bed mounts/pivots.
IRON MAIDEN
Well-known member
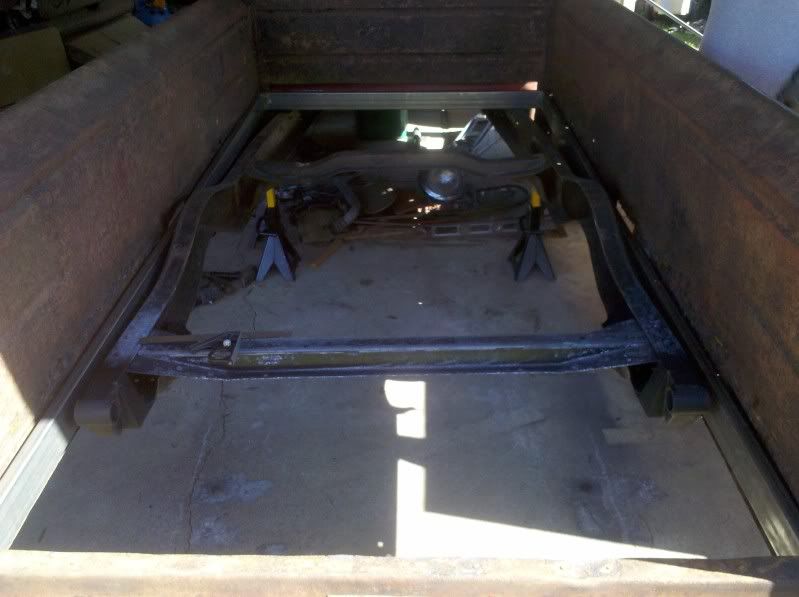
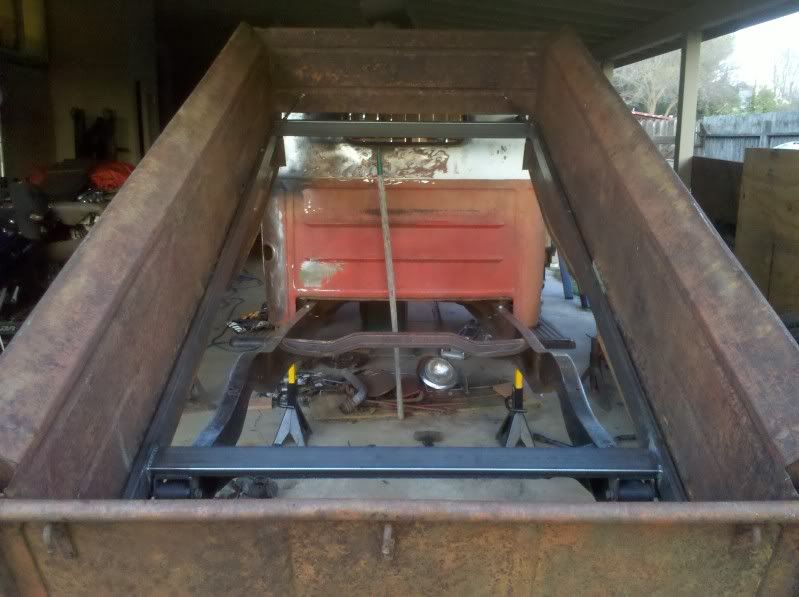
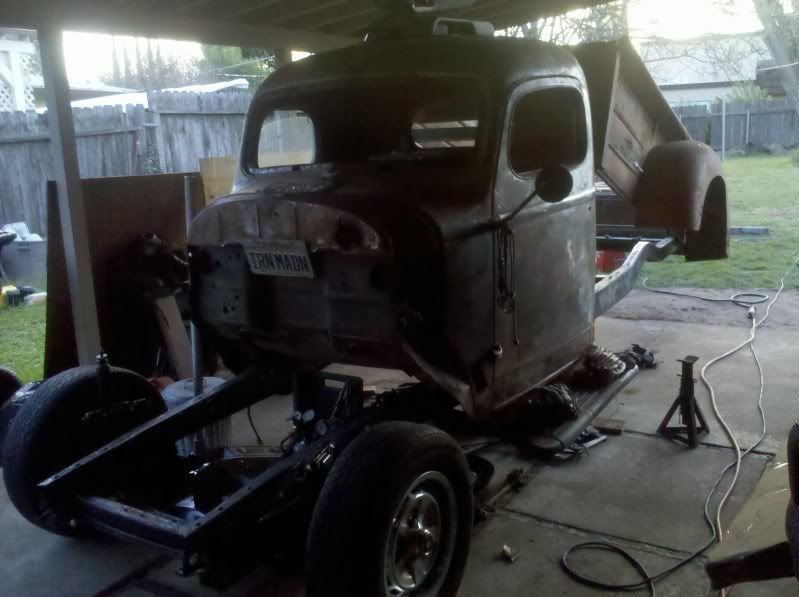
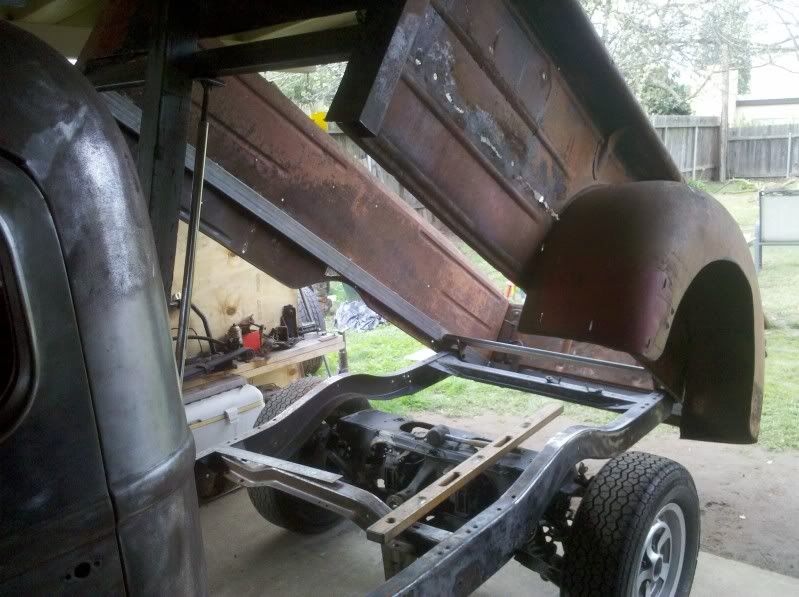
All bolted and clamped in and ready for its fiirst tilt.....

IRON MAIDEN
Well-known member

IRON MAIDEN
Well-known member
Actually, it will be to make those inboard brakes easier to deal with. And to show off the IRS.
rainman
Rough Rodder
Could put an actuator on it raise it to automatically!!
earthman
Fascinated by rolling objects!
More nice work
Snake Farm
Ol school snake charmer!
Ooooh, like'n the tilt bed![cl[cl[cl