41 Fargo Project

Rat Rods Rule

Help Support Rat Rods Rule:

This site may earn a commission from merchant affiliate links, including eBay, Amazon, and others.

Sulzst

Active member
Joined
Apr 23, 2011
Messages
39
Location
Athabasca, Alberta, Canada
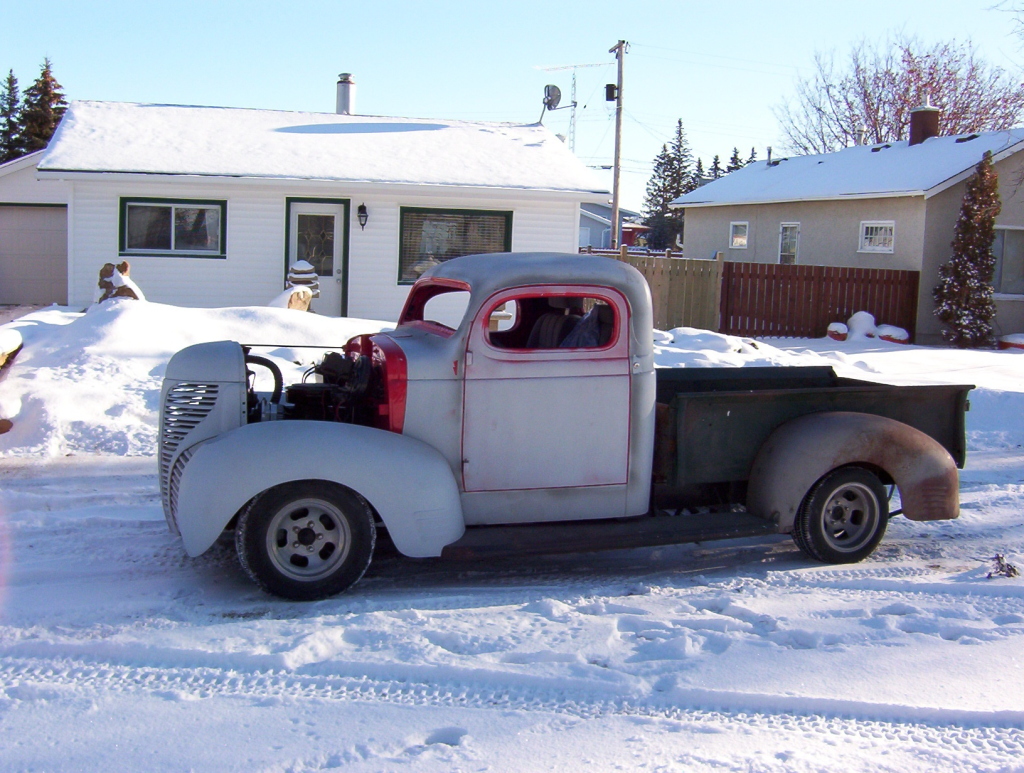
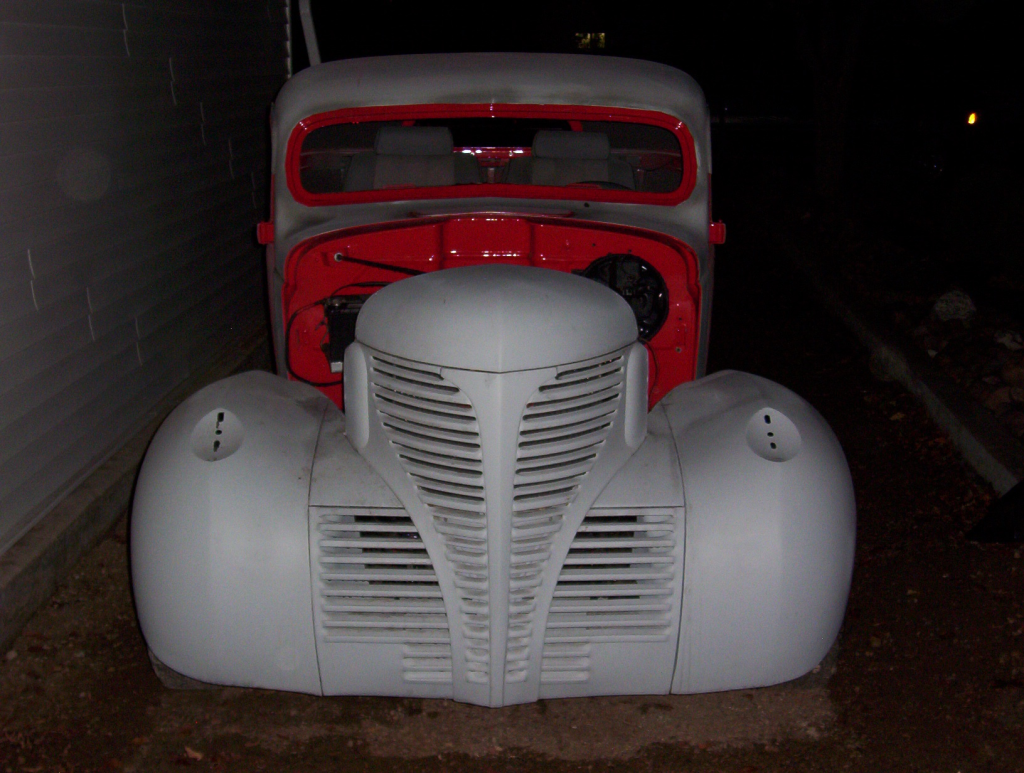
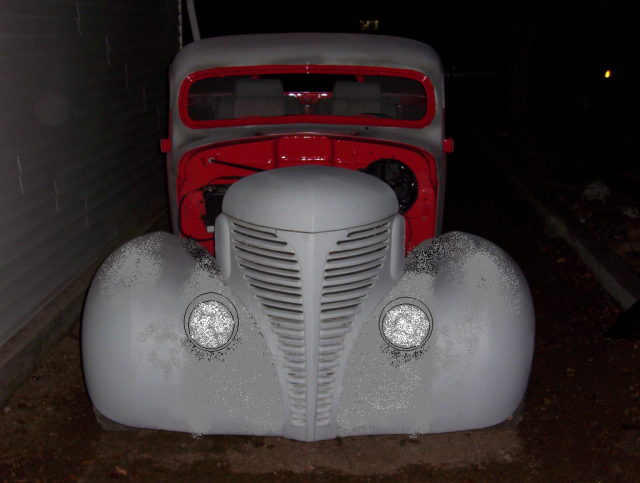
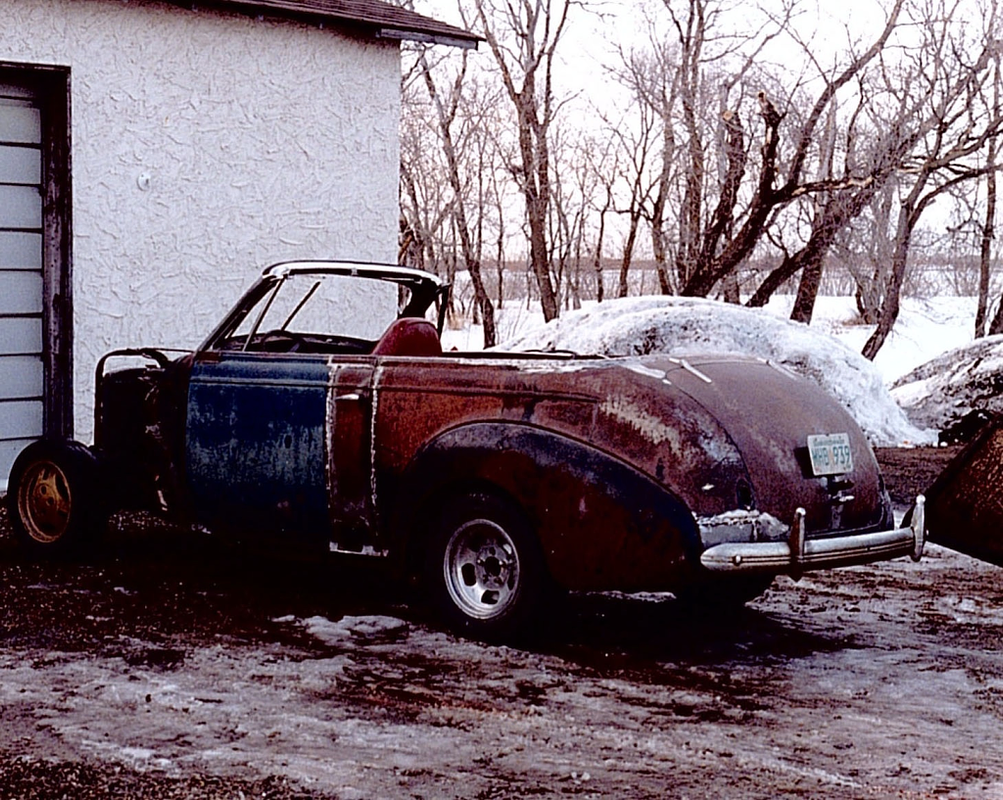
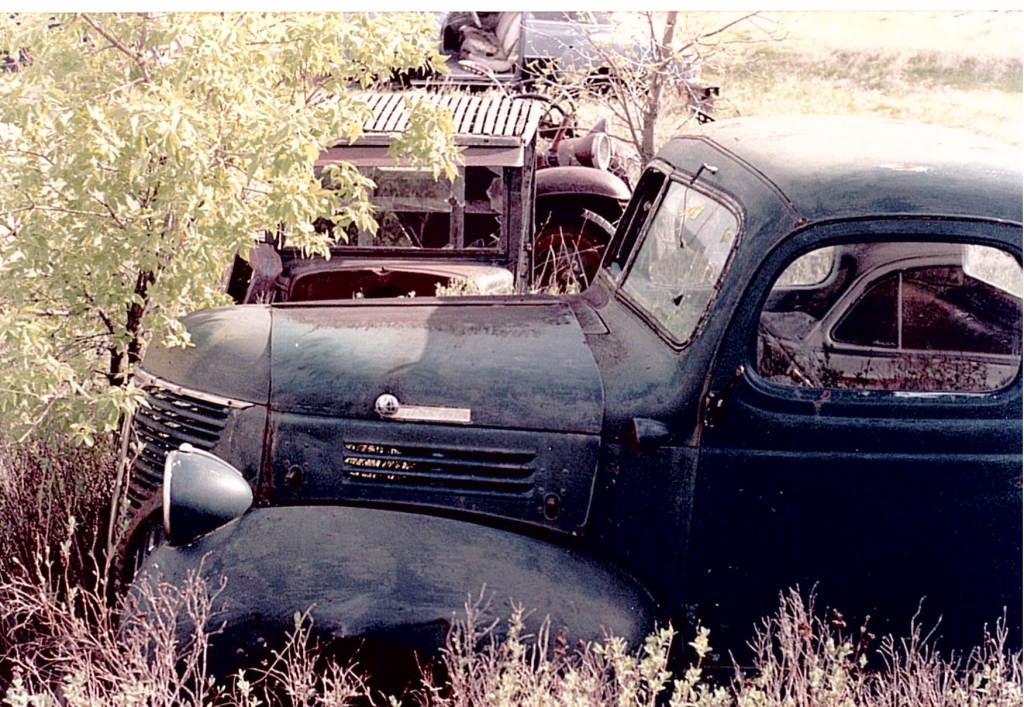
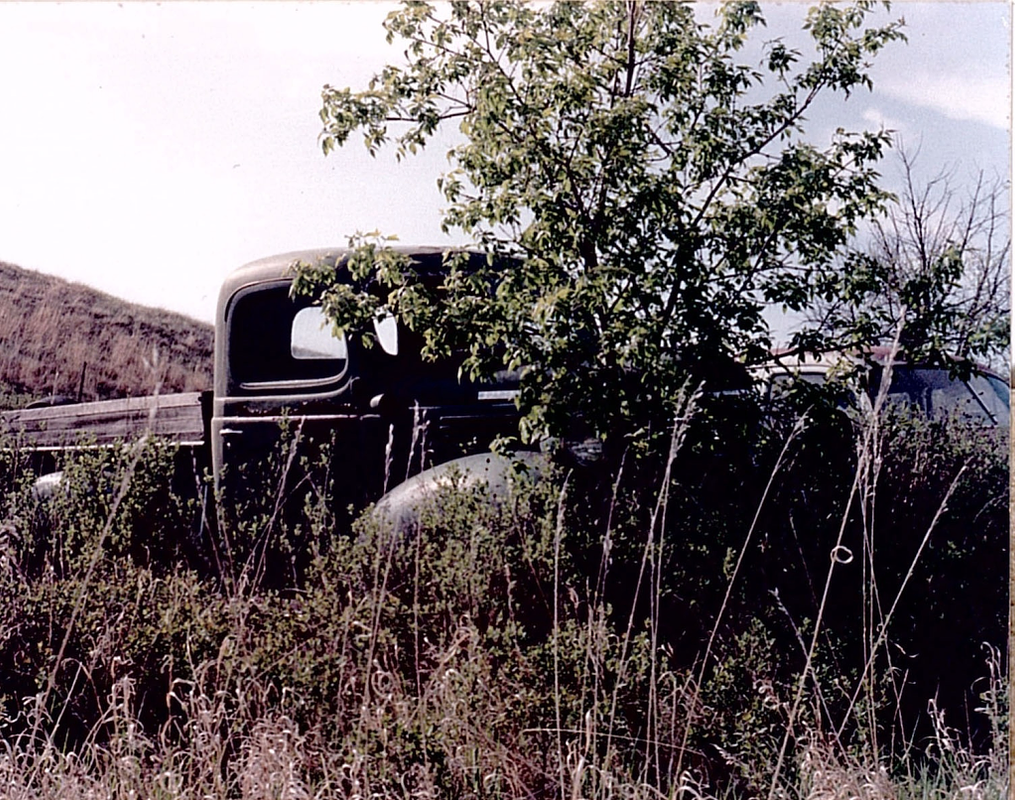
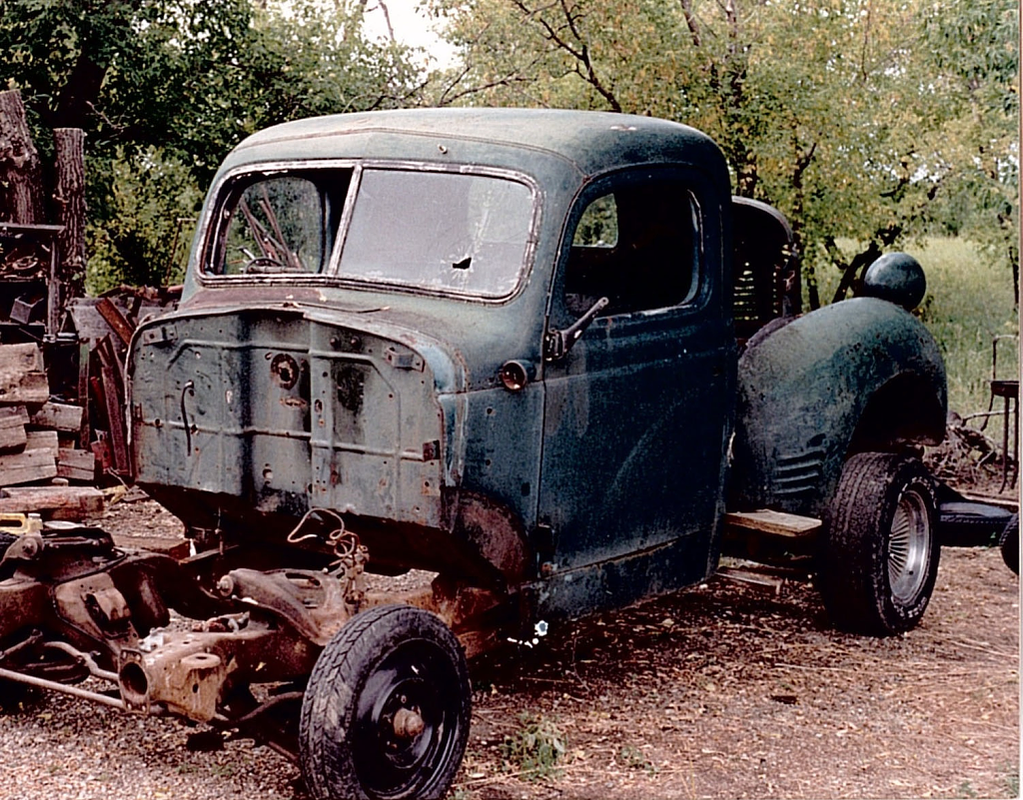
I am new to the forum, just joined last week, i was looking around on the net for inspiration and really like the rat rod concept, my truck was pretty much a rat rod project so i joined, all the other projects are great inspiration. Here are some pictures of the truck from the first day i picked it up in farmers field (free for getting it out of his yard). And some more as i progressed. More to come.

I do have some spare parts like door handles, window regulators etc that i do not need after shaving the handles and putting in power windows.. If someone can use them let me know, i don't want anything for them, just want them to go to a good cause and get them out of my shop.

8ff540bd.png
e50f3cb1.png

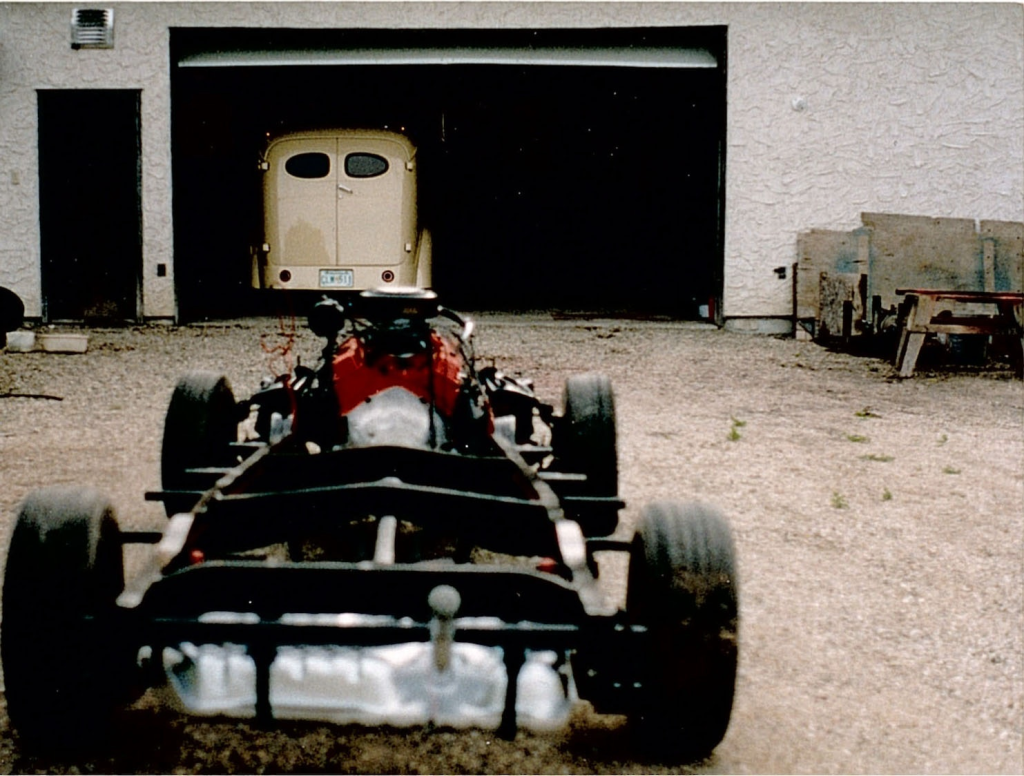
81 camaro subframe attached to the original frame, 10 bolt gm posy rear end mounted
512fcca2.png

Finally drivable, burned some rubber off and ready to strip it all back down
7a409865.png

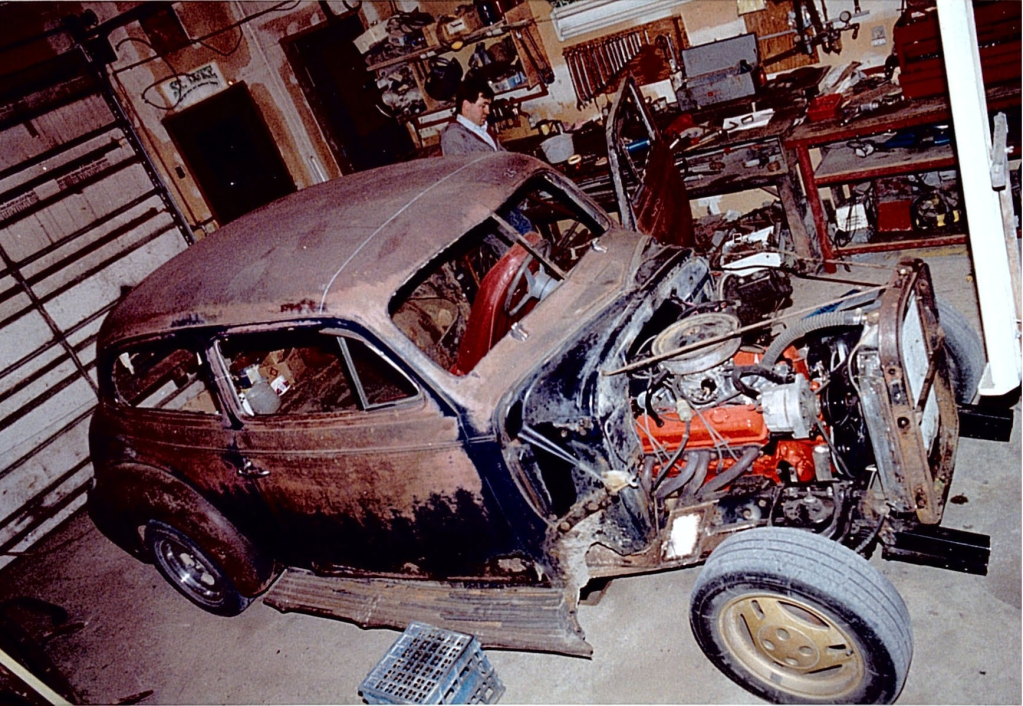
body off, frame blasted and painted and a wrecker 350 installed
bbc0a284.png

cb2b475c.png

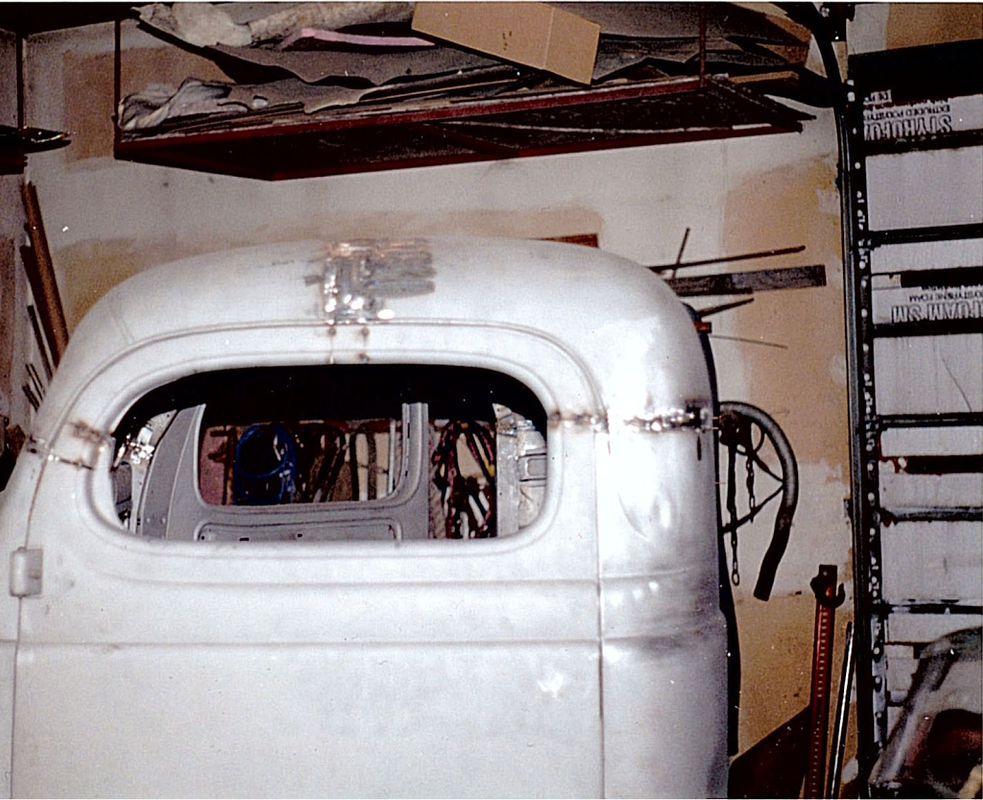
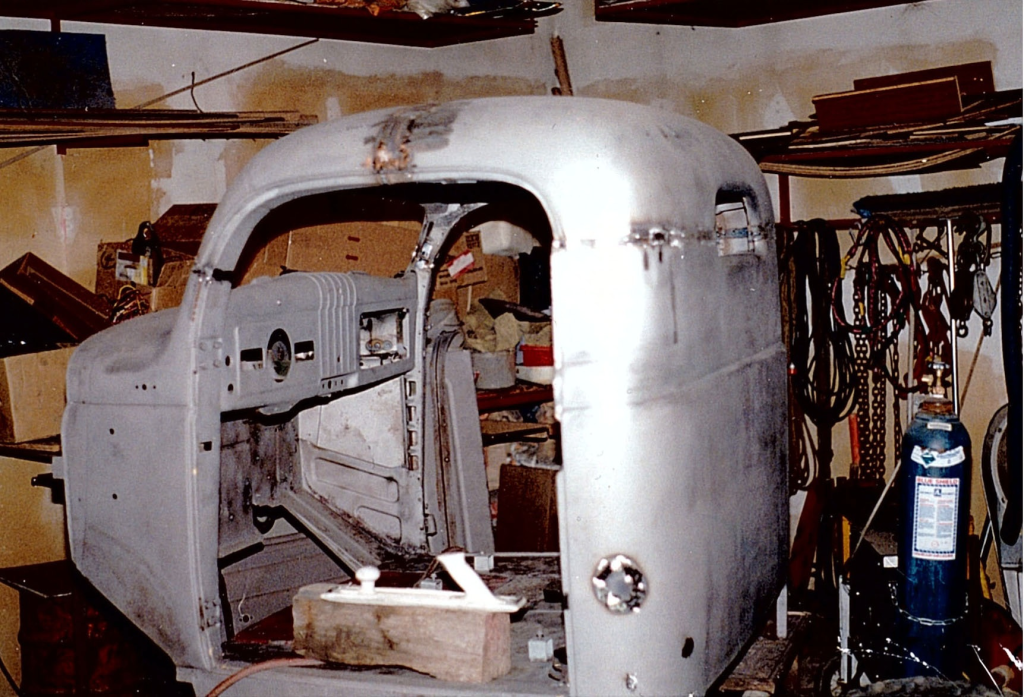
Now getting down to business, 4 inch chop and lots of hours welding, tweaking, a few cases of welding flash from tacking parts together, feels like sand in your eyes, but worse. Split the top to make up the front post lean, lots of time getting body lines back to where they belonged. Became a much better mig welder doing this!
b7a4db17.png


163f4952.png

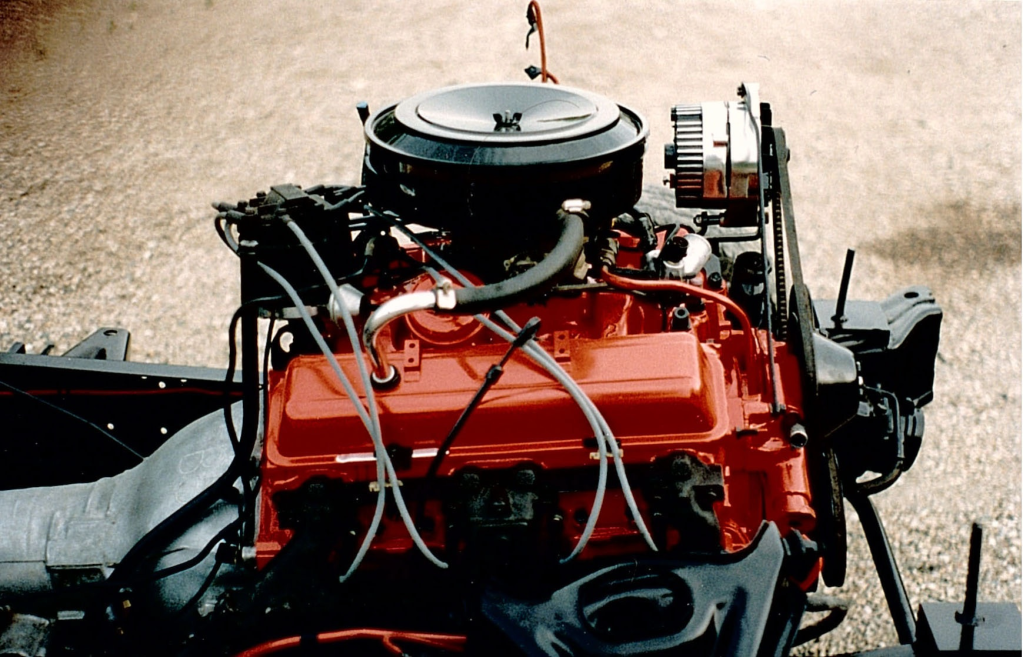
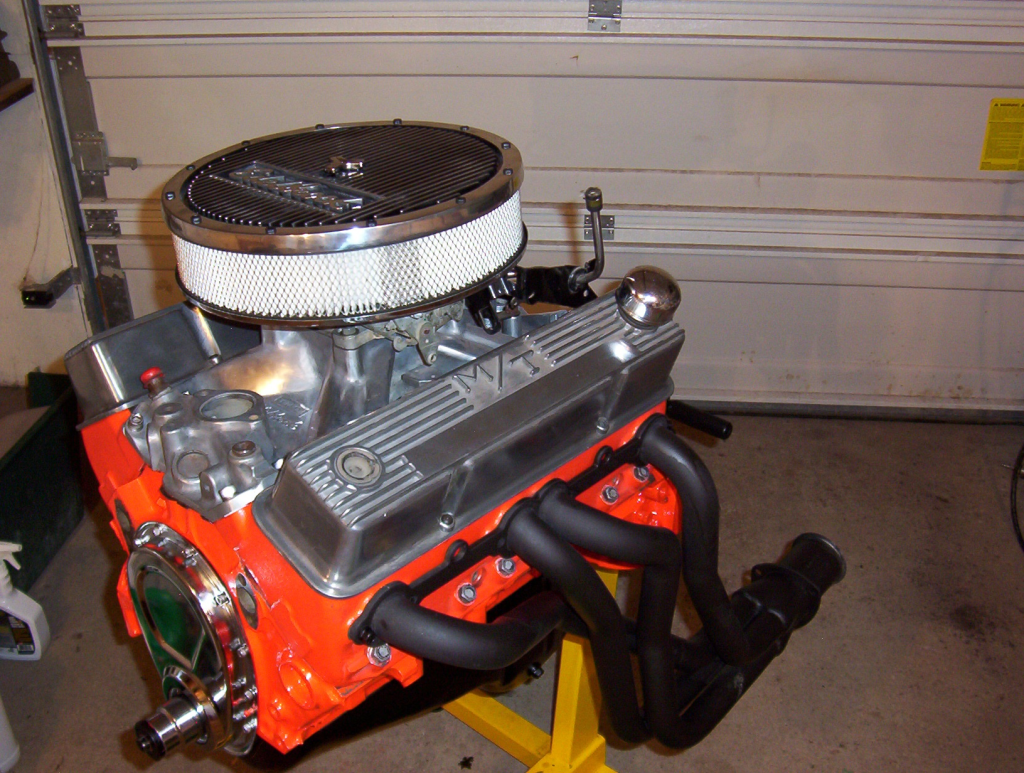
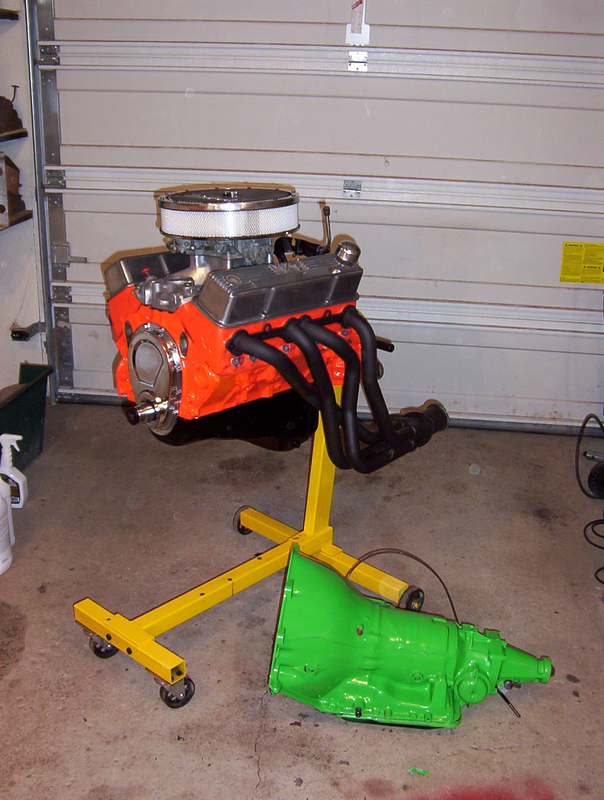
Now for the real engine, 383 stroker 400 hp or so, mated to a rebuilt th350 with a shift kit and 3300 rpm stall converter (sure hope i put the tranny together correctly, first tranny build, more complicated than i anticipated)
eb5ecef6.png

011bf866.png
 
cool project, i also have a 41 dodge check out the link below. Are you going to run the fenders? be a shame not to since you have the rear fenders.
 
I am planning to run the fenders, all four were in good shape and the truck looks fine to me with fenders on. here is a picture with the whoel body
mounted and the cab in primer

c36f8e43.png

da3a33c1.png
 
there were a few relics worth retrieving, the cab in the background with fenders behind it was a complete 1929 chevy truck, did a bit of work to it as well, here is the before and after
8ff540bd.png

81c3c77c.png
 
Cool truck! The chop is just right and I too like that you are keeping the fenders [cl[cl I've always liked how fat the fenders are on those old Dodges but never particularly liked the way the headlights are perched out there on the fenders. Also when I look at the grille in these trucks I tend to see only that awesome center section [dr If It were mine I'd fill the side grilles to make the fenders look even fatter and then mold some headlights in like this :cool:...

dodgepaint.png


....but that's just me :D

Again, cool project and I guess you did do a bit of work on that Chevy :eek: Very nice!
 
fenders

l agree with Snake Farm on the headlight/fender idea[;)

makes it look a lot cleaner and smoothes out the front-end. the cool thing is its such a subtle change most folks won't know. l like those kind of mods, keepem' guessing.

Later:cool:
 
nice yeah i dig the fenders totally, i just have never been able to find a decent set of front or rear fenders, gonna paint it all the way?? that red looks pretty bright is it viper red? i really like that front grille also
 
Cool truck! The chop is just right and I too like that you are keeping the fenders [cl[cl I've always liked how fat the fenders are on those old Dodges but never particularly liked the way the headlights are perched out there on the fenders. Also when I look at the grille in these trucks I tend to see only that awesome center section [dr If It were mine I'd fill the side grilles to make the fenders look even fatter and then mold some headlights in like this :cool:...

dodgepaint.png


....but that's just me :D

Again, cool project and I guess you did do a bit of work on that Chevy :eek: Very nice!

Snake !! do you use photoshop to do the picture mods? nice job....
that is a BIG improvement on the headlights,,,

SULZST,, Nice project,, you must stay pretty busy, doing all these projects.. are they all yours?? very nice work,, [dr[dr
 
Thanks for the digital mockup Snake Farm! I do like the look with the grill sides blanked out! Makes the center section stand out, good thing it isn't painted yet! with the lights i am not sure yet, i havent really looked at it with the chop and the lights on, i will do this on the weekend and decide if i like it or not, it wouldn't be that hard to inset a pair of light like you drew, esp when filling in the grille sides. thanks again! ill let you know how i proceed.
 
I stay busy at work and trying to complete the honeydoo list, then in my spare time i try to sneak out to the shop and work on the projects. They are mine, I also have a 41 chevy sedan (now convertible) grafted on a 60 chrysler convertible top and side glass. here is a picture. I also have my eye on a 56 Buick, might pick it up tomorrow, luckily i have lots of room to store it all. Below is the post of the 41 sedan, at this time the mustang II ifs is in along with a small block and a 4 speed muncie, 9 inch ford rear shortened a bit. Next the frame was boxed and x-membered to make up for the loss of the ceiling for support, also added supports at the bottom of the doors.

917e5444.png


Then the top came off, had to lengthen the doors to accommodate the longer glass from the donor car, this also included shrinking the back of the sedan, more fit up issues than the 41 chop. Installed the rear crank triange windows from the donor in the back, then grafted in the convertible top and modified the windshield header to accept the same curvature as the donor window. Slimmed the convertible top to fit and mounted all the hydraulics and trimmed the back trunk area to fit. Below is after the graft. This one is on ice for a while, fargo is the priority this summer, convertible next winter, ill start a build post when I get back to it unless there are requests for more info.
886cc73e.png
 
got some work done

Worked at the plant for the last three weeks straight, finally got a weekend off. I ripped out the old rad and mounted a serpentine two belt drive for the alternator and power steering, it has a 30% overdrive on the water pump, also added a new aluminum pump. With all of this and the new aluminum rad I am hoping to get some good cooling. Only one issue, not much room for an electric fan, only room for a pusher, hope to fire it up tomorrow and see how it does, pics to follow tomorrow.
 
new rad and surpentine arrangement

I got my electric fan mounted to the new radiator, i made some small brackets and pop riveted the mounts to the side of the radiator and then bolted the fan on. looks ok, hope the pusher arrangement will give enough cooling! I also have a shot of the front of the engine with the surpentine pulley drive, not a whole lot of space up front so the fan had to go on the front of the ratiator.
 

Attachments

  • P6030003.jpg
    P6030003.jpg
    124.8 KB · Views: 16
  • P6030004.jpg
    P6030004.jpg
    114.6 KB · Views: 14
  • P6030005.jpg
    P6030005.jpg
    57.6 KB · Views: 22
pusher fan didnt work

so i got the rad back in and all connected, fired up the truck and let it idle for a while, as soon as the fan came on, i didnt like the amount of heat rejection or airflow, so i shut it down and went back to work.

had to make more room in the grill area, to move the radiator forward, zipcut and plasma cutter made quick work of that. redid the fan mount and had to make a new mount because the fan was in the way for the top mount. In the end i did manage to get the fan in on the correct side. Should have just done that in the first place, would have saved a lot of time:mad:

i also made a real mess when i took the rad cap back off, coolant was still a bit hot, so i decided to build an overflow tank as well, i had some stainless pipe from work so i changed out my mig wire to 309 and went to work. added fitting and a sight tube. looks pretty good, but the pipe guage is a bit thick, weighs about 10 pounds, still need to mount it. Next on the list is the shockave front airbag shocks so i can drive over a speed bump without scraping the headers.
 

Attachments

  • P6050008.jpg
    P6050008.jpg
    116.1 KB · Views: 37
  • P6040007.jpg
    P6040007.jpg
    94.8 KB · Views: 29
  • P6050009.jpg
    P6050009.jpg
    75.4 KB · Views: 28
Test run

I got the rad and fan etc all back in on the weekend. Today I took her out for a spin and it worked great.
Stayed nice and cool around 180 or so, no issues. I also moved the battery under the box and beside the frame to make more room in the engine bay. Next..... Shockwaves on the front.
 

Latest posts

Back
Top